
DIY Sponge Accent Wall
In my last post, All You Need To Know To Create A Beautiful Pegboard Wall, I gave you a sneak peak of the sponge wall we will talk about today.
That post focused on how to create this peg board wall and today I want to share how I added a fun pattern in under five minutes!
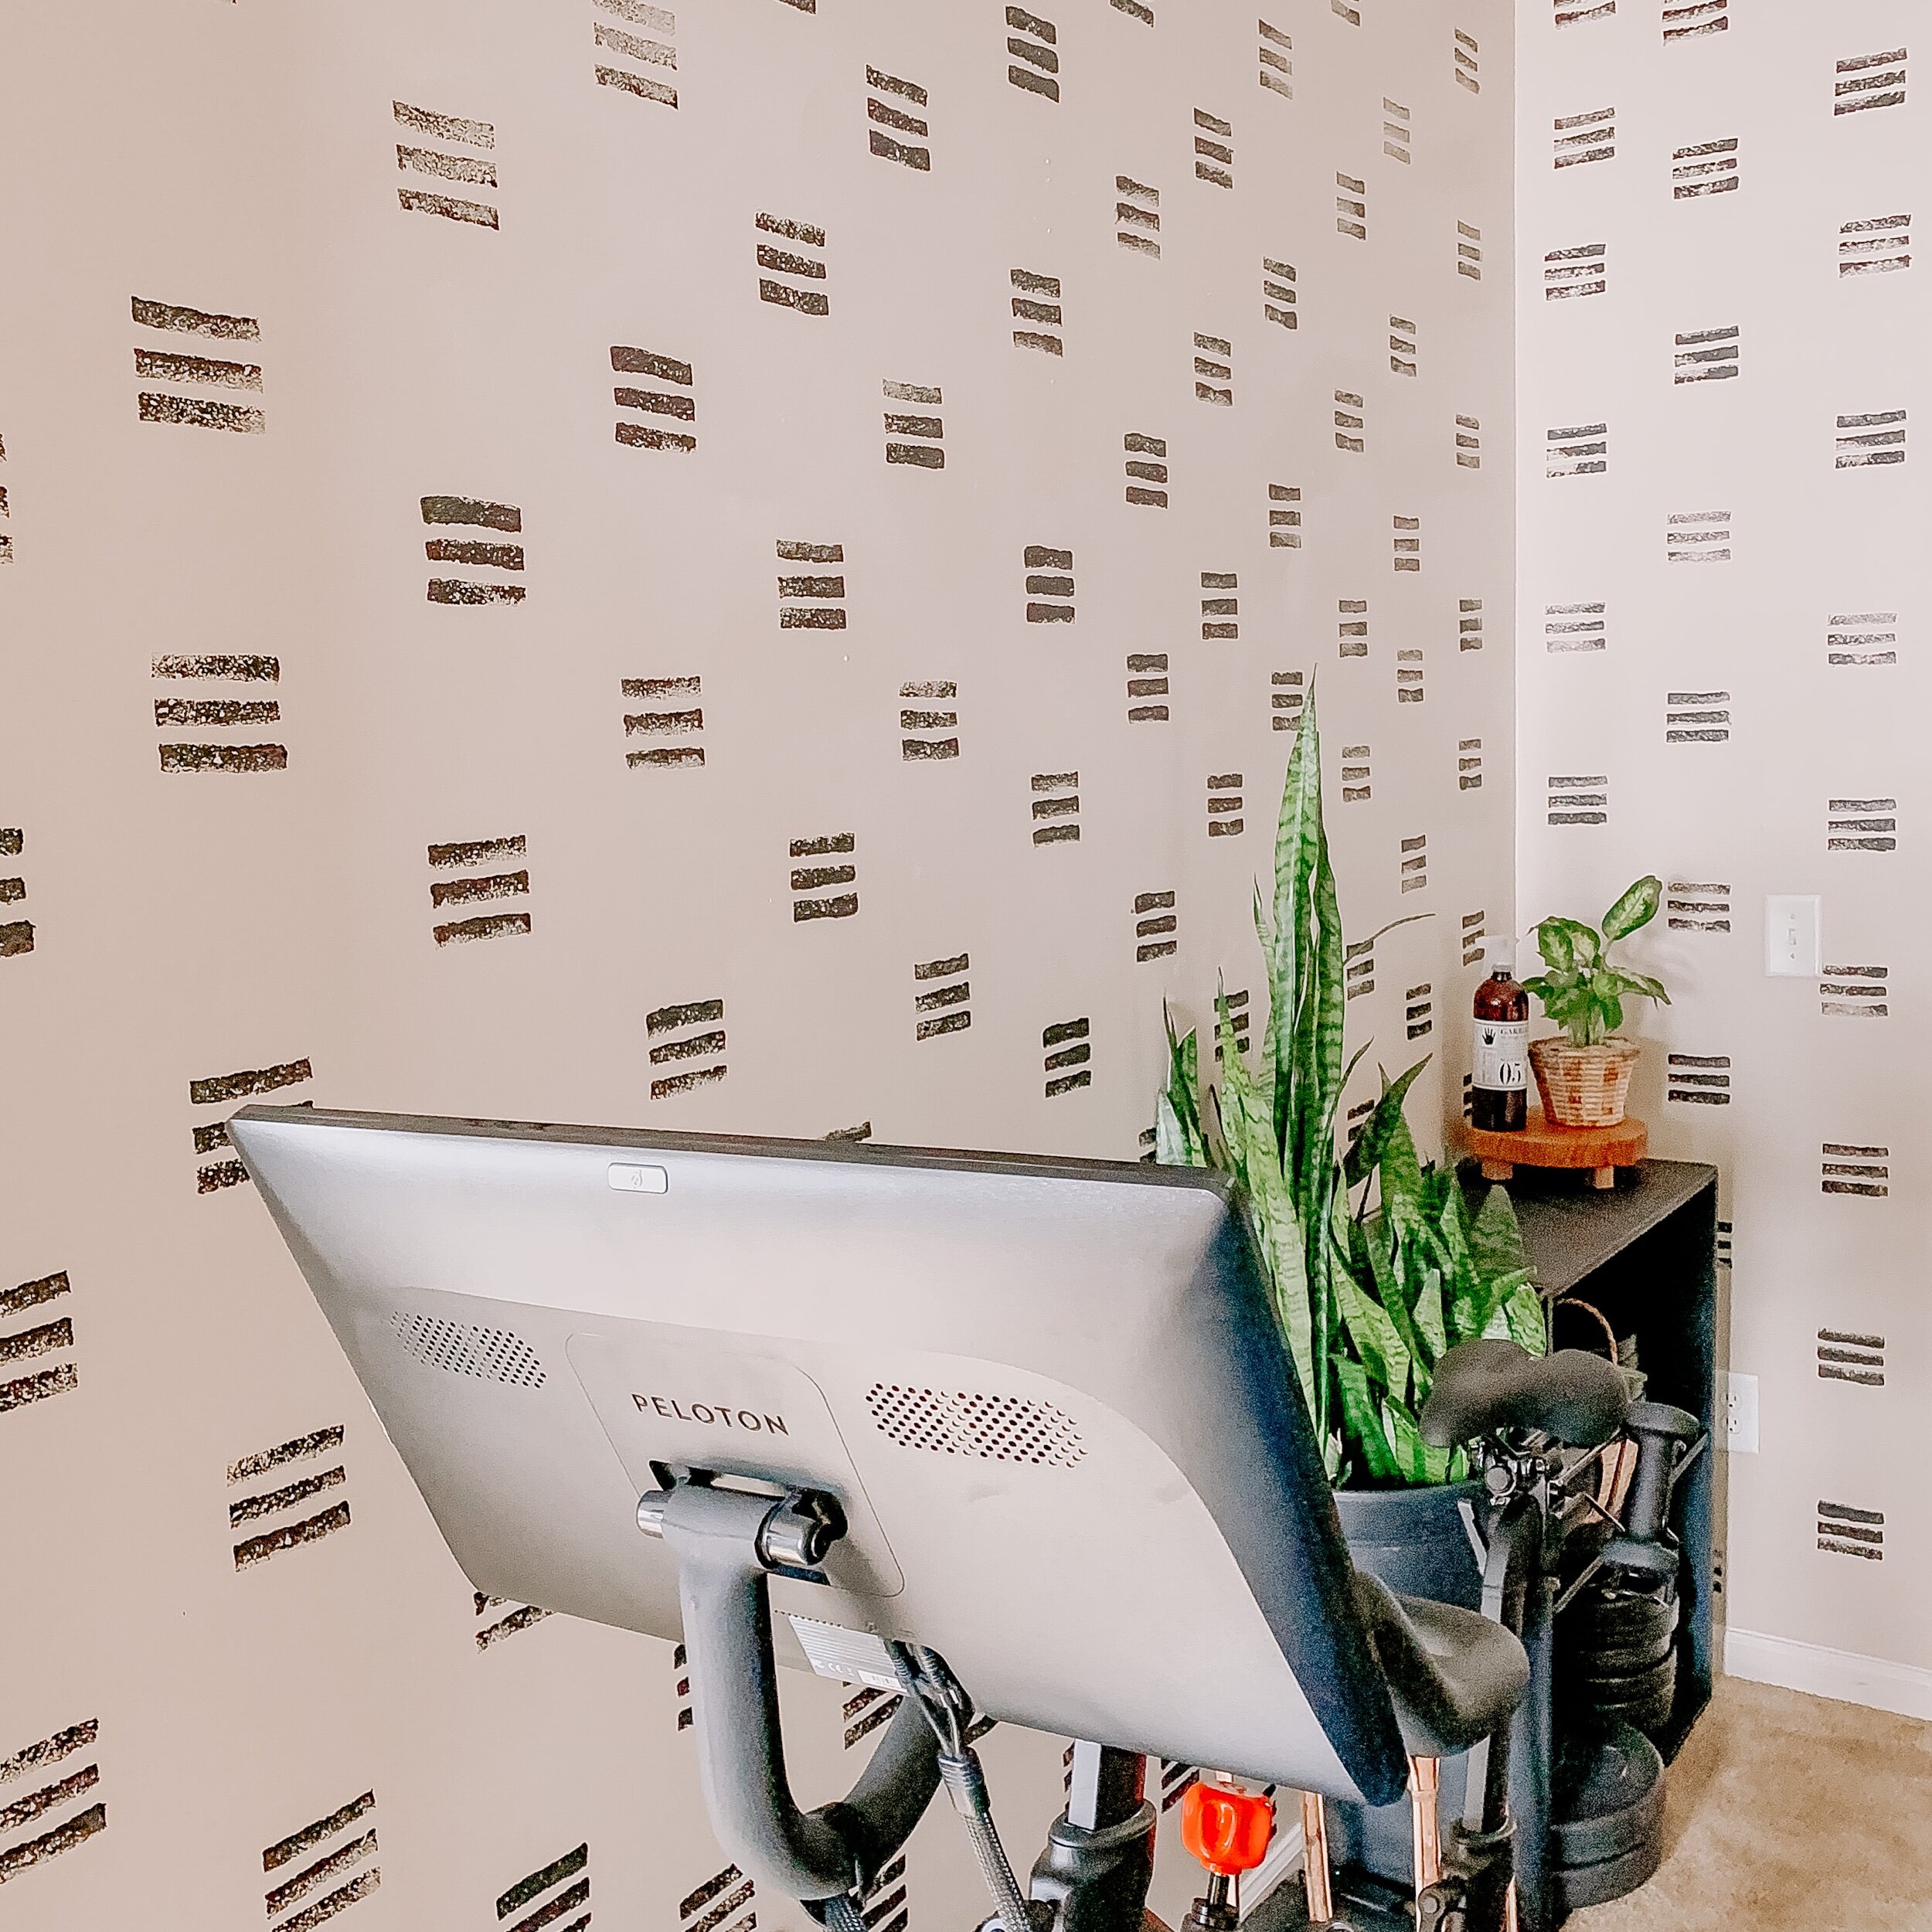
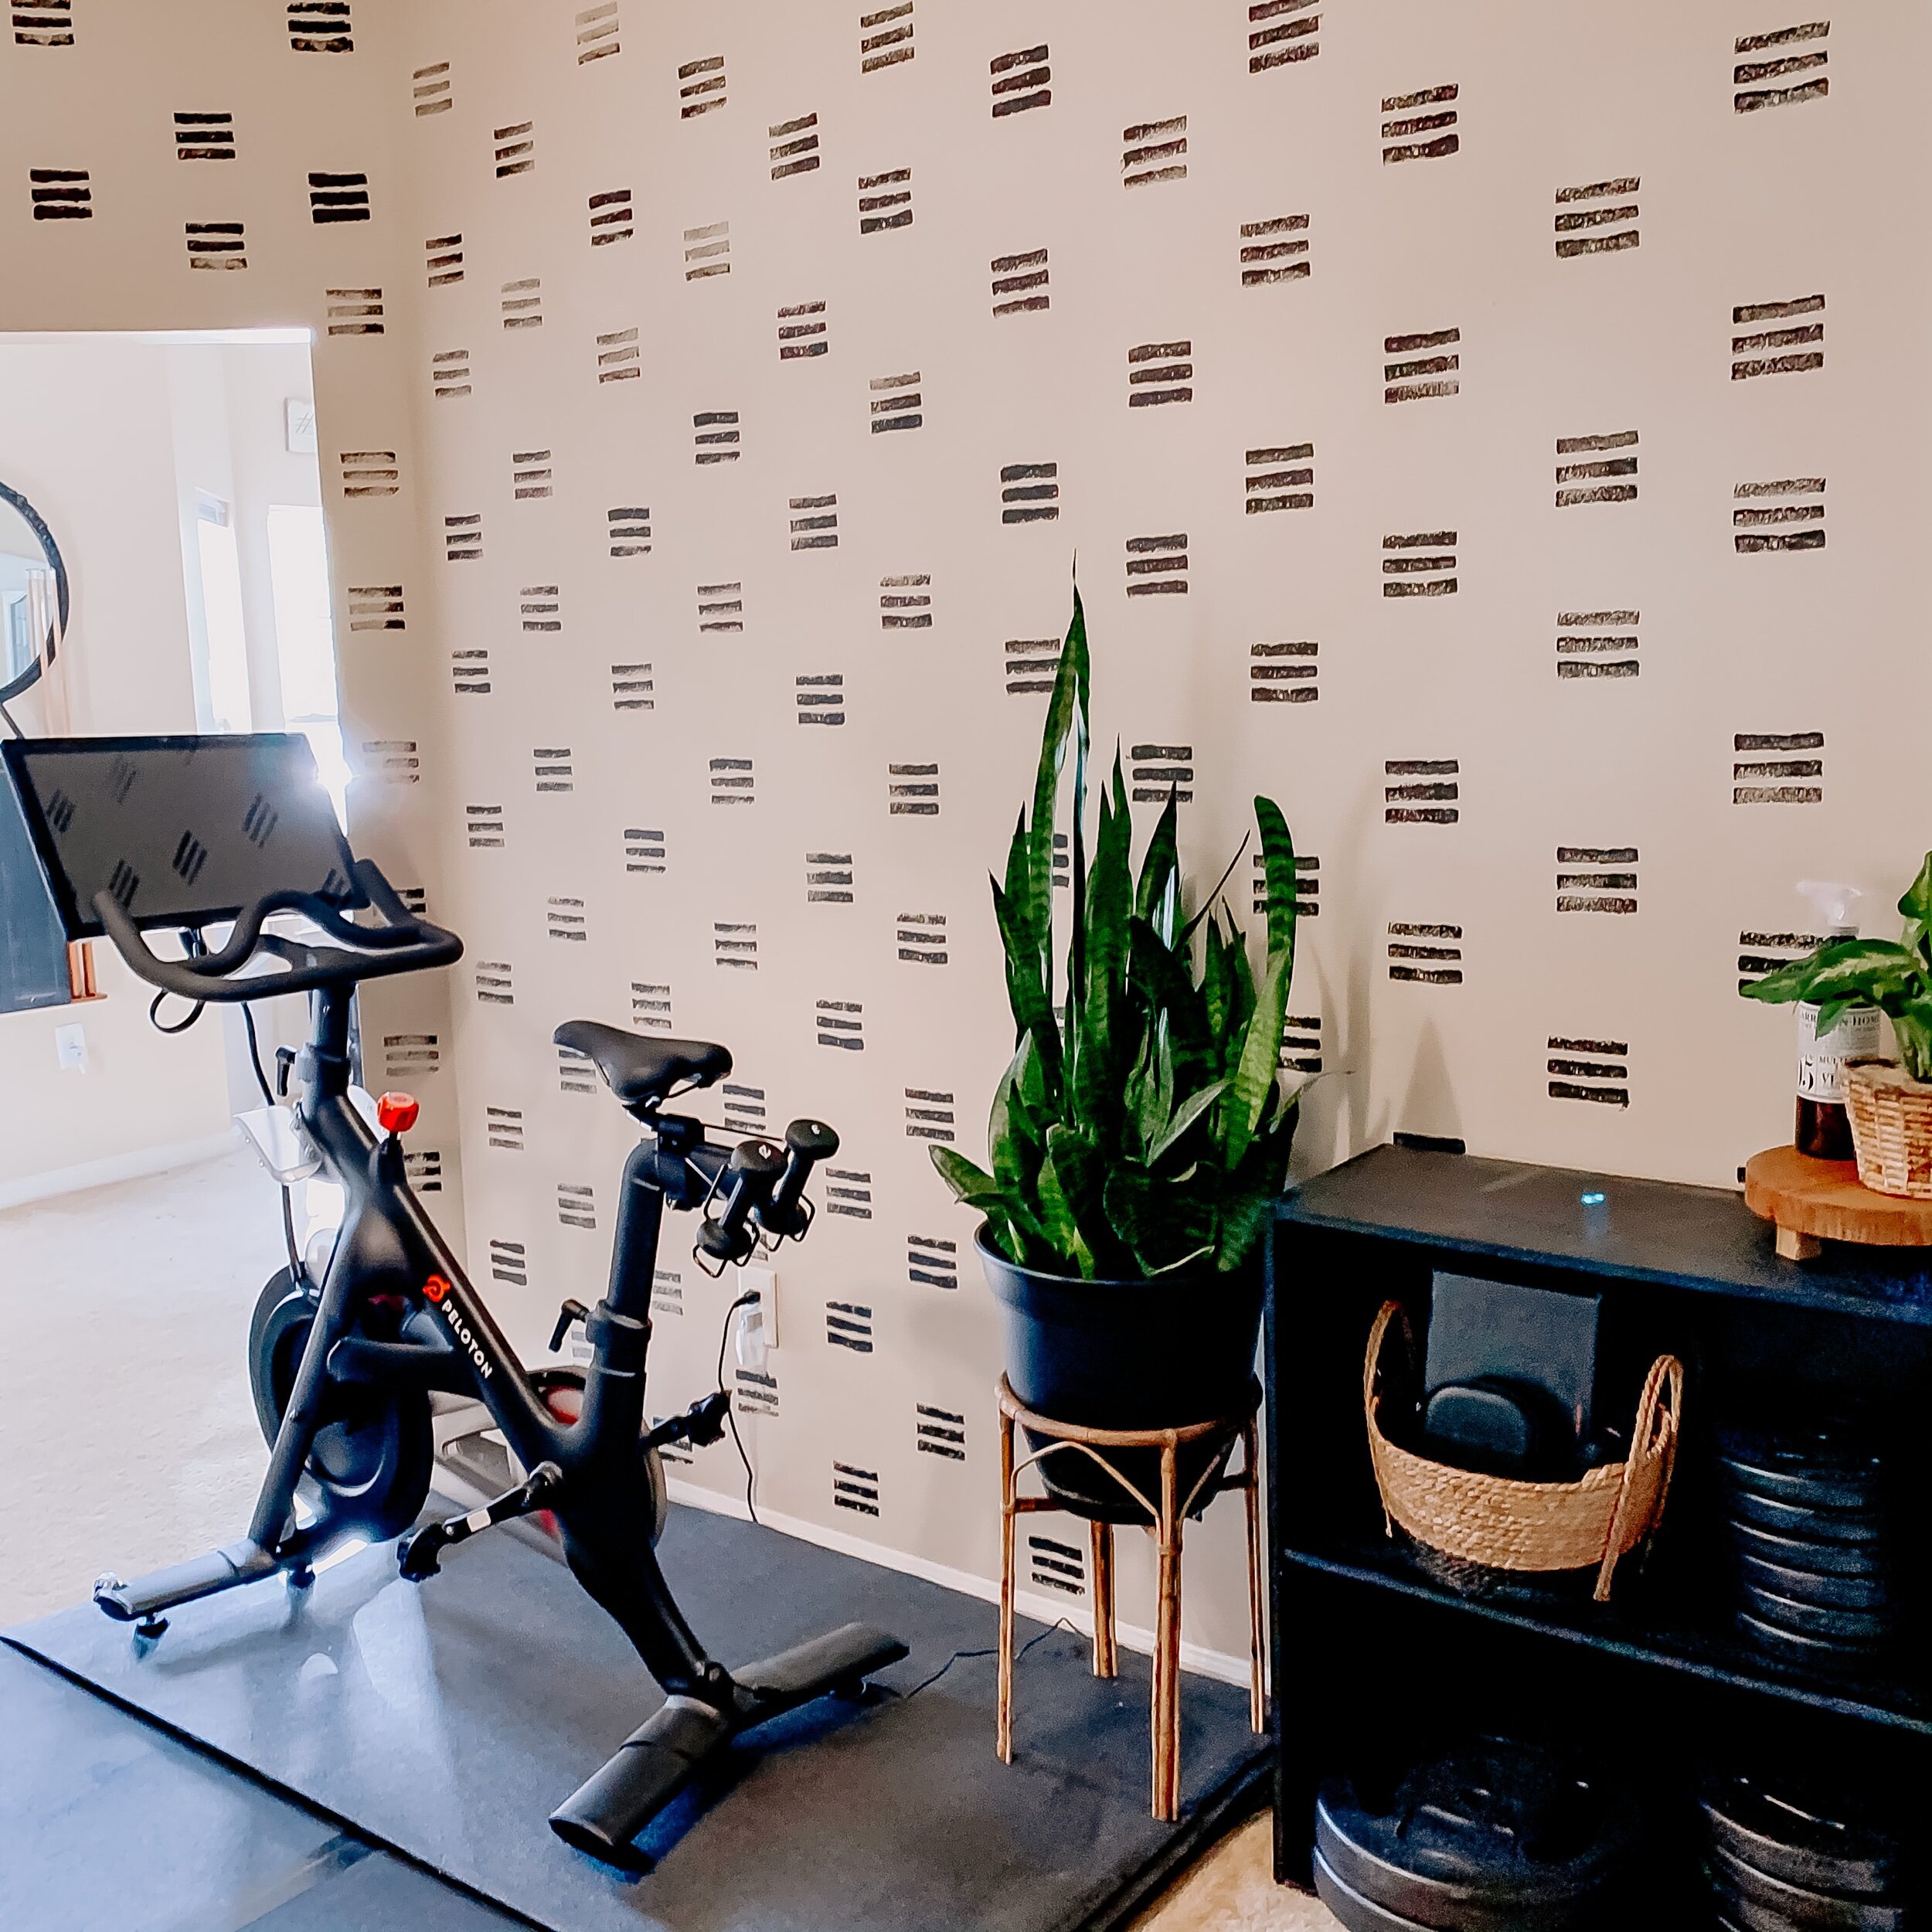
This wall may have taken less than 5 minutes to paint but the difference it made is incredible! Just look at the before and after! Which room would you be motivated to workout in?
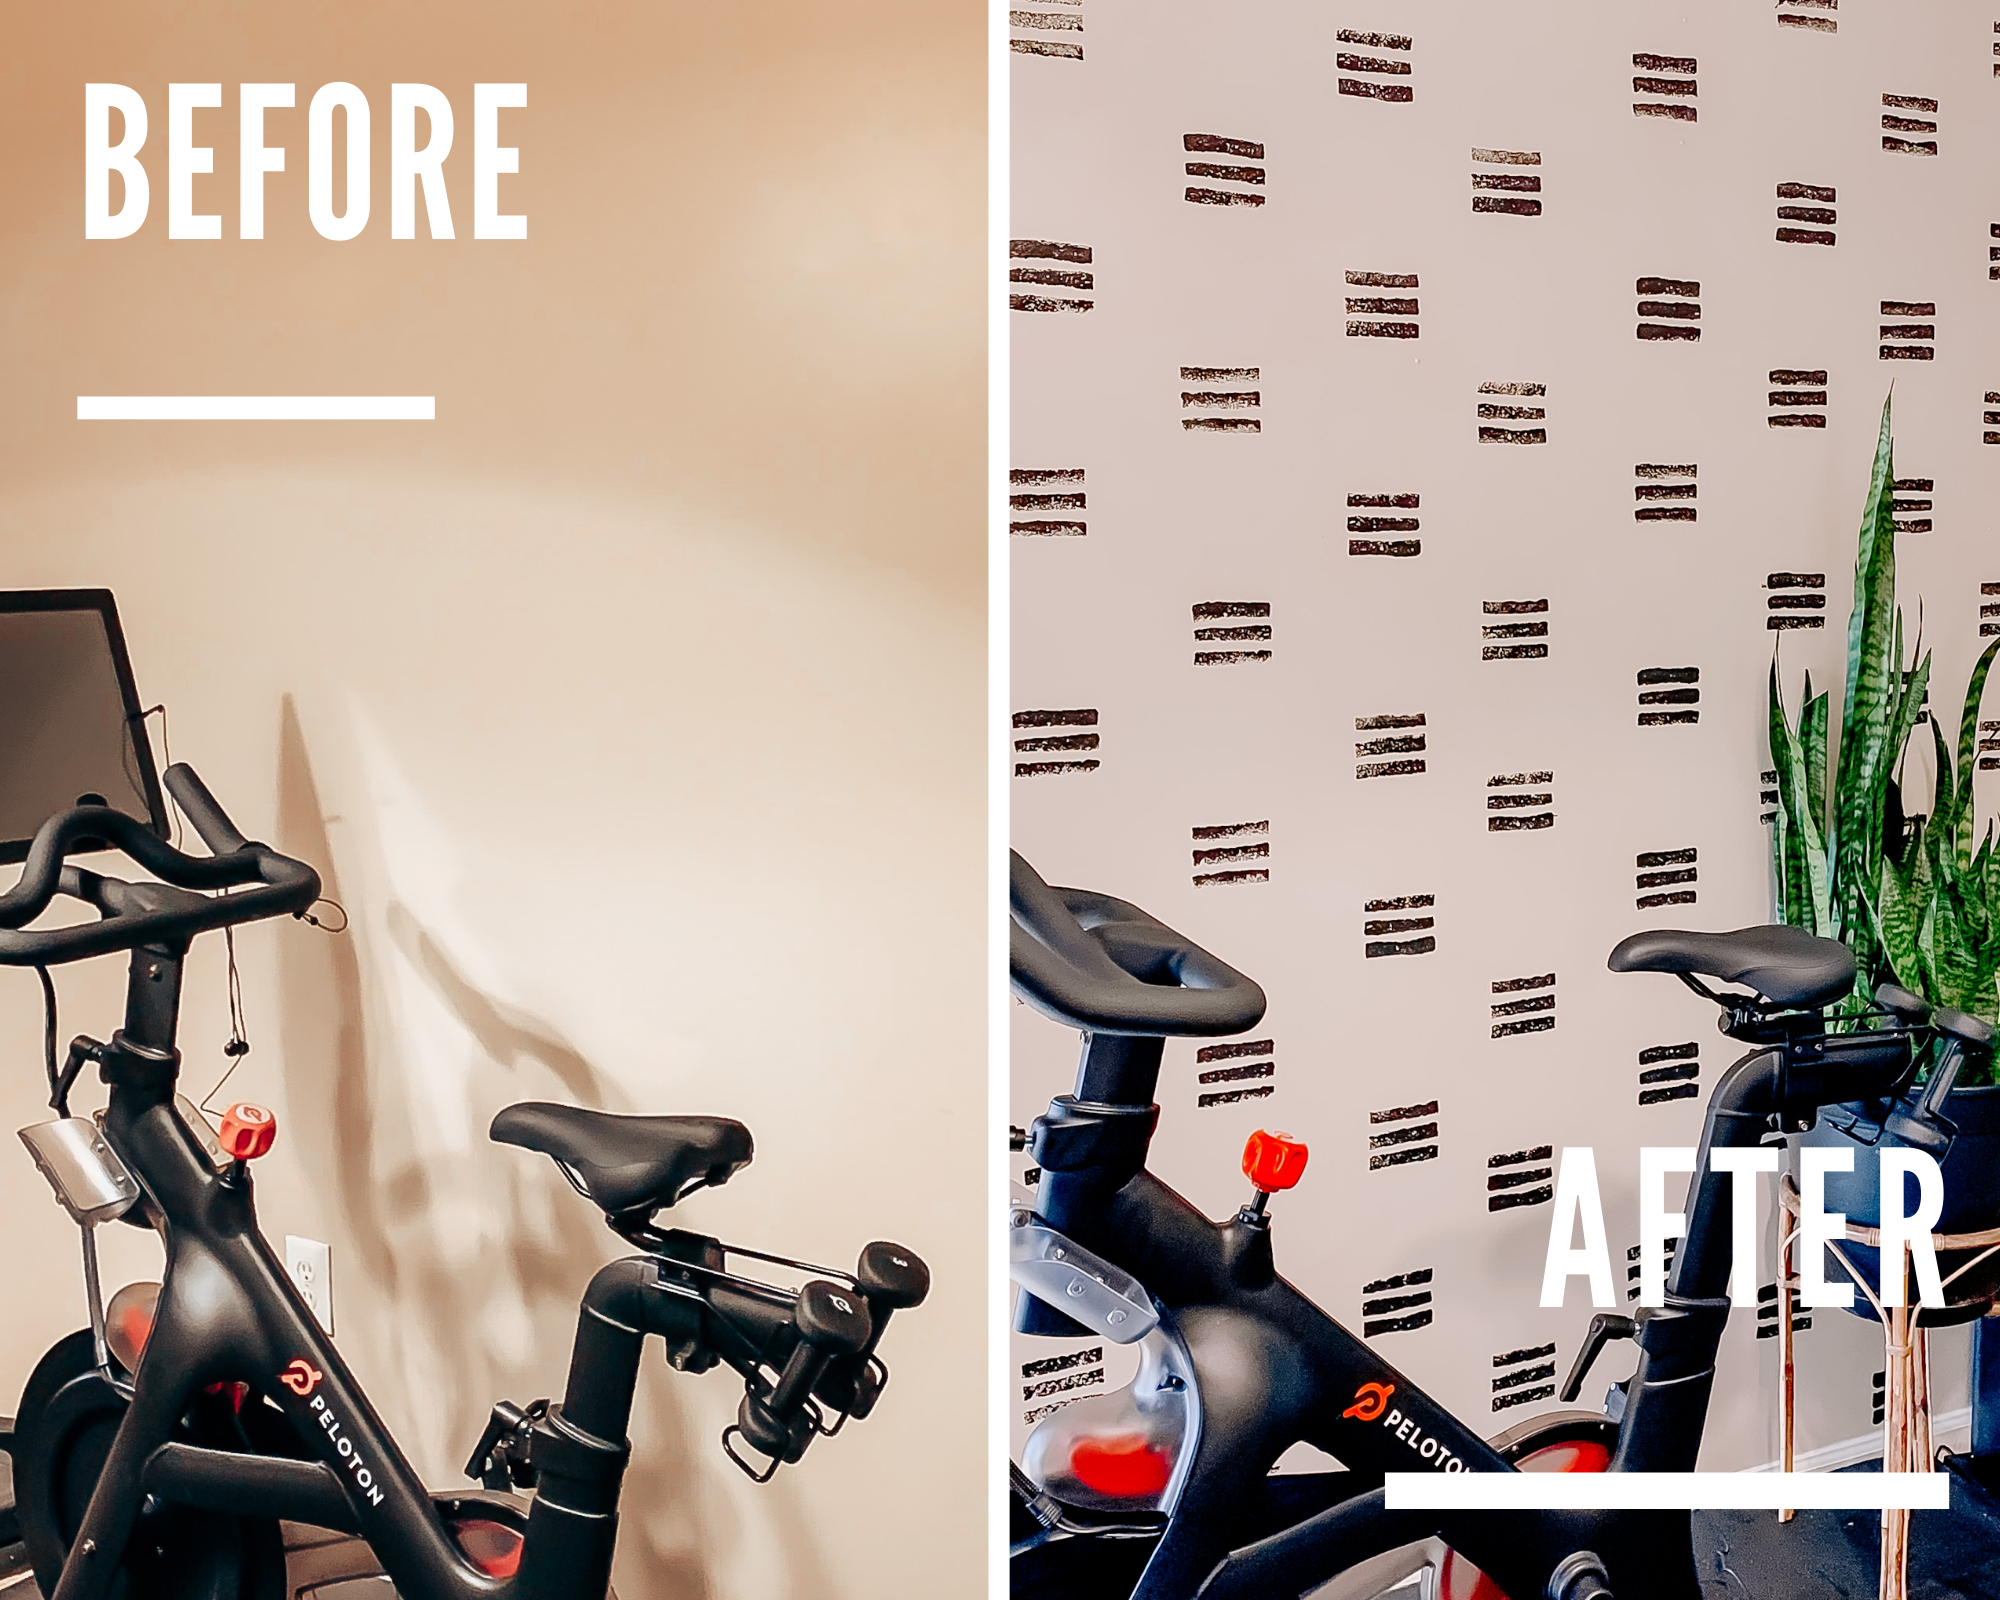
I can tell you, my motivation to workout in this space has gone up drastically!
I am a firm believer that Aesthetically pleasing spaces inspire. They can calm you, motivate you and improve your mood.
Don’t believe me? Pay attention to how you feel in your own home. If you have a room that is clean and decorated in a way you like, you are more likely to stay a while and feel at ease. If it’s messy and not appealing to the eye, you are more likely to be irritable and frustrated in that space.
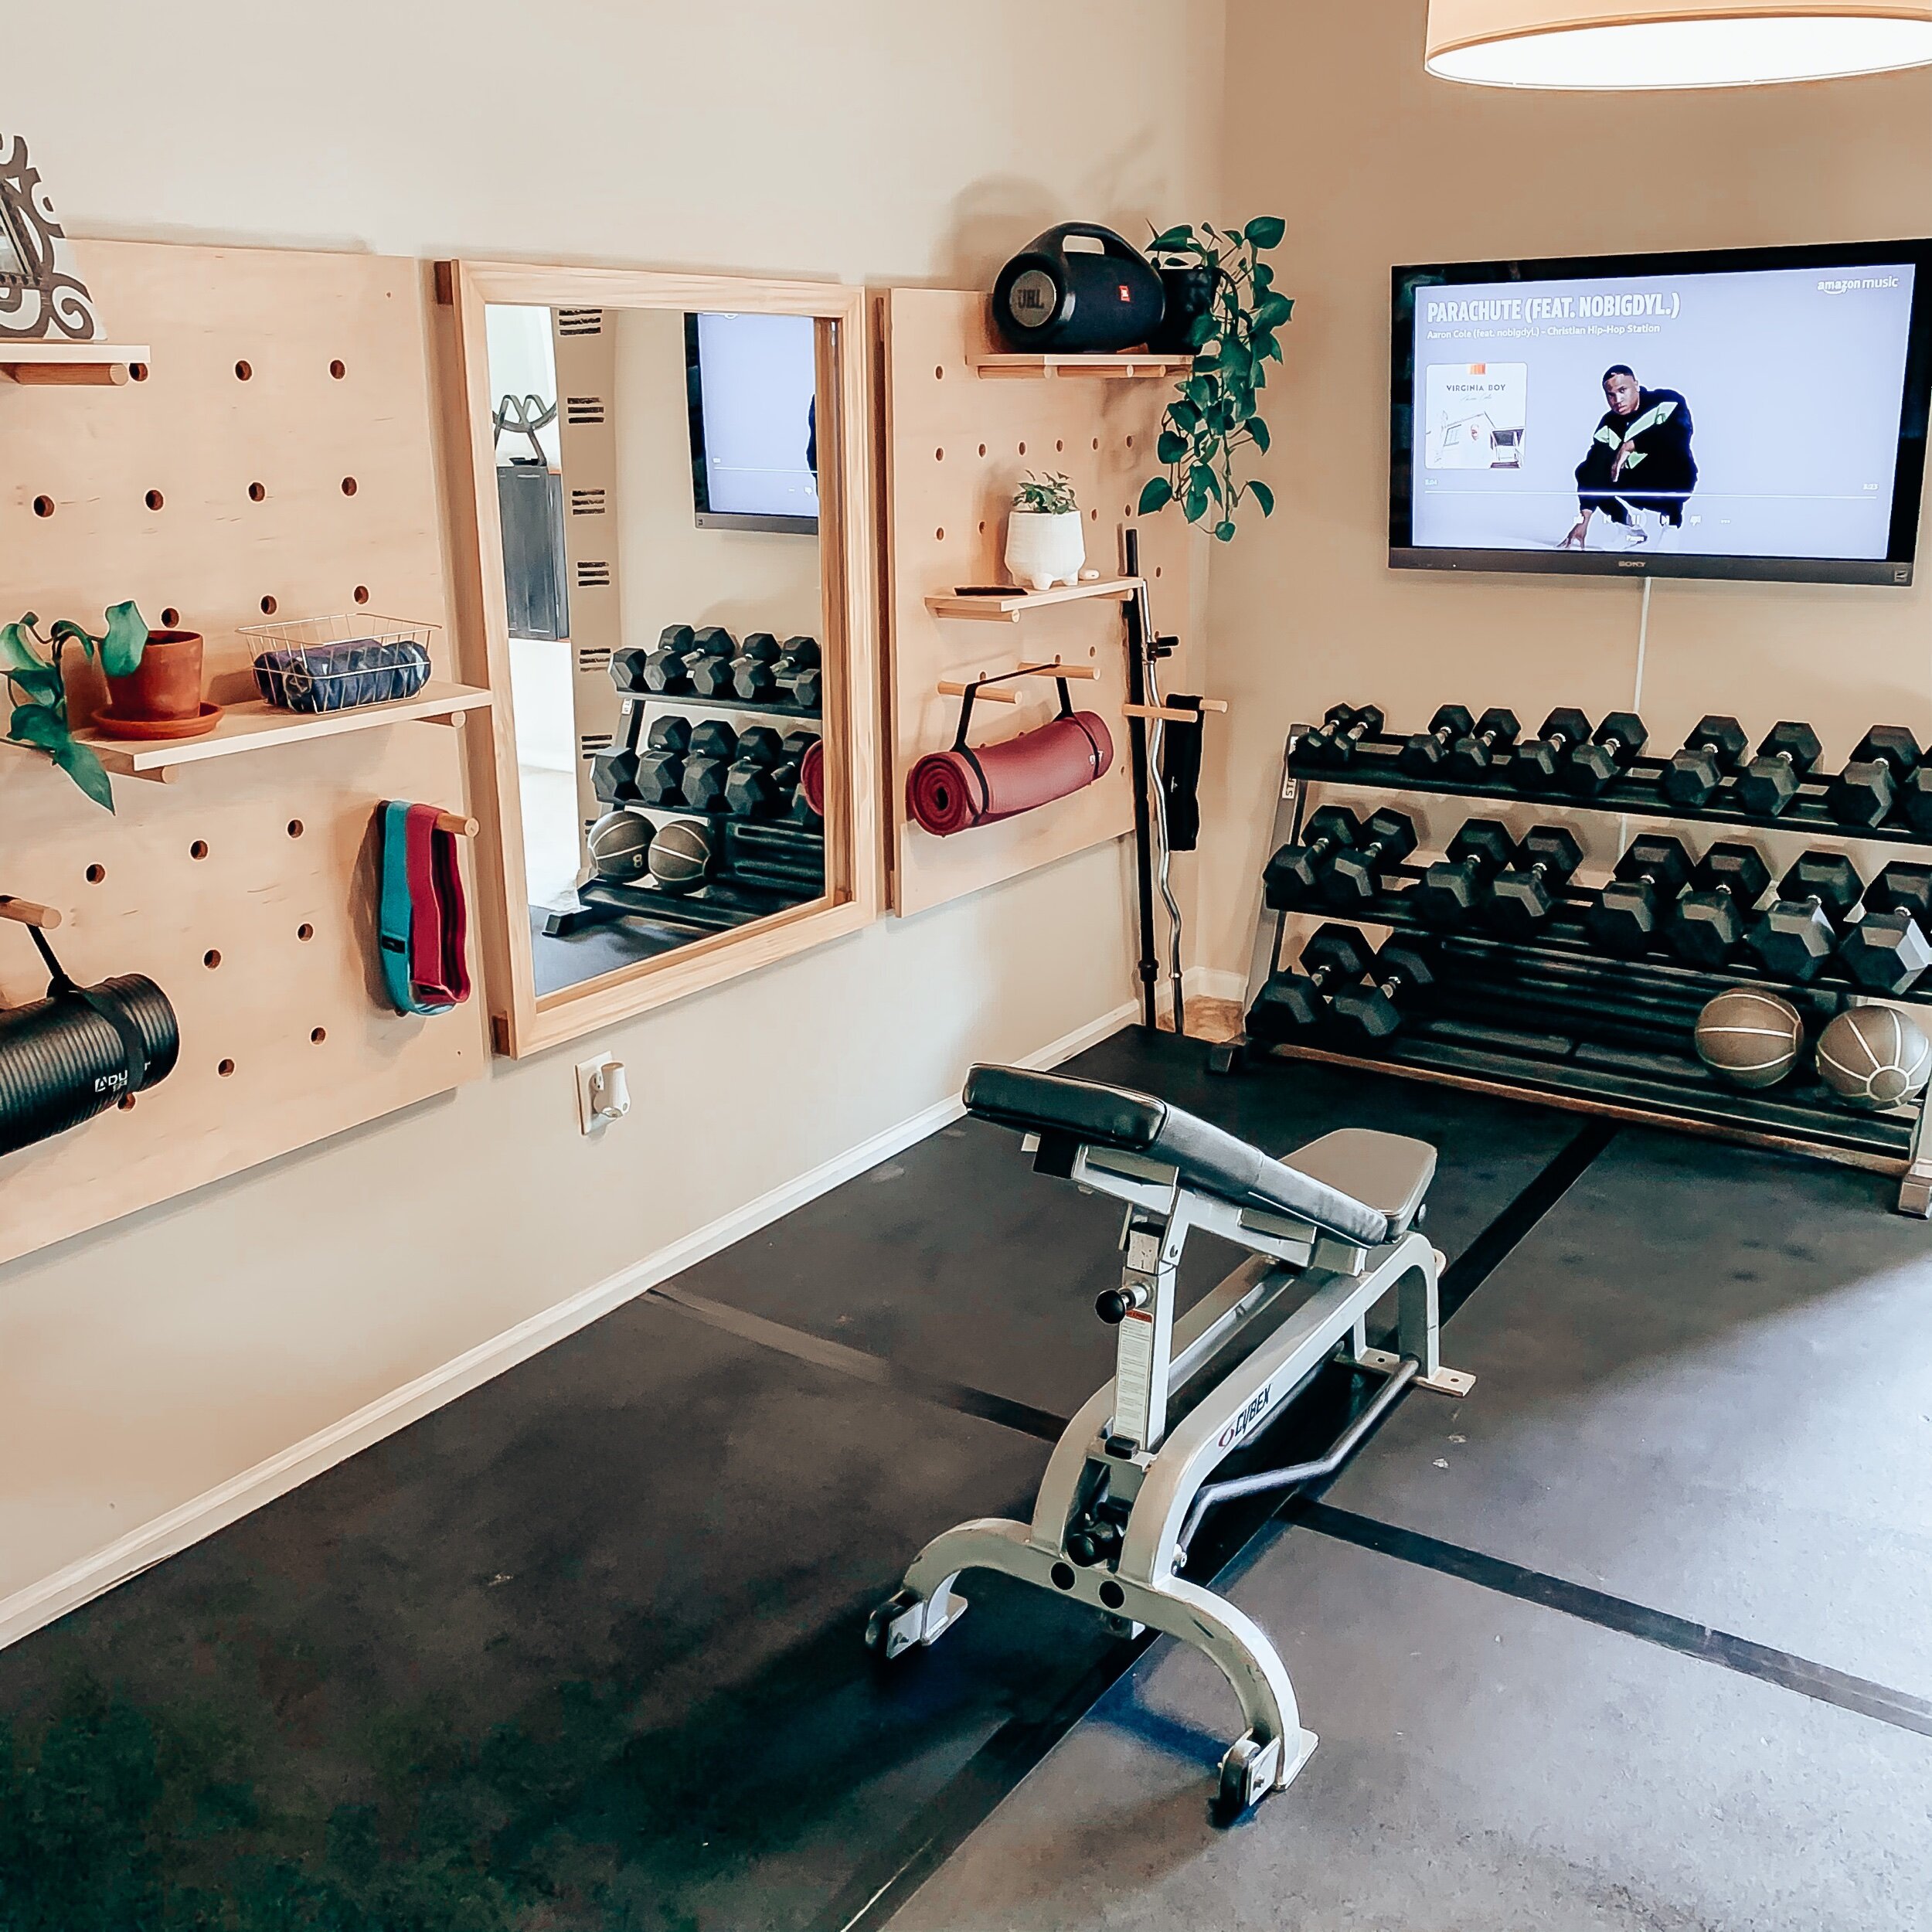
That being said, I have plenty of spaces in my home that still need work and this is the first time I’ve ever had a beautifully, designated space in my home to workout. I’ve always used the garage, living room or where ever I could go. So if it’s not your season for a space like this, that’s ok, we’ve all been there.
A happy heart and healthy mind are much more important than any tangible place or thing.
Budget Friendly DIY
If you are ready to transform a space in your home, then I hope this post inspires you to get crafty and give this a try! It’s budget friendly and since it doesn’t take a lot of time, you can totally fit this project into your schedule.
What you’ll need
-
A sponge (snag some at the dollar tree)
-
A box (I used the lip of a box I had in my garage but a clip board or other flat surface would work)
-
Paint (you don’t need much so choose a color and get a sample paint size at Lowe’s to save $)
-
Paint tray (a paper plate would work)
-
Gorilla Glue
-
Box cutter/Razor Blade
-
Scissors
-
A ruler (with level is best)
-
Sharpie or something to draw a line on your sponge
Step by step – how to create a sponge stencil
Once you’ve gathered all of your materials, it’s time to cut your sponge. For this design I made six cuts. Each cut needs to be the same size so be sure to watch the video below for a visual of how I did this.
You can choose how thick you want your sponge to be but I found 1/2 inch to work great. To get an exact line, I suggest using a ruler to make the marks before making any cuts. I kept my ruler in place as I used the box cutter to make the first cuts.
Next, you will you will mark where your sponges will go. I used my ruler to measure and make all of my marks, starting at the ends of my box. This gave me plenty of space between the sponges, which is necessary in order to create this pattern.
Again, be sure to watch the video, at the end of this post, and it will all make sense.
Glue your sponge on each mark and place a weight of some sort directly on top of your sponges to hold them in place while they dry. I used a weight plate.
Once the glue is dry you are ready to go! Making the stencil is the most time consuming part and even that doesn’t take long.
Start by dipping, one side of your sponges, into the paint at a time. The harder you push the more paint your sponge will soak up. I suggest not pushing too hard. Give it a firm push but not to where the sponge is pushed all the way down. If there is too much paint on the sponge it tends to bleed together and won’t give you the look you want.
Sponge painting Technique
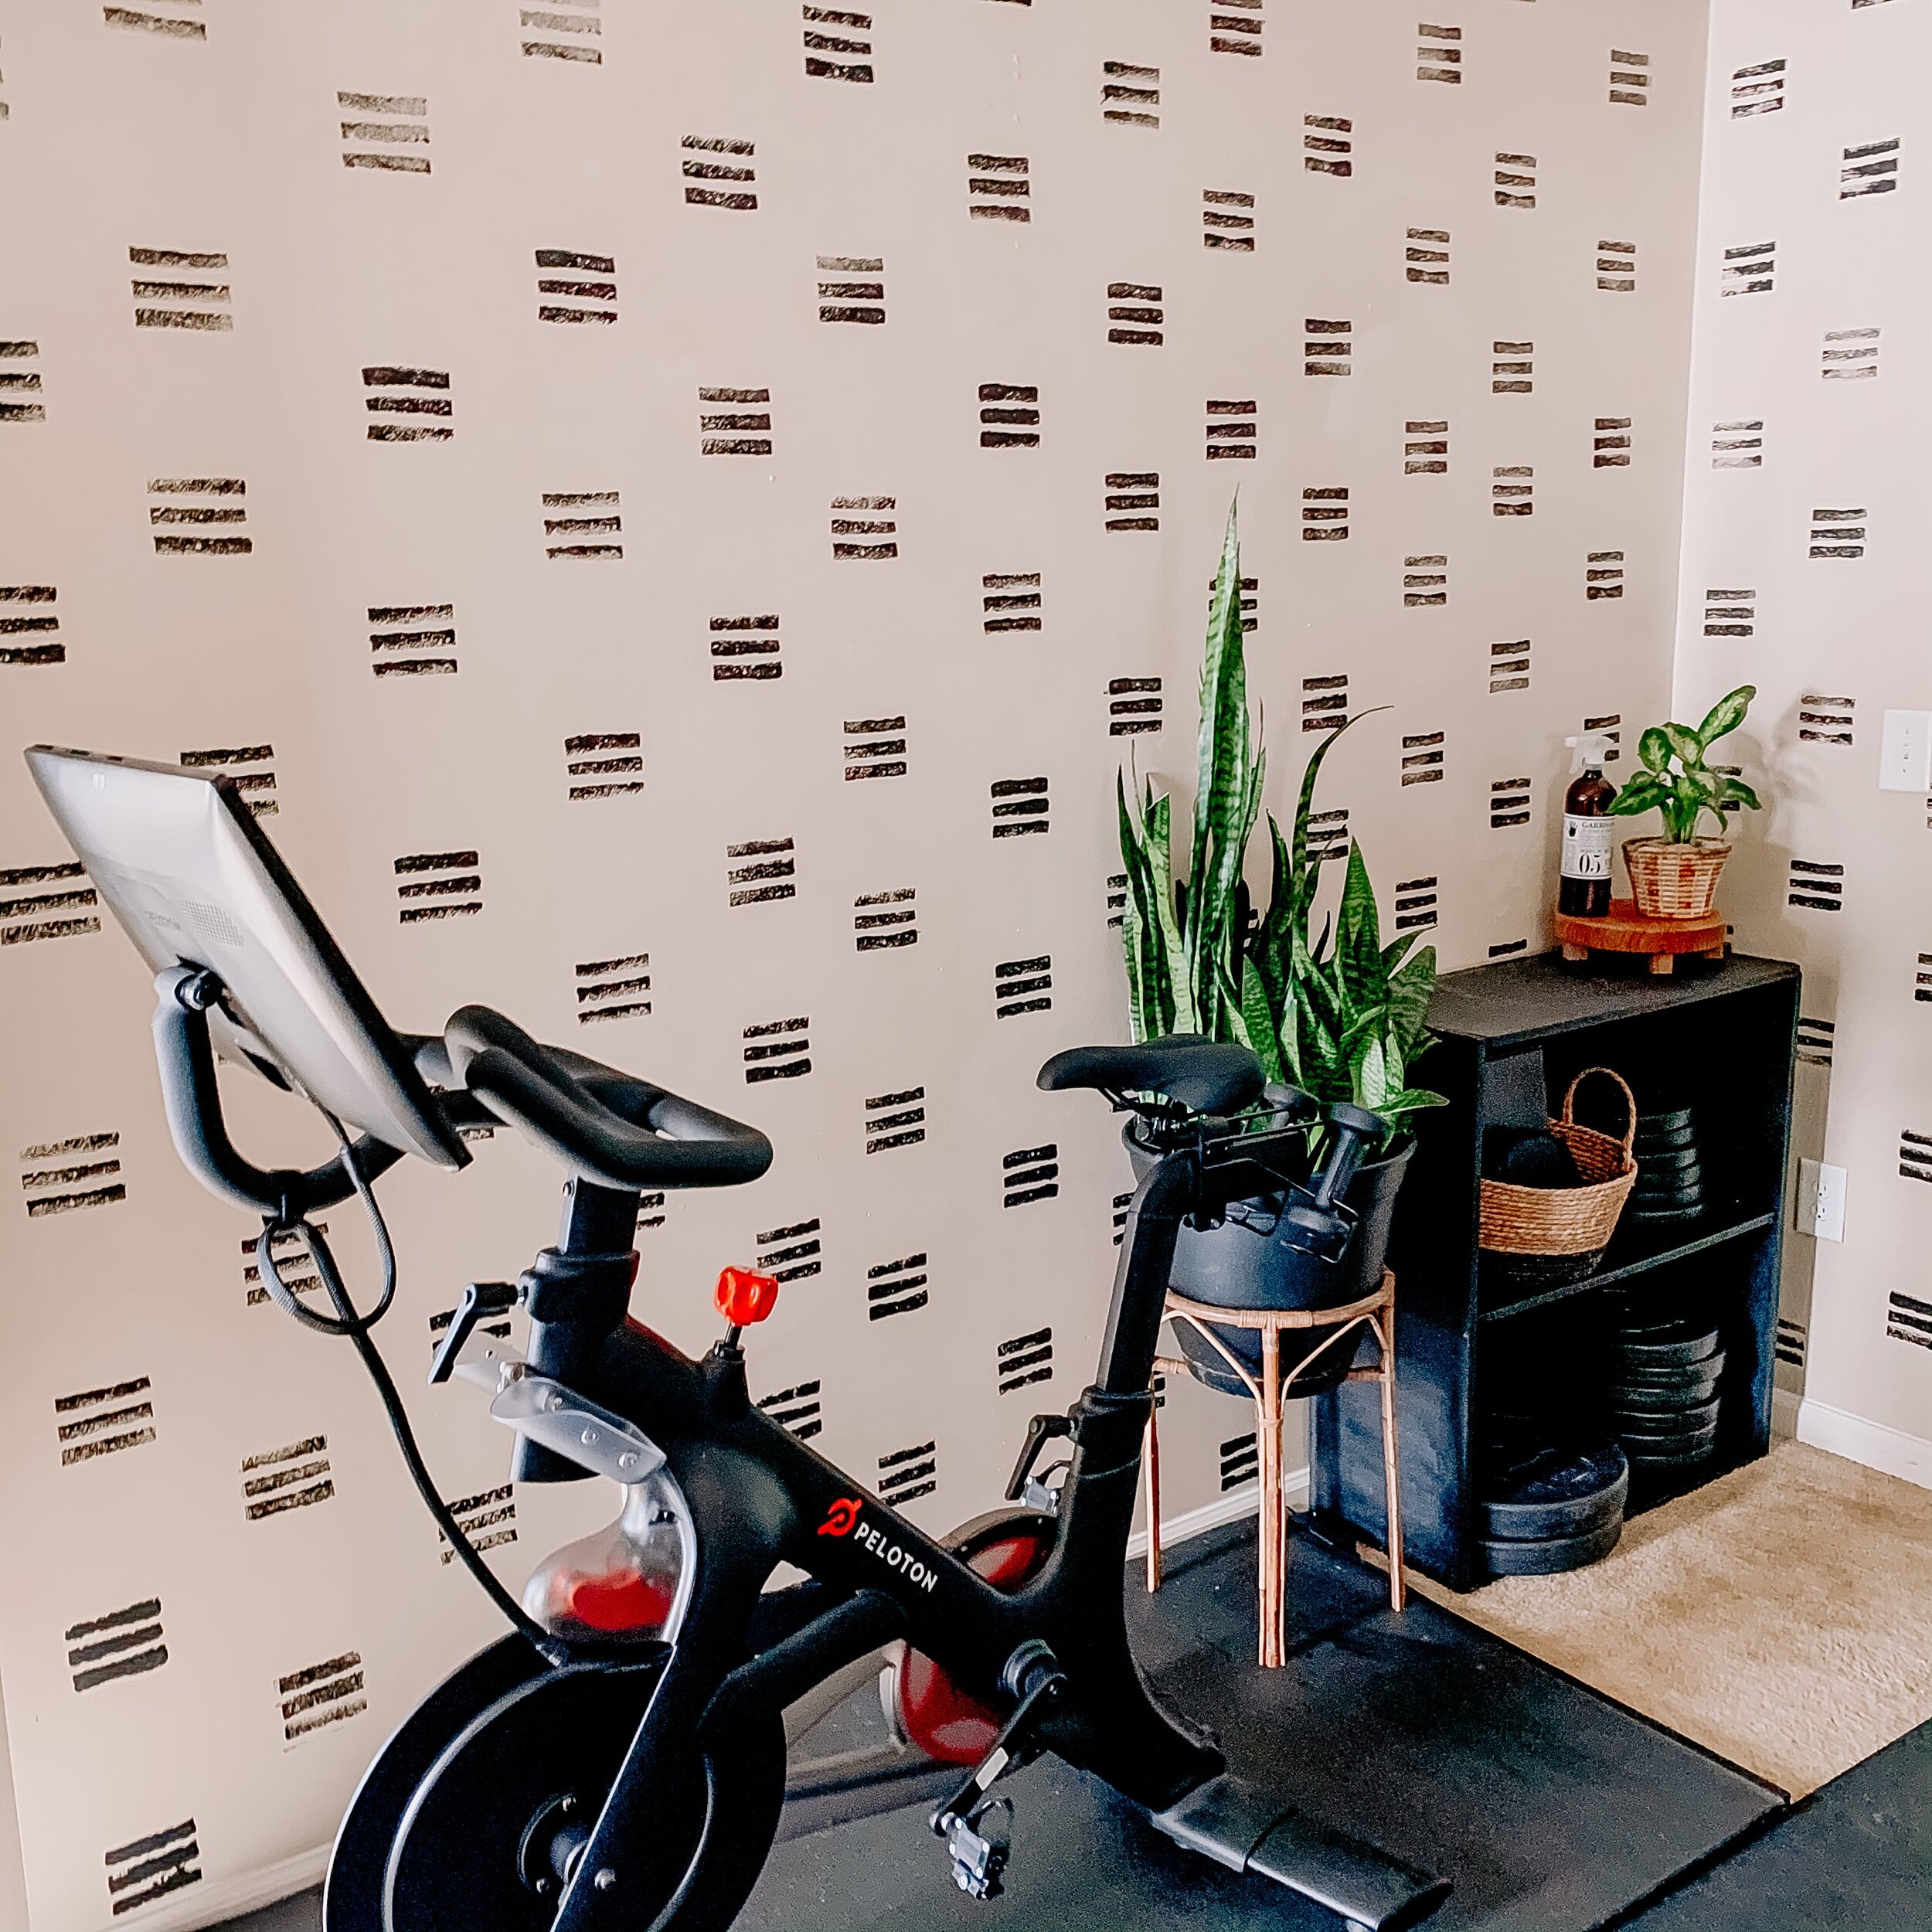
Start at the bottom of your wall, all the way to the left. Hold your stencil, where you want your design to start.
Lightly place the stencil where you want it and with one hand over the top sponges, press down. Do the same for the bottom and then pull your stencil, with both hands, away from the wall.
Instead of going all the way up that side of the wall first, I suggest staggering your stencil. Then you can eye how far apart you want them to go and make sure you are getting the look in the photo.
Repeat that process until done! That’s it.
If you have places where it looks like you may not have enough space for a complete stencil, either save those for last and cut your stencil to size, or put a little more space between each row to compensate.
That’s the beauty of a sponge wall, it’s very forgiving and the imperfections seem to add more character, so don’t get too worried if you press to hard or too light. It will all come together in the end.
Of course if you prefer a lighter or darker look, adjust your pressure and paint application accordingly and have fun with it!
If you are a visual learner like me, check out the video below to see the process.
Will you be giving this DIY a try?
Let me know in the comment section below or shoot me a message on Instagram! Of course, ask any and all questions you may have, I’d love to help!
Don’t forget, you can also share or save this post on Pinterest or your social, to refer back too. That is always highly appreciated as well.
Happy Creating Friend! Can’t wait to see what you transform!
With Love & His Spark,
Lisa Faye


[…] Dark Sponge Painted Accent Wall via Wildfire Restoration // Right: Light Sponged Painted Accent Wall via Project […]