
How to make your own Giant Pegboard
If you want to make a space both beautiful and functional, this is for you! In this post you will learn all you need to know to create a modern pegboard wall.
My Pegboards
Have you ever seen those home gyms that make you drool? Ok, maybe that’s just me but I’ve wanted a studio type, home gym for all of my adult life!
Don’t get me wrong, I’ve always had a space to workout in my home but it usually served as OTHER things as well.
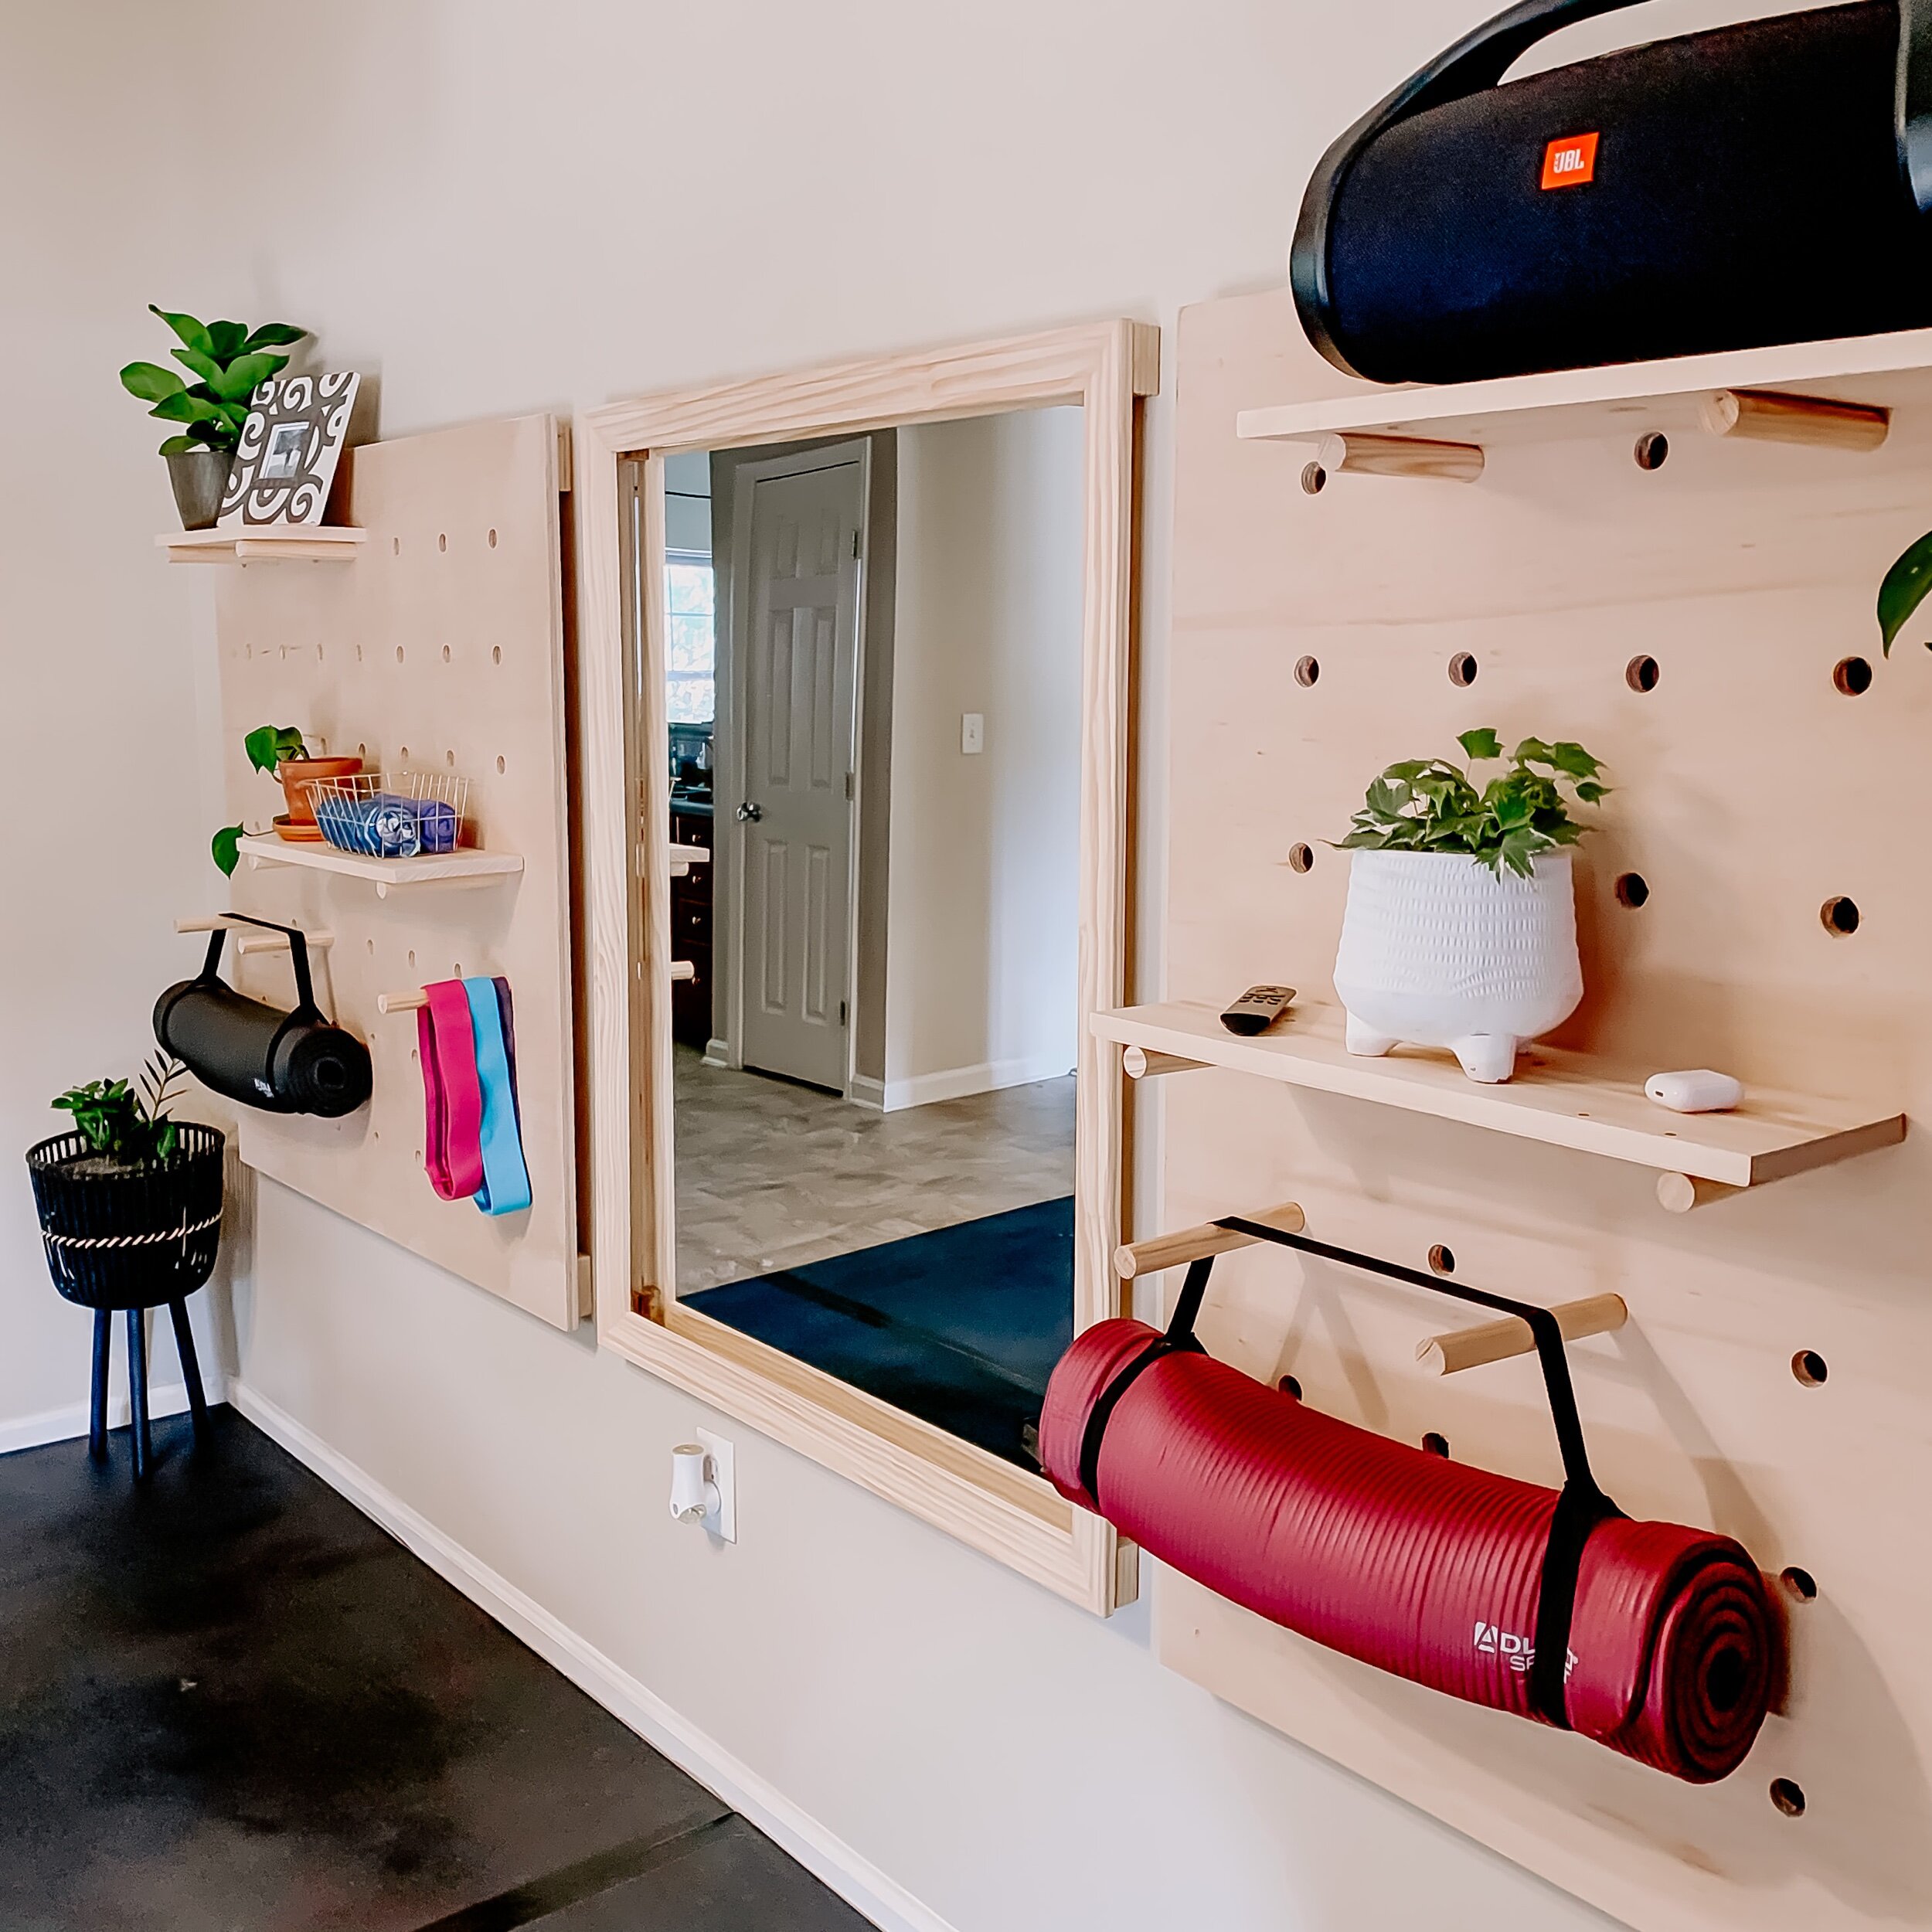
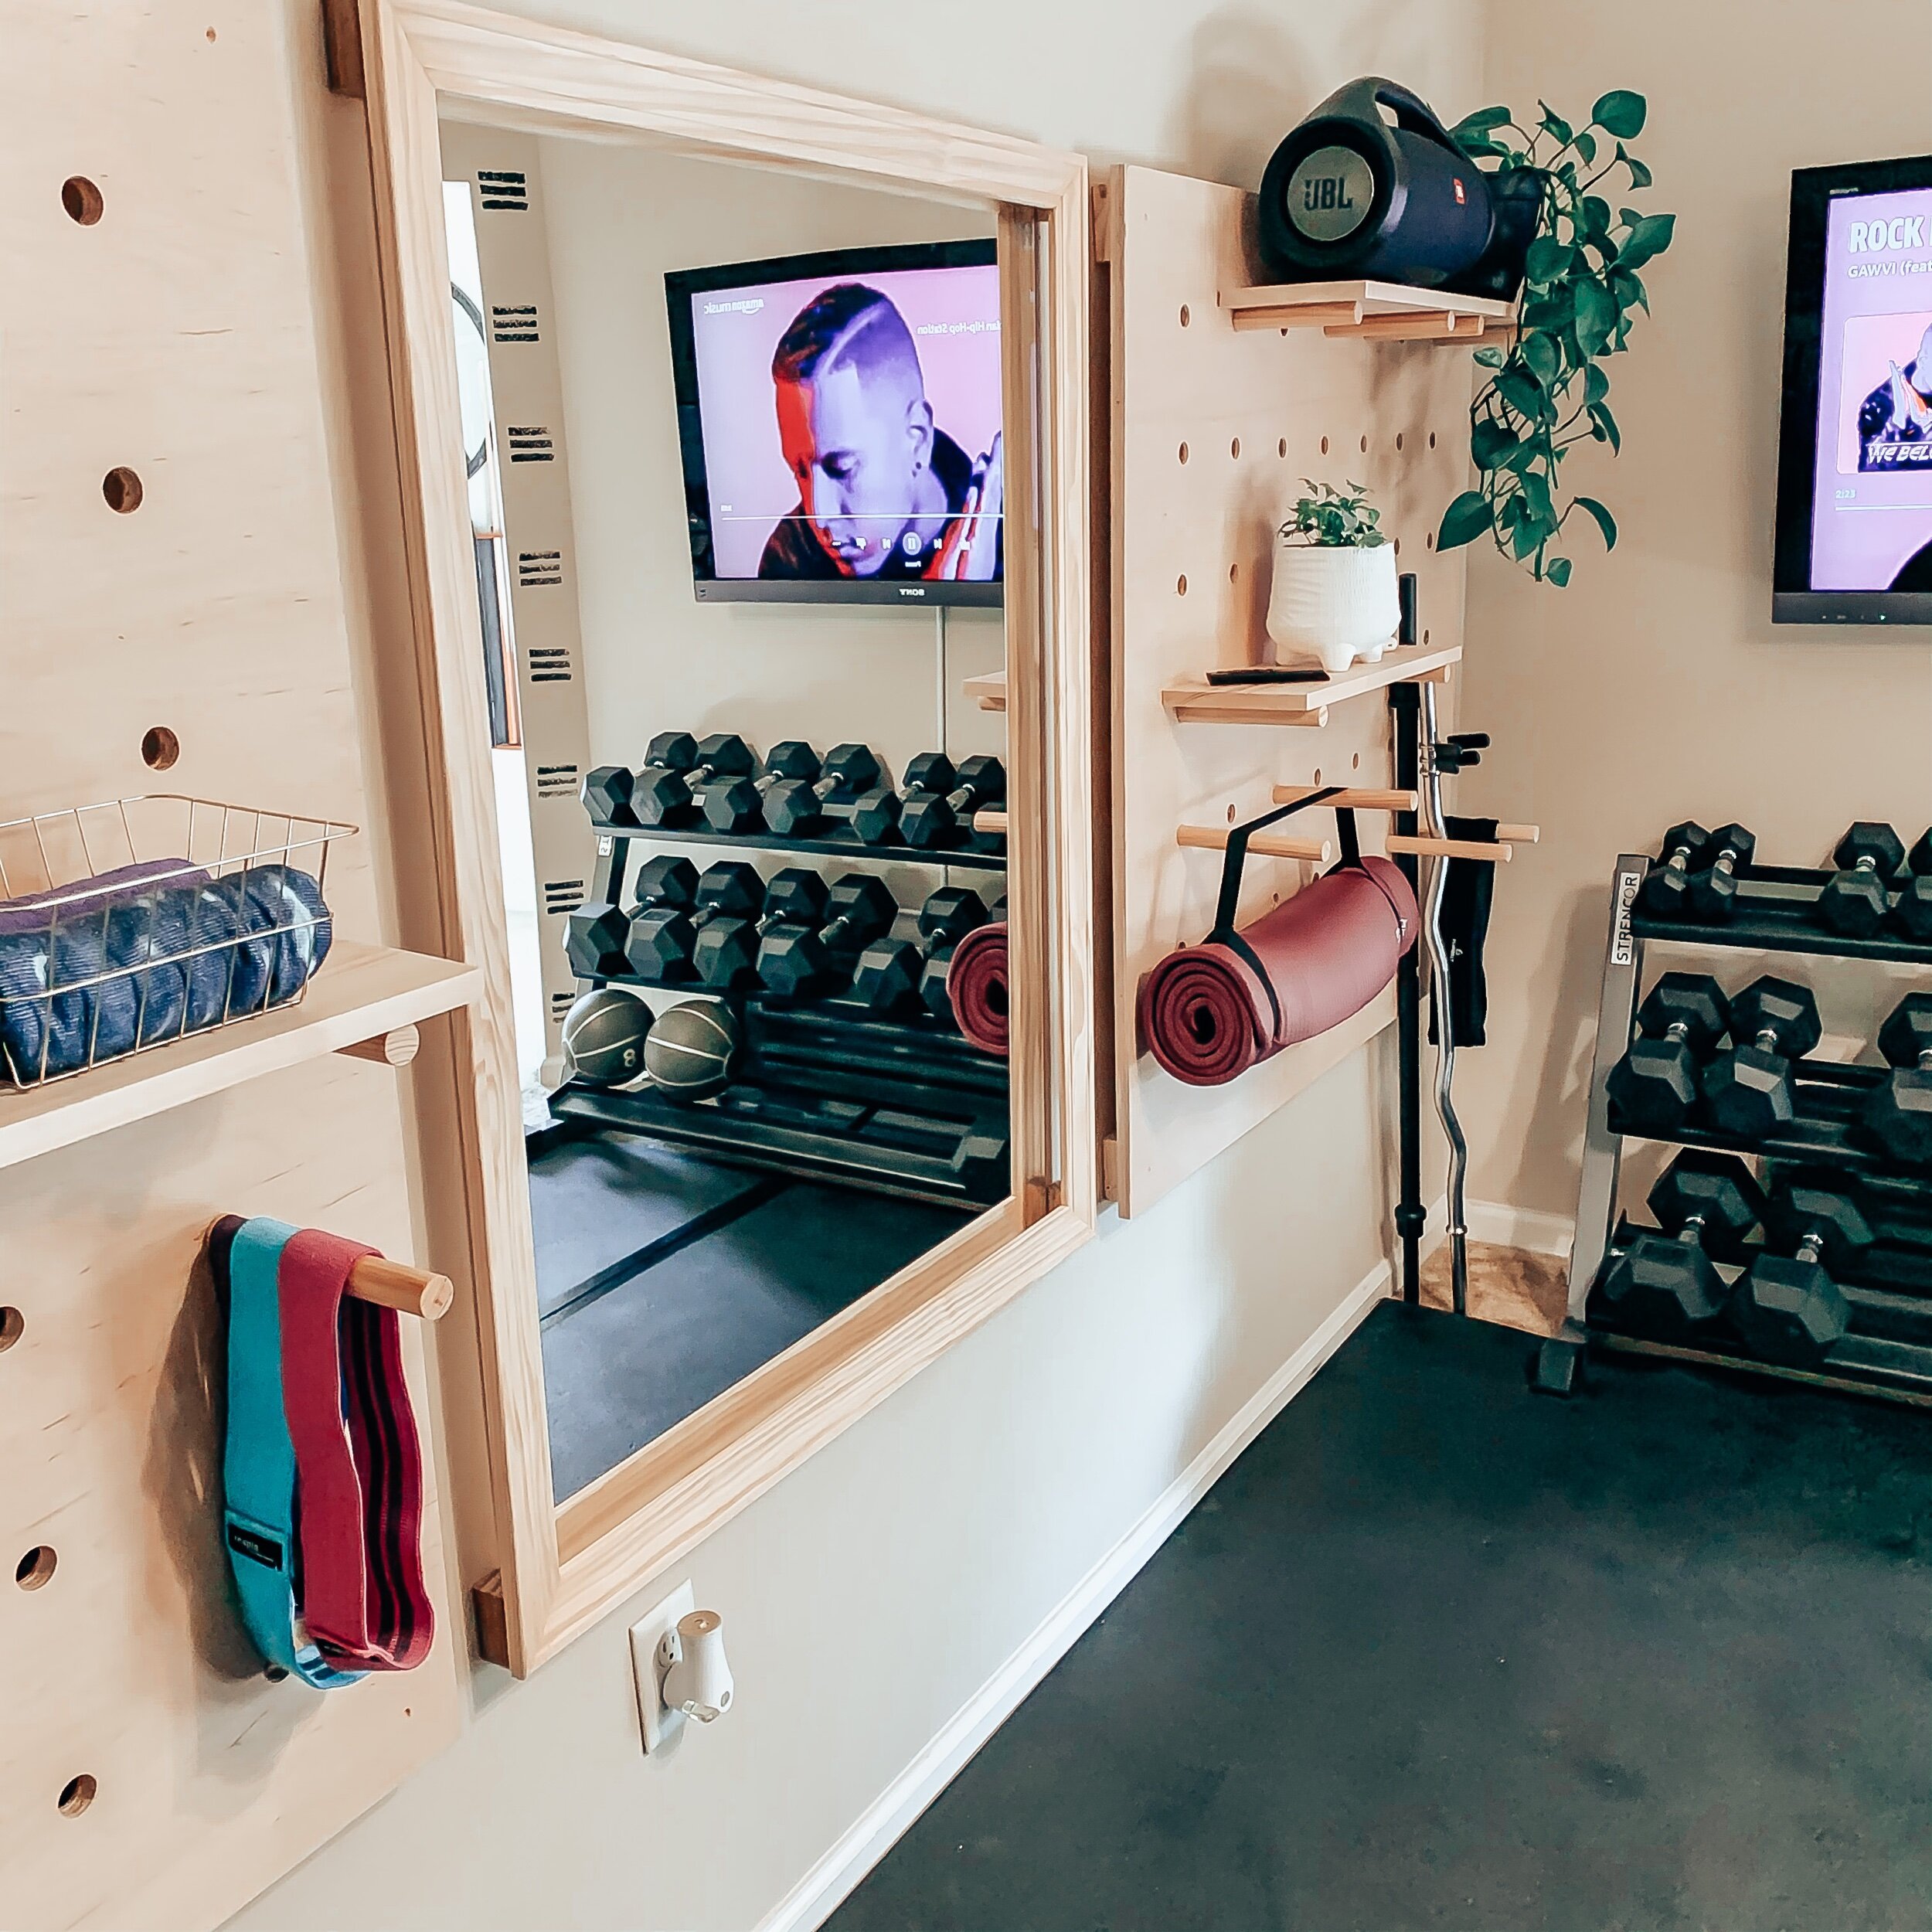
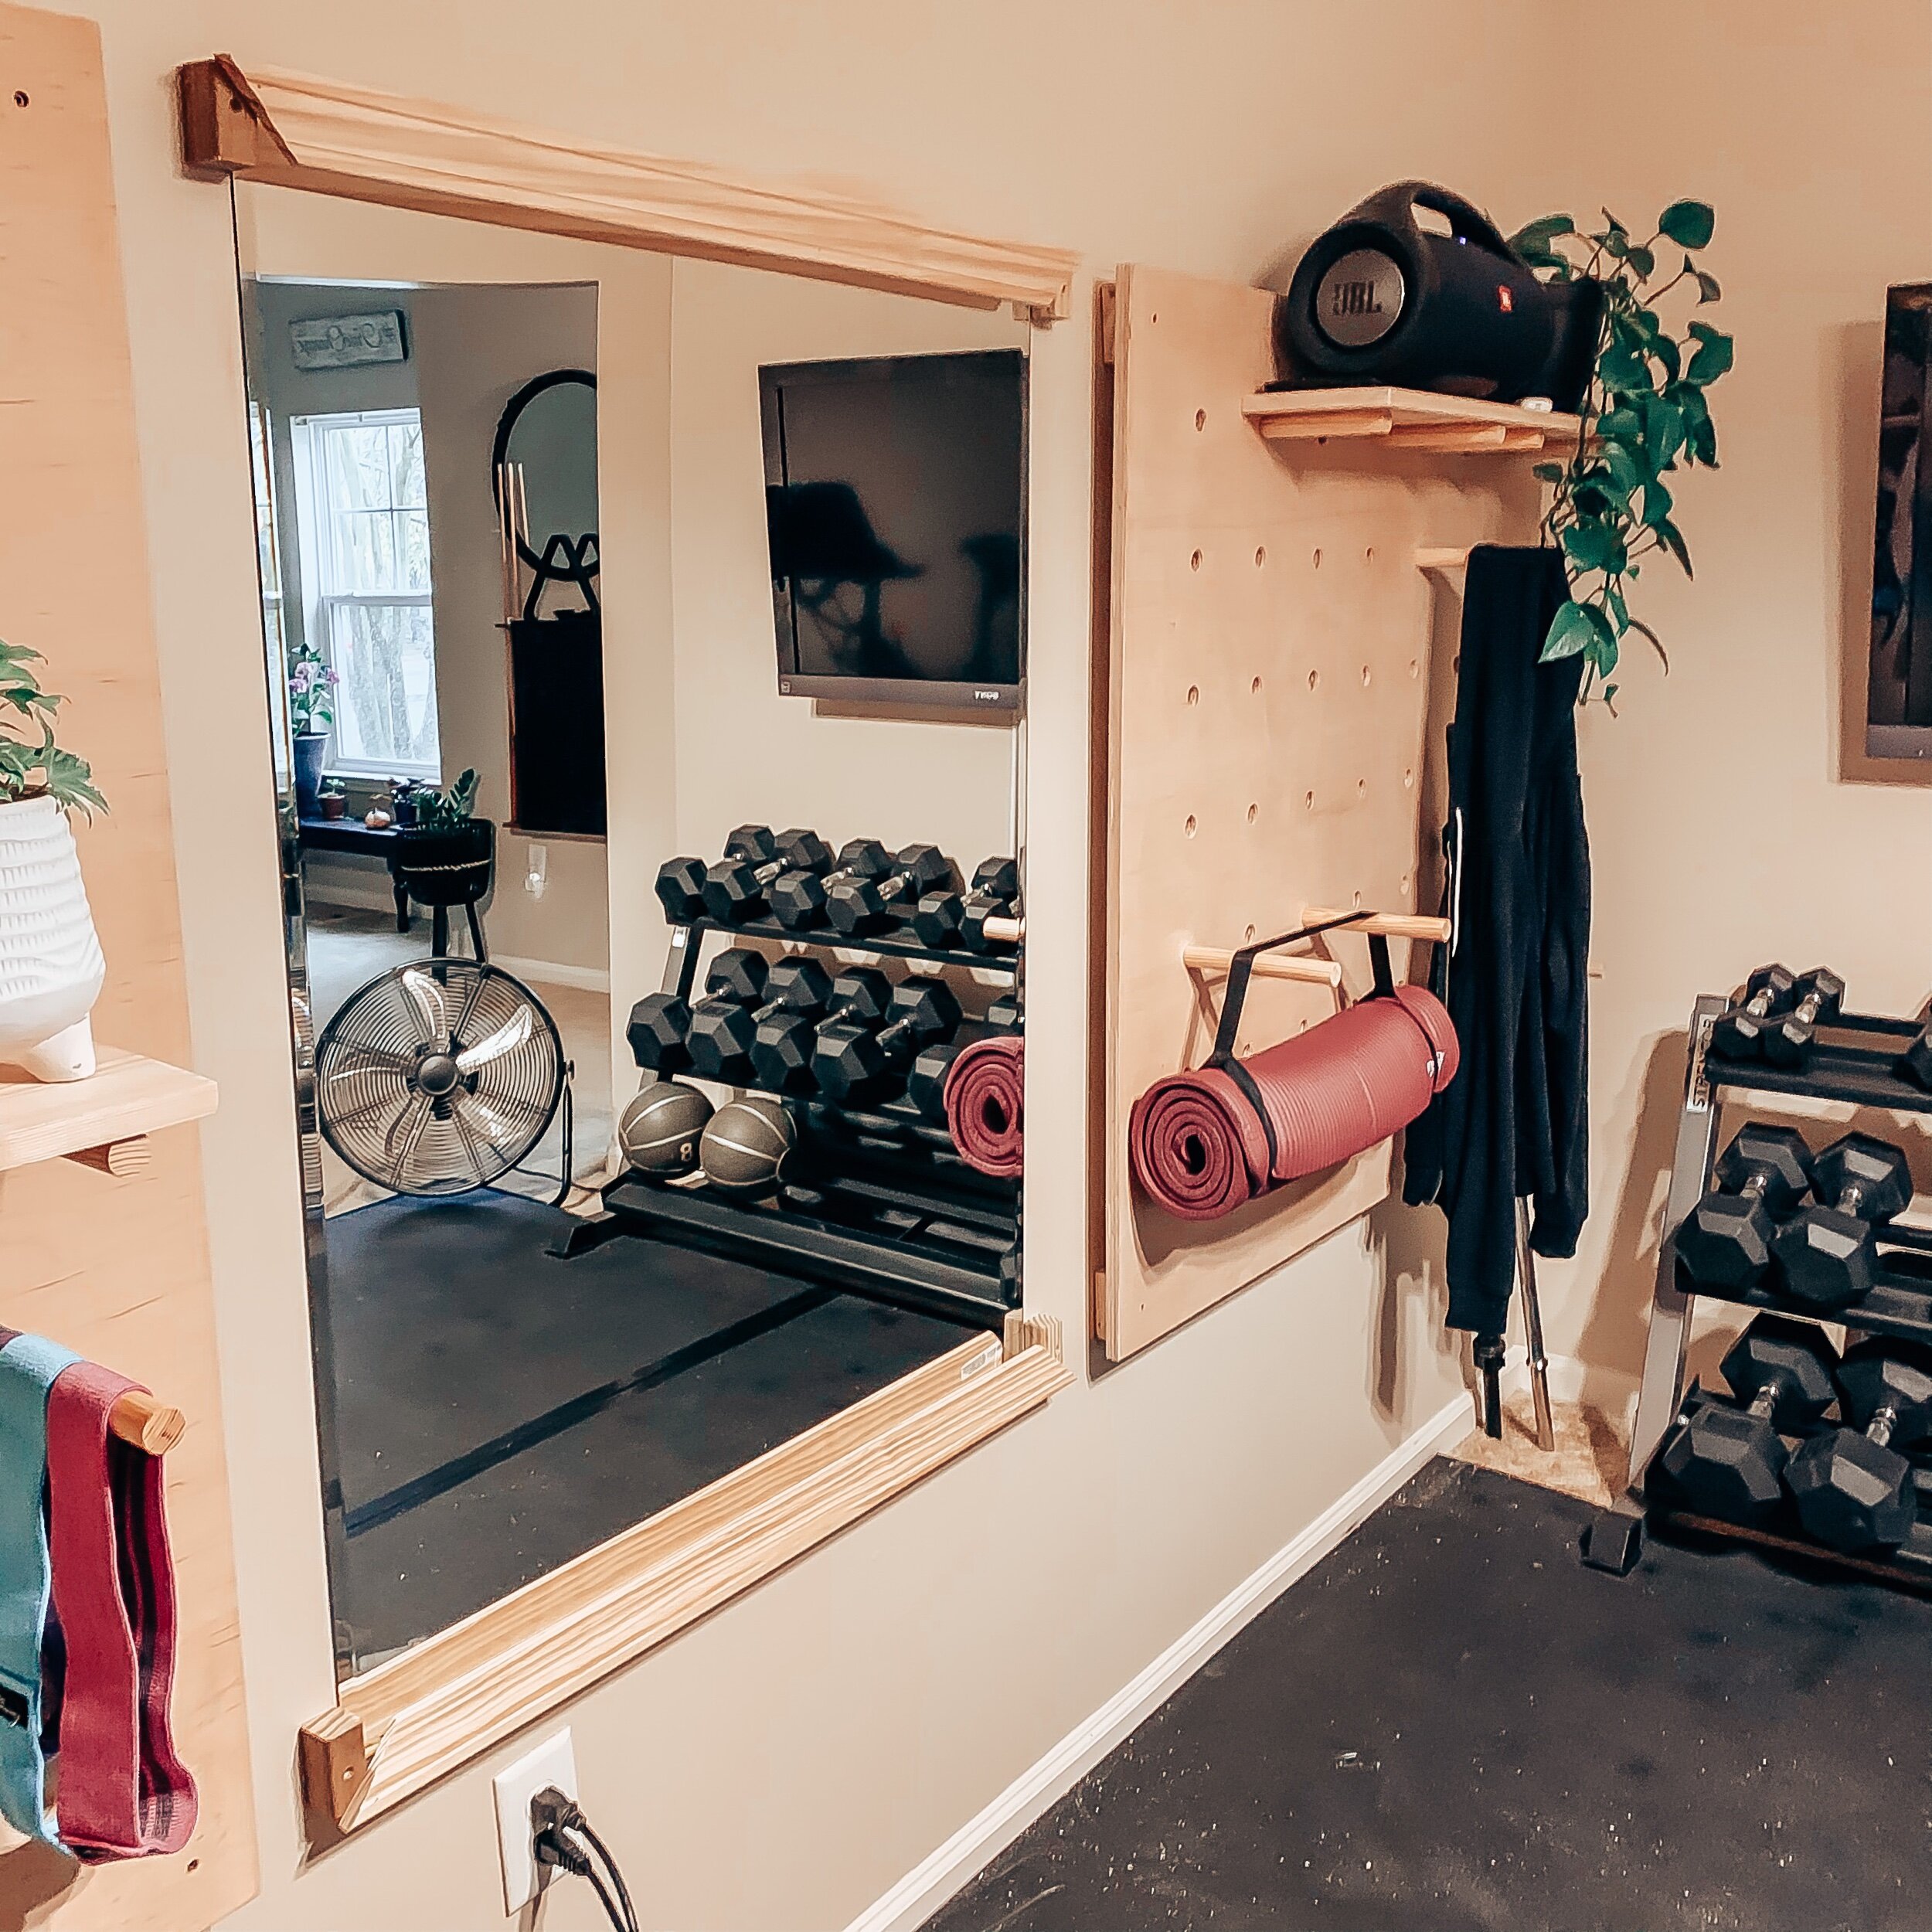
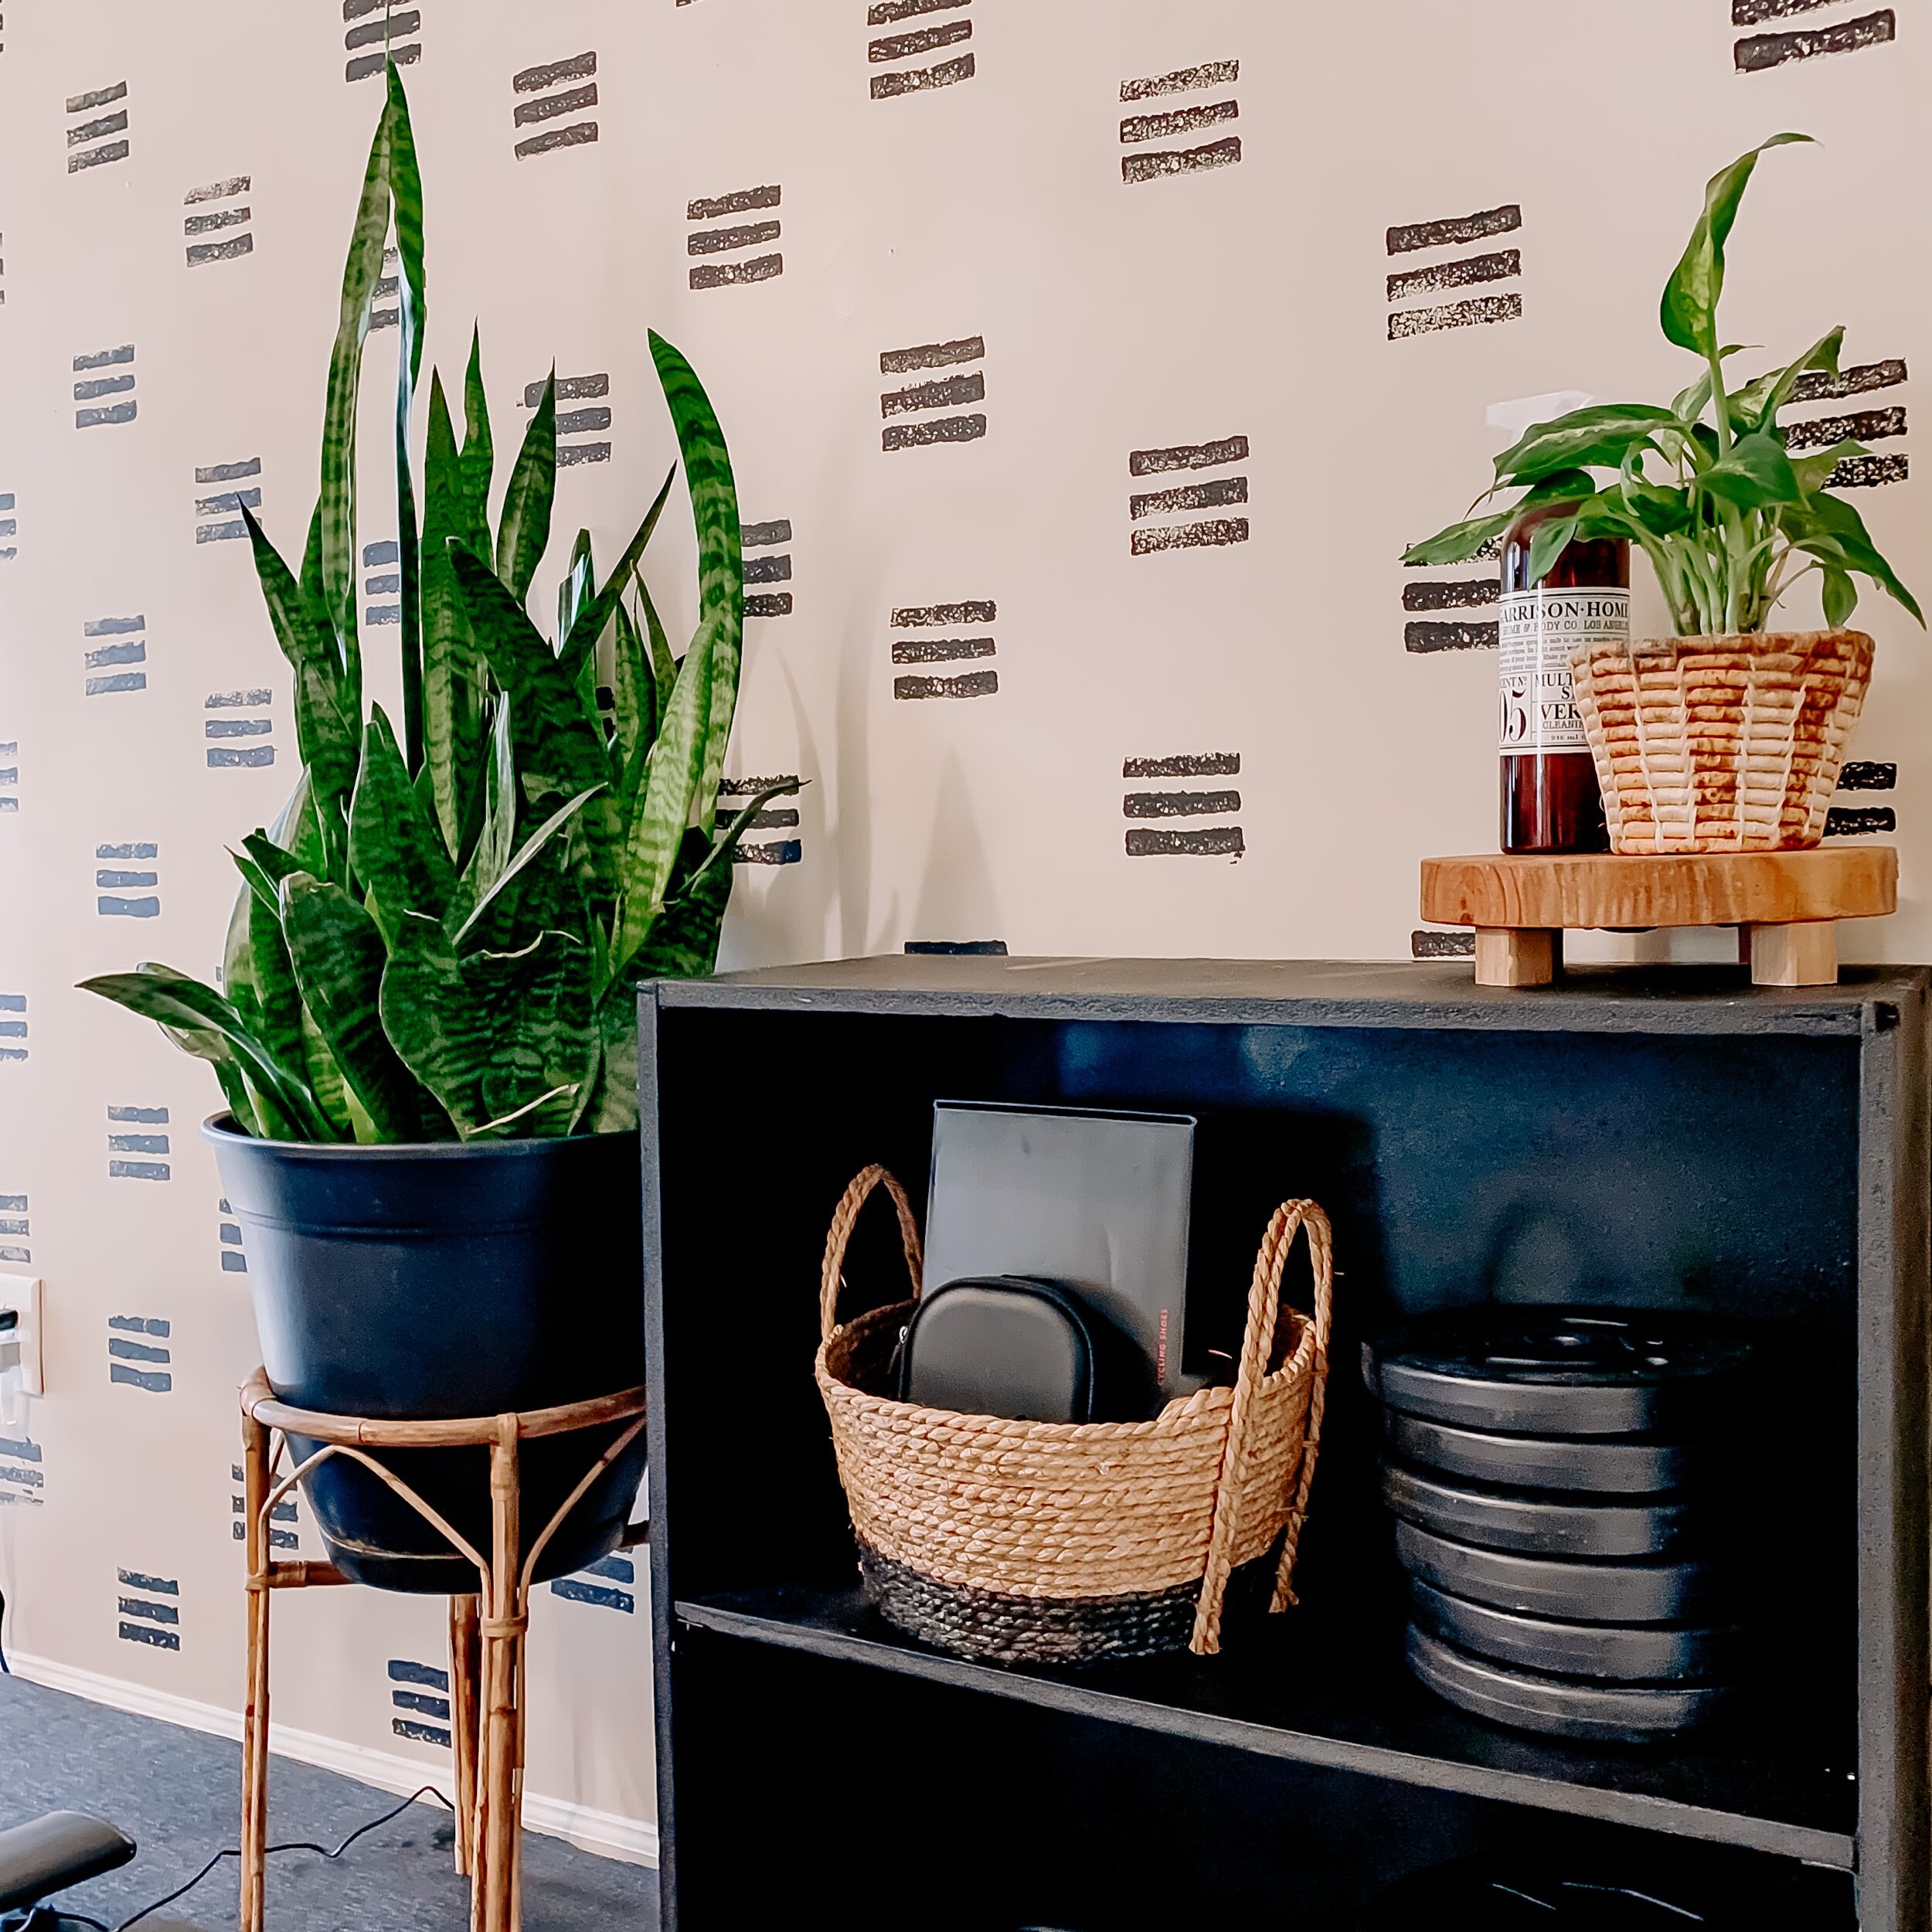
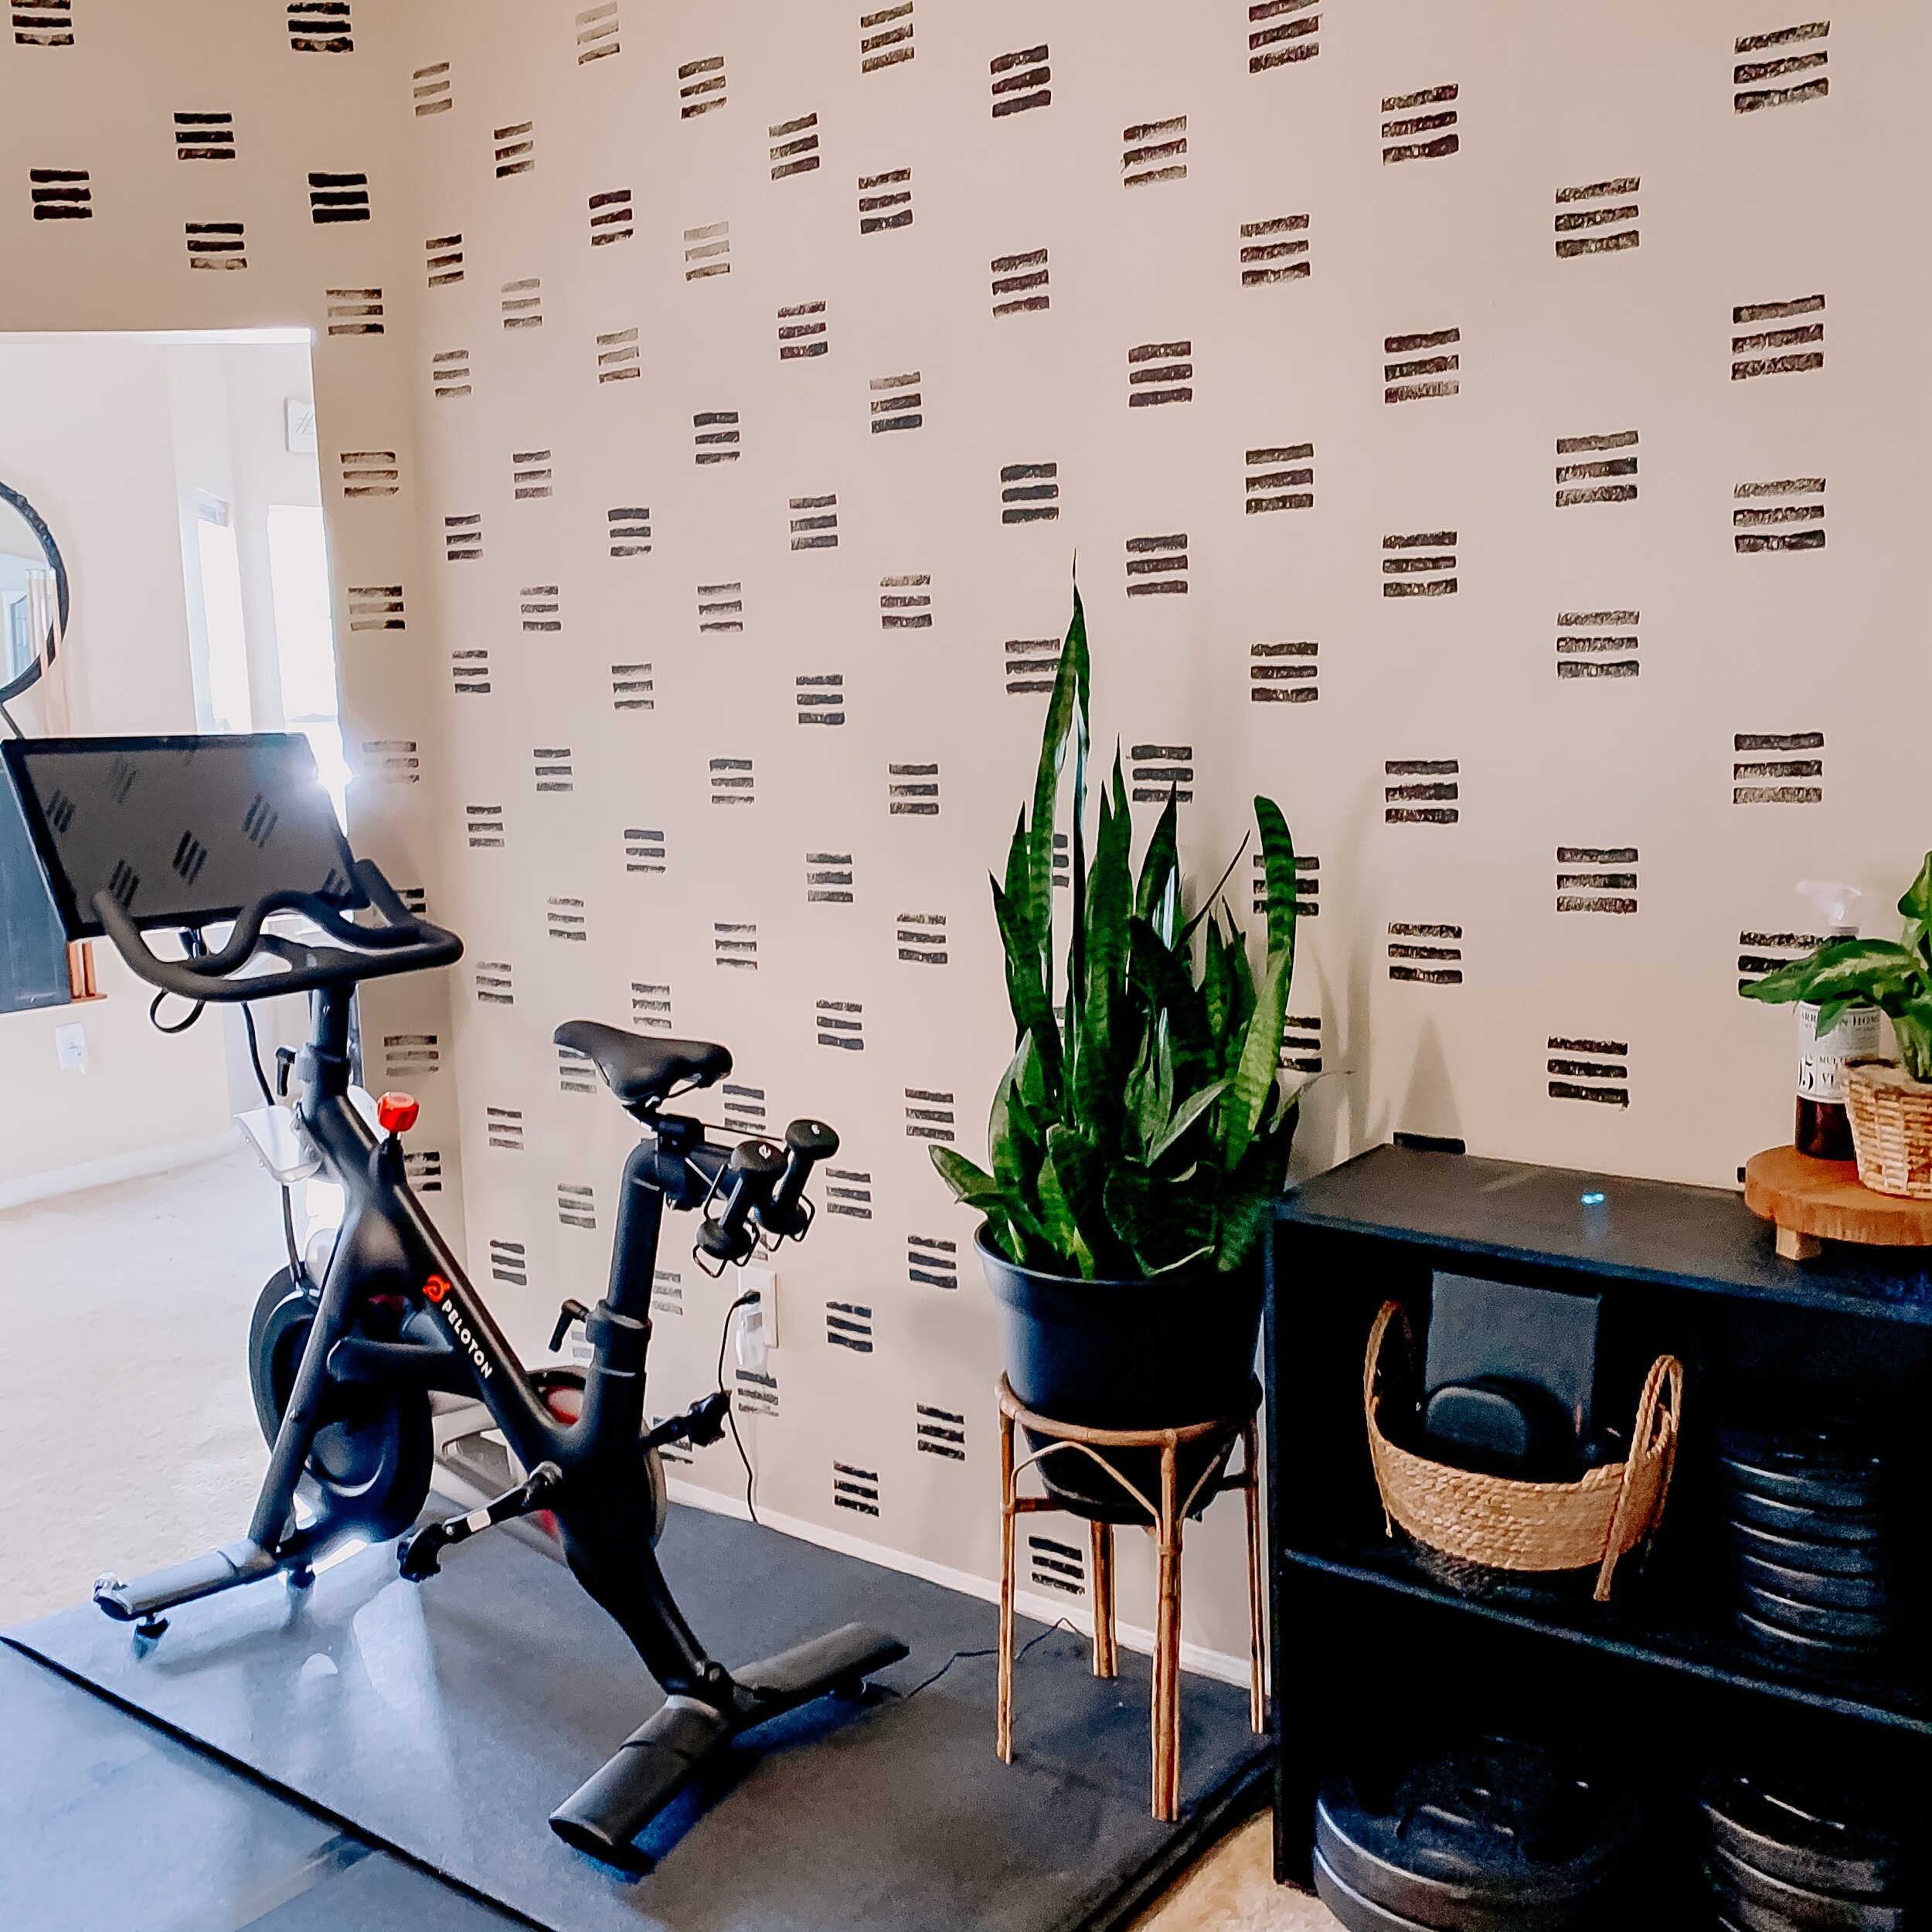
I am motivated by esthetically pleasing spaces, so I am thrilled with the way this project turned out, and excited to show you my ACTUAL HOME GYM!
How it all came about
This space used to be our formal dining room.
This is what it looked like around this time last year.
After two of our kids left the nest, let’s just say, a lot of things have changed around here!
How to create a Pegboard
Now let’s get to the part you came for, the step-by-step process of creating your own pegboard.
I was introduced to the idea of a pegboard by my good friend Pinterest, and I knew I had to have it!
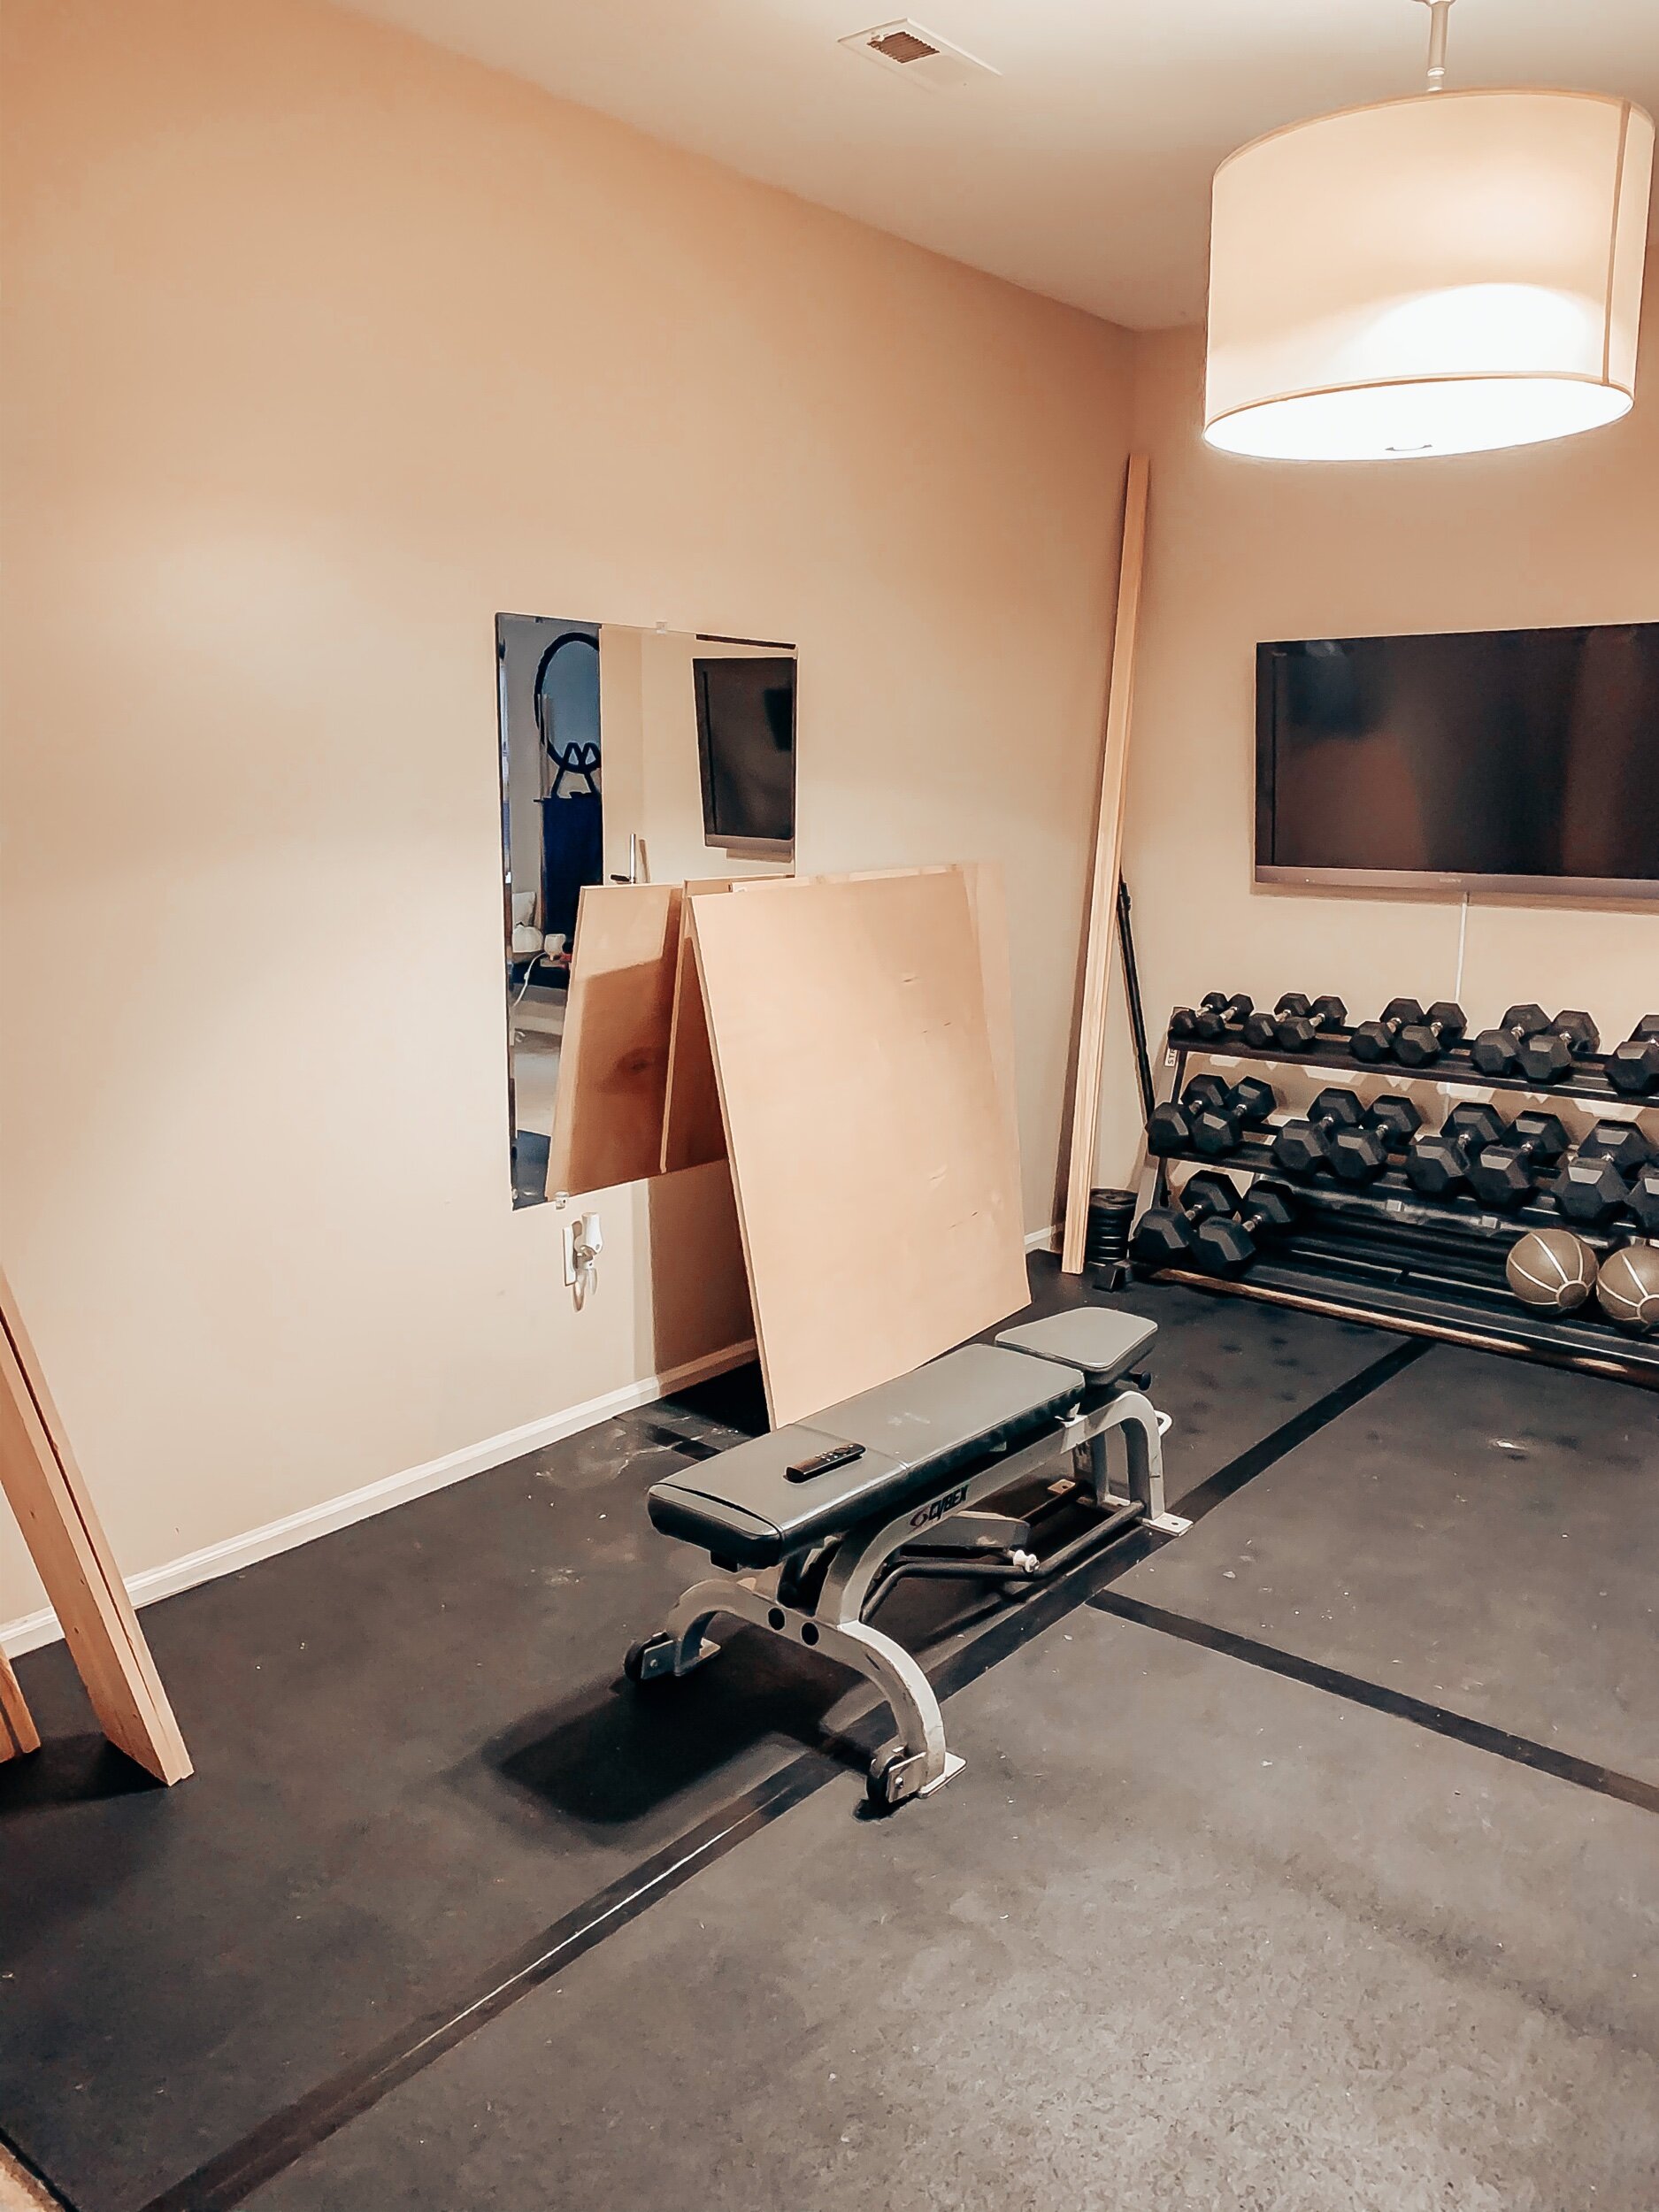
Now, imagine the wood is gone…that was all we had in our workout space prior to this project. One semi beat up mirror and our gym equipment.
I’m sure it goes without saying, but this space was very uninspiring and had me questioning why my dining room table was now packed up in the garage?
As a woman approaching 40, I need all the inspiration I can get and this room just wasn’t making the cut!
What you’ll need to make a large wall mounted Pegboard:
-
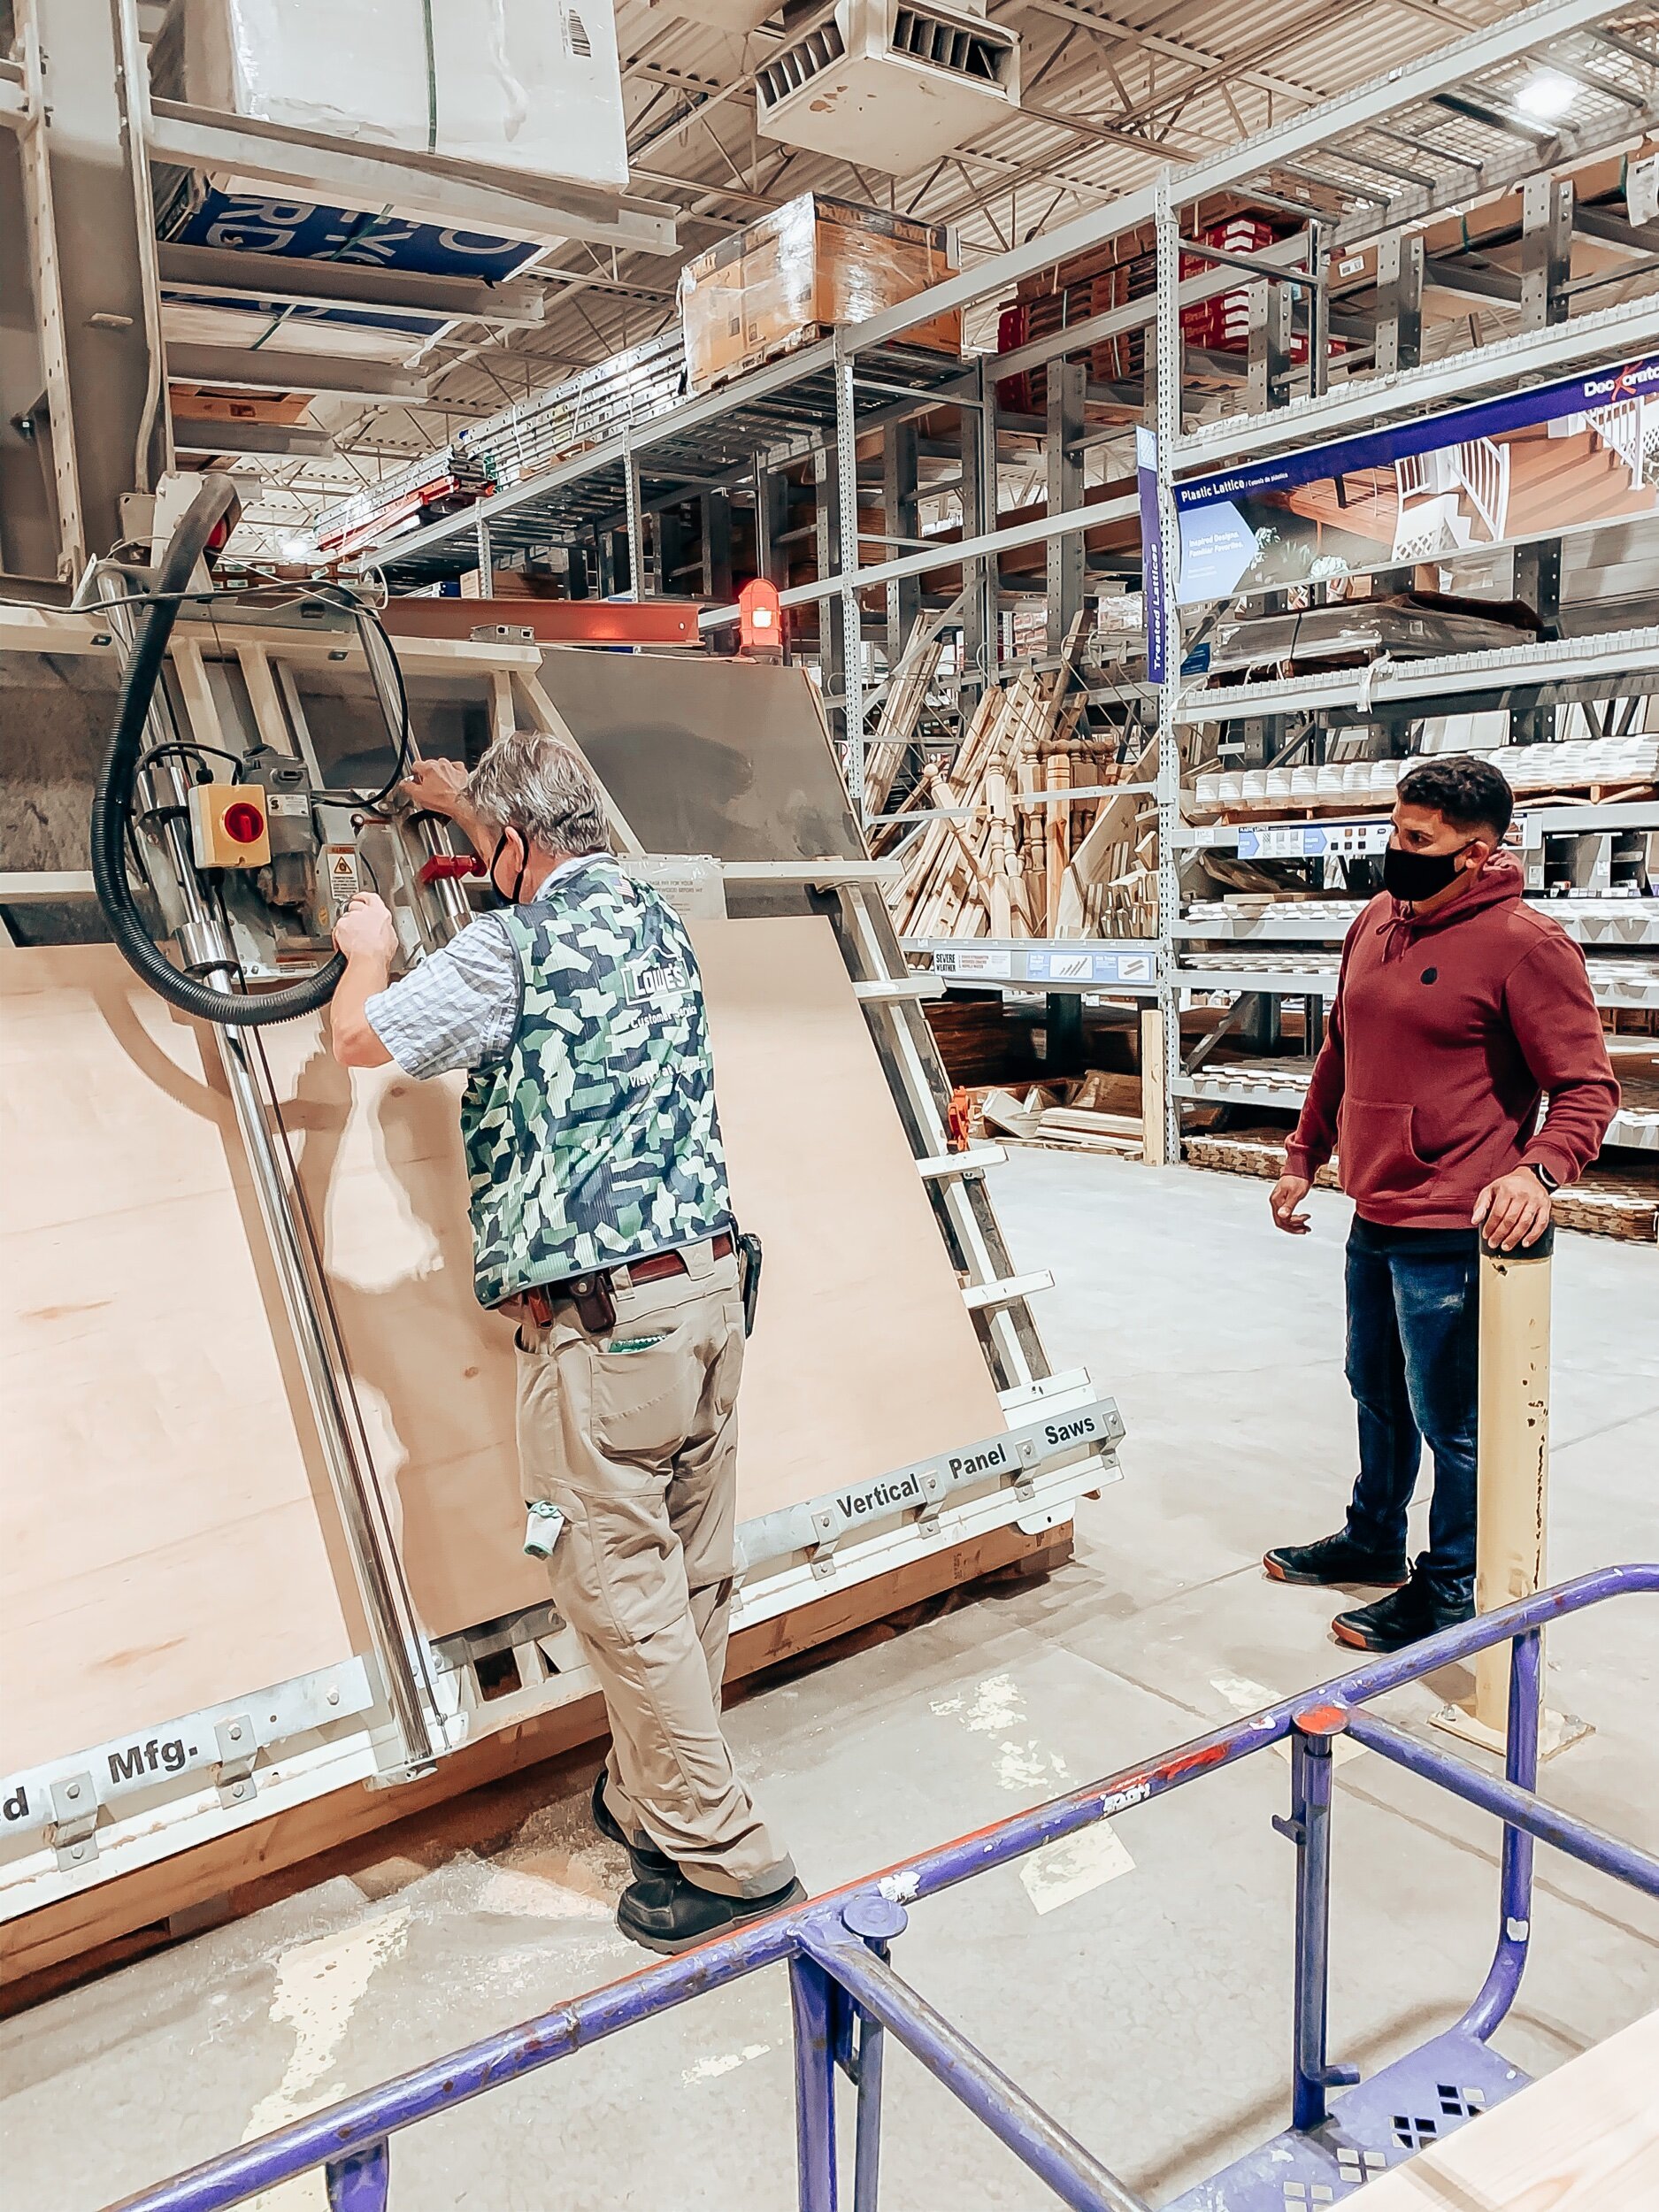
One 4’ x 8’ piece of high grade finished plywood, cut in half. They can do this for you at the store. We had them cut it for us at Lowe’s when we purchased it.
-
Two 1” X 6’ dowel rods (these will become your pegs)
-
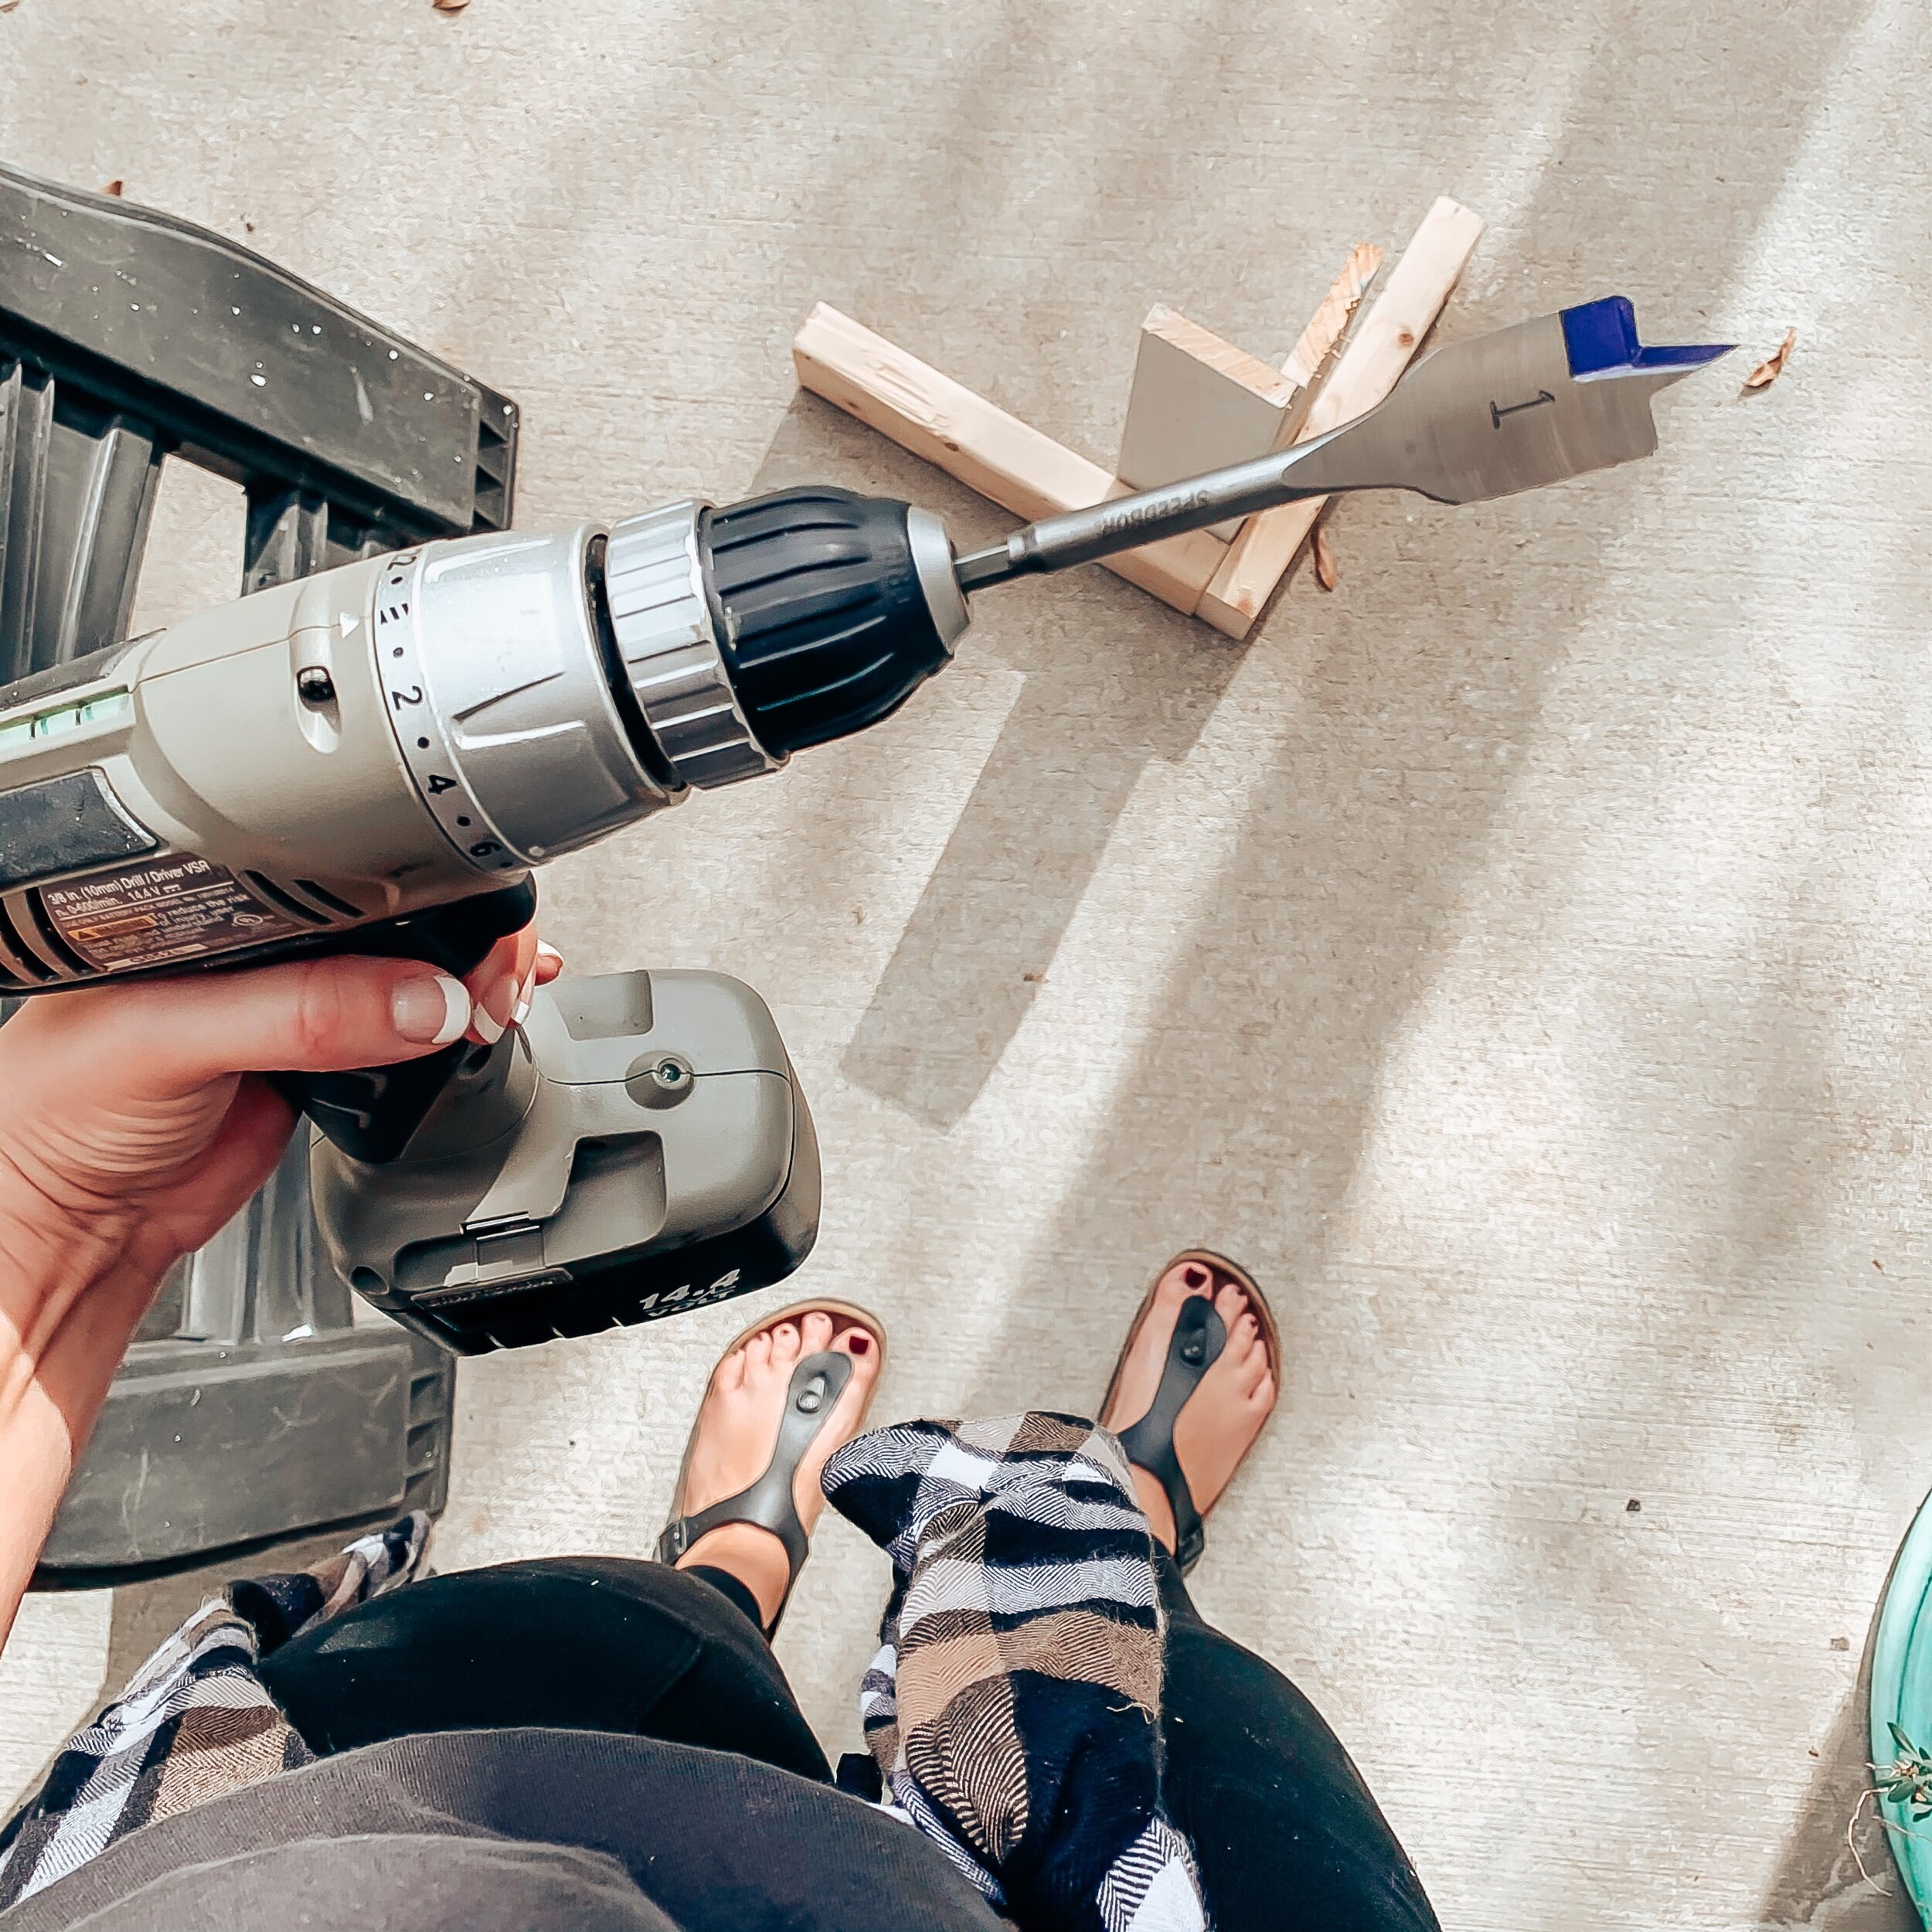
1” Spade Wood drilling bit
-
3” wood decking nails
-
2” x 2” block (used to hold the peg board to the wall)
-
Wood filler (natural color)
-
String (for grid)
-
Tape (for grid)
-
Pencil
-
Puck lights (if you want them to light up like ours, not a necessity)
-
Wood for shelving ( ours were 1” x 8” x 12’ and we purchased two of these)
-
Small drill bit (to pre drill holes)
-
Dremel with small sander attachment or a file set to sand the inside of your peg board holes. ( DO THIS STEP LAST)
-
Tools: Electric screwdriver, Dremel, Nail Gun, small air compressor, Miter saw, Sander, 3’level, stud finder, and a super hunky husband helps too!
-
We also framed our mirror using a solid pine casing 2” c 1/4” x 8’
Let’s get started!

Once you have your plywood cut (we had ours cut in store) it’s time to decide where the holes for your pegs will go.
I’ve read some blog post where they purchased a pegboard as a guide to mark their holes. To save money, we made our own grid using string, tape and a pencil to mark where each hole would be drilled. It worked like a charm!
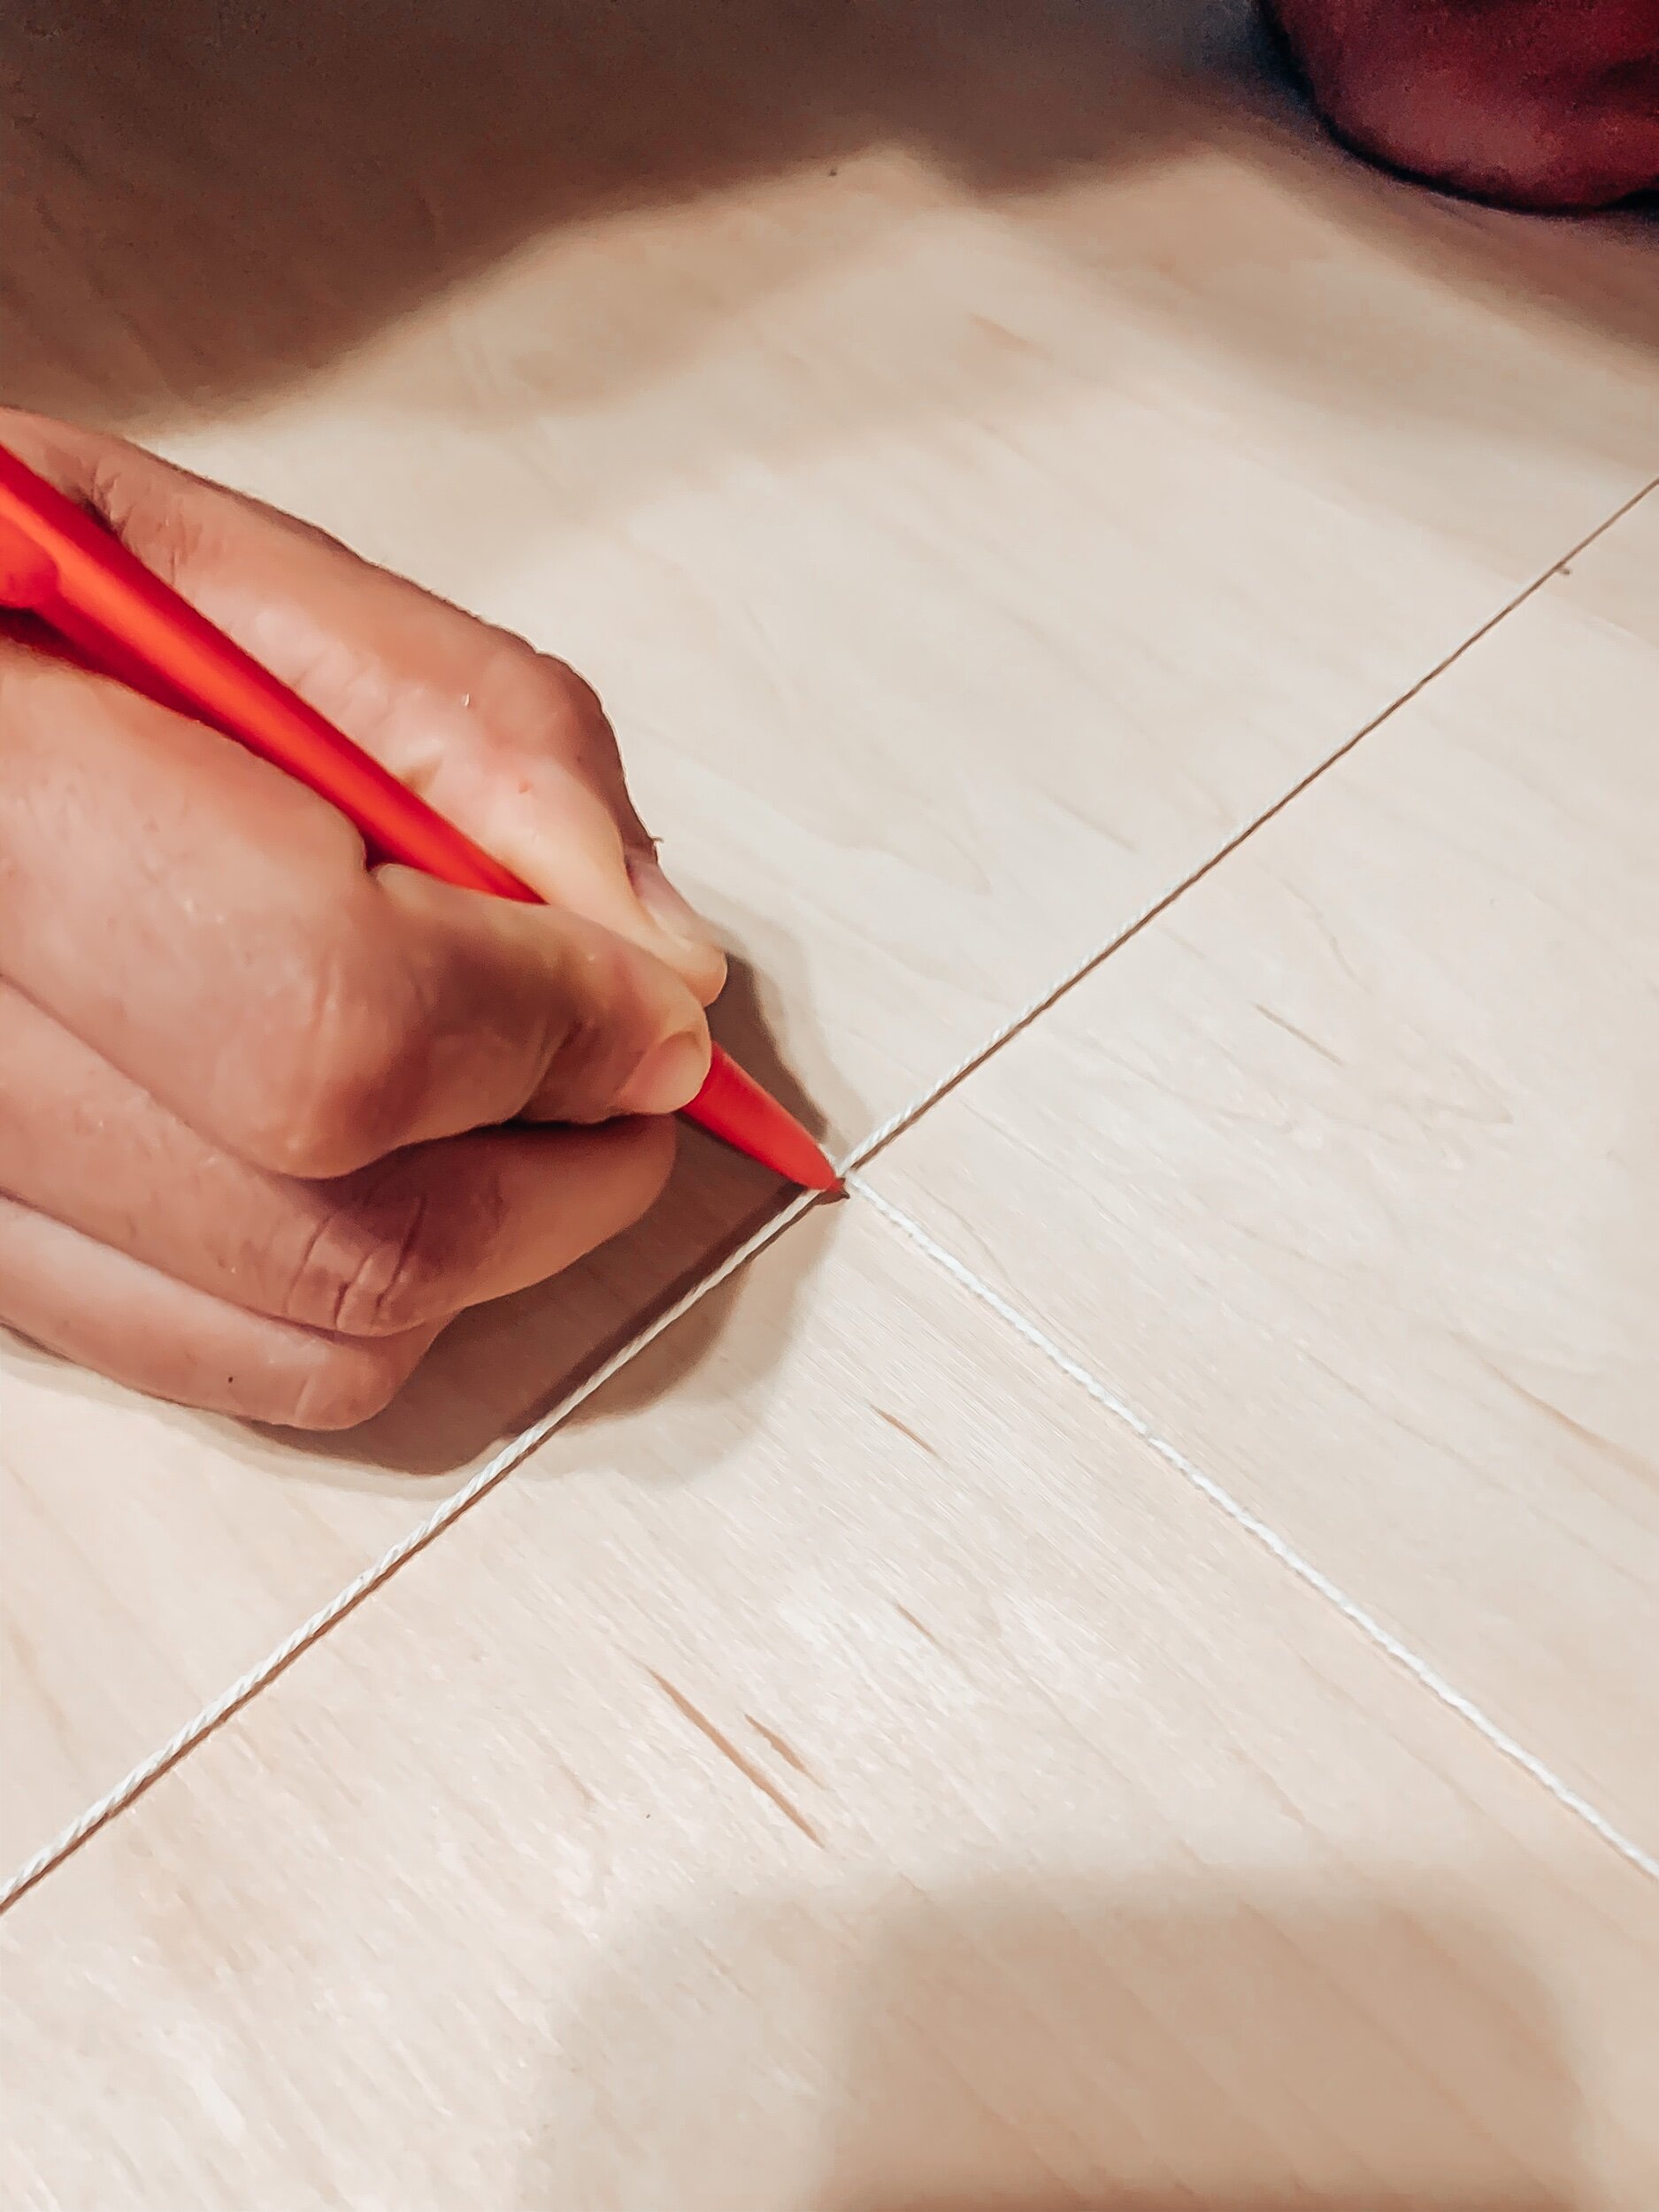
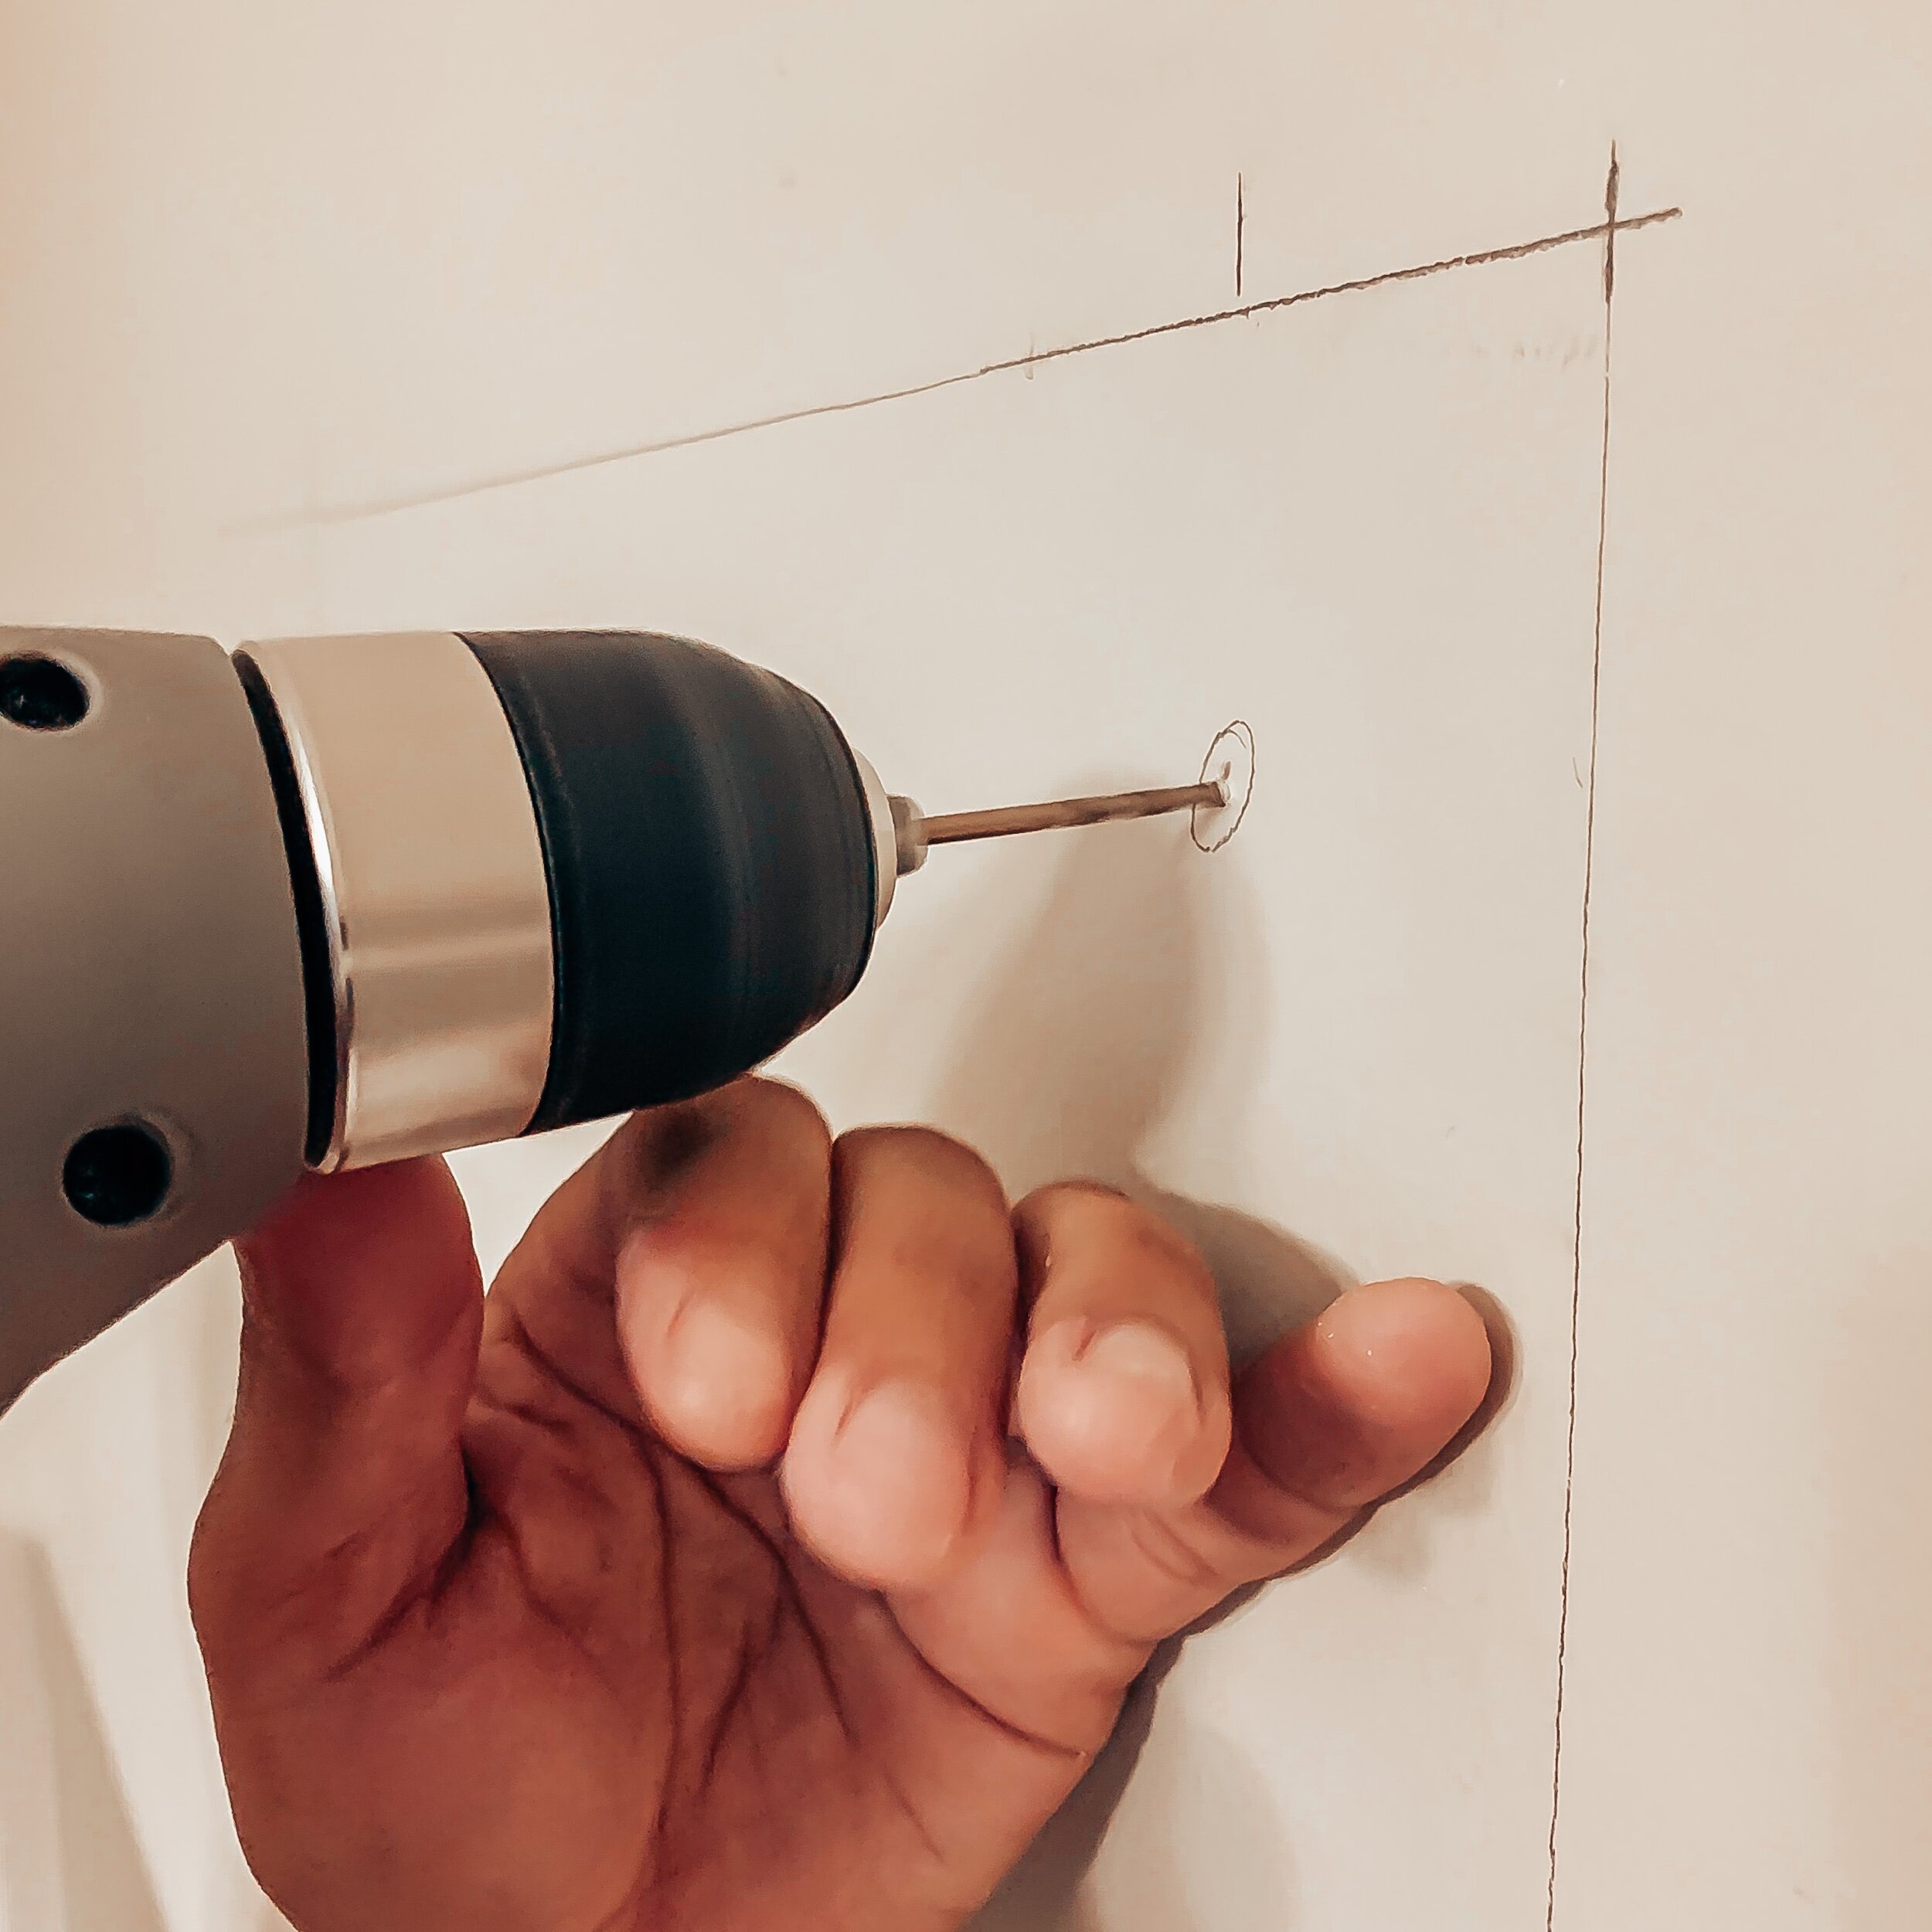
To create the grid, make a small mark every six inches, on all four sides of your plywood.
Then, use those marks as a guide. Take a piece of string that can fit across the entire board and have room to tape it to the back as well.
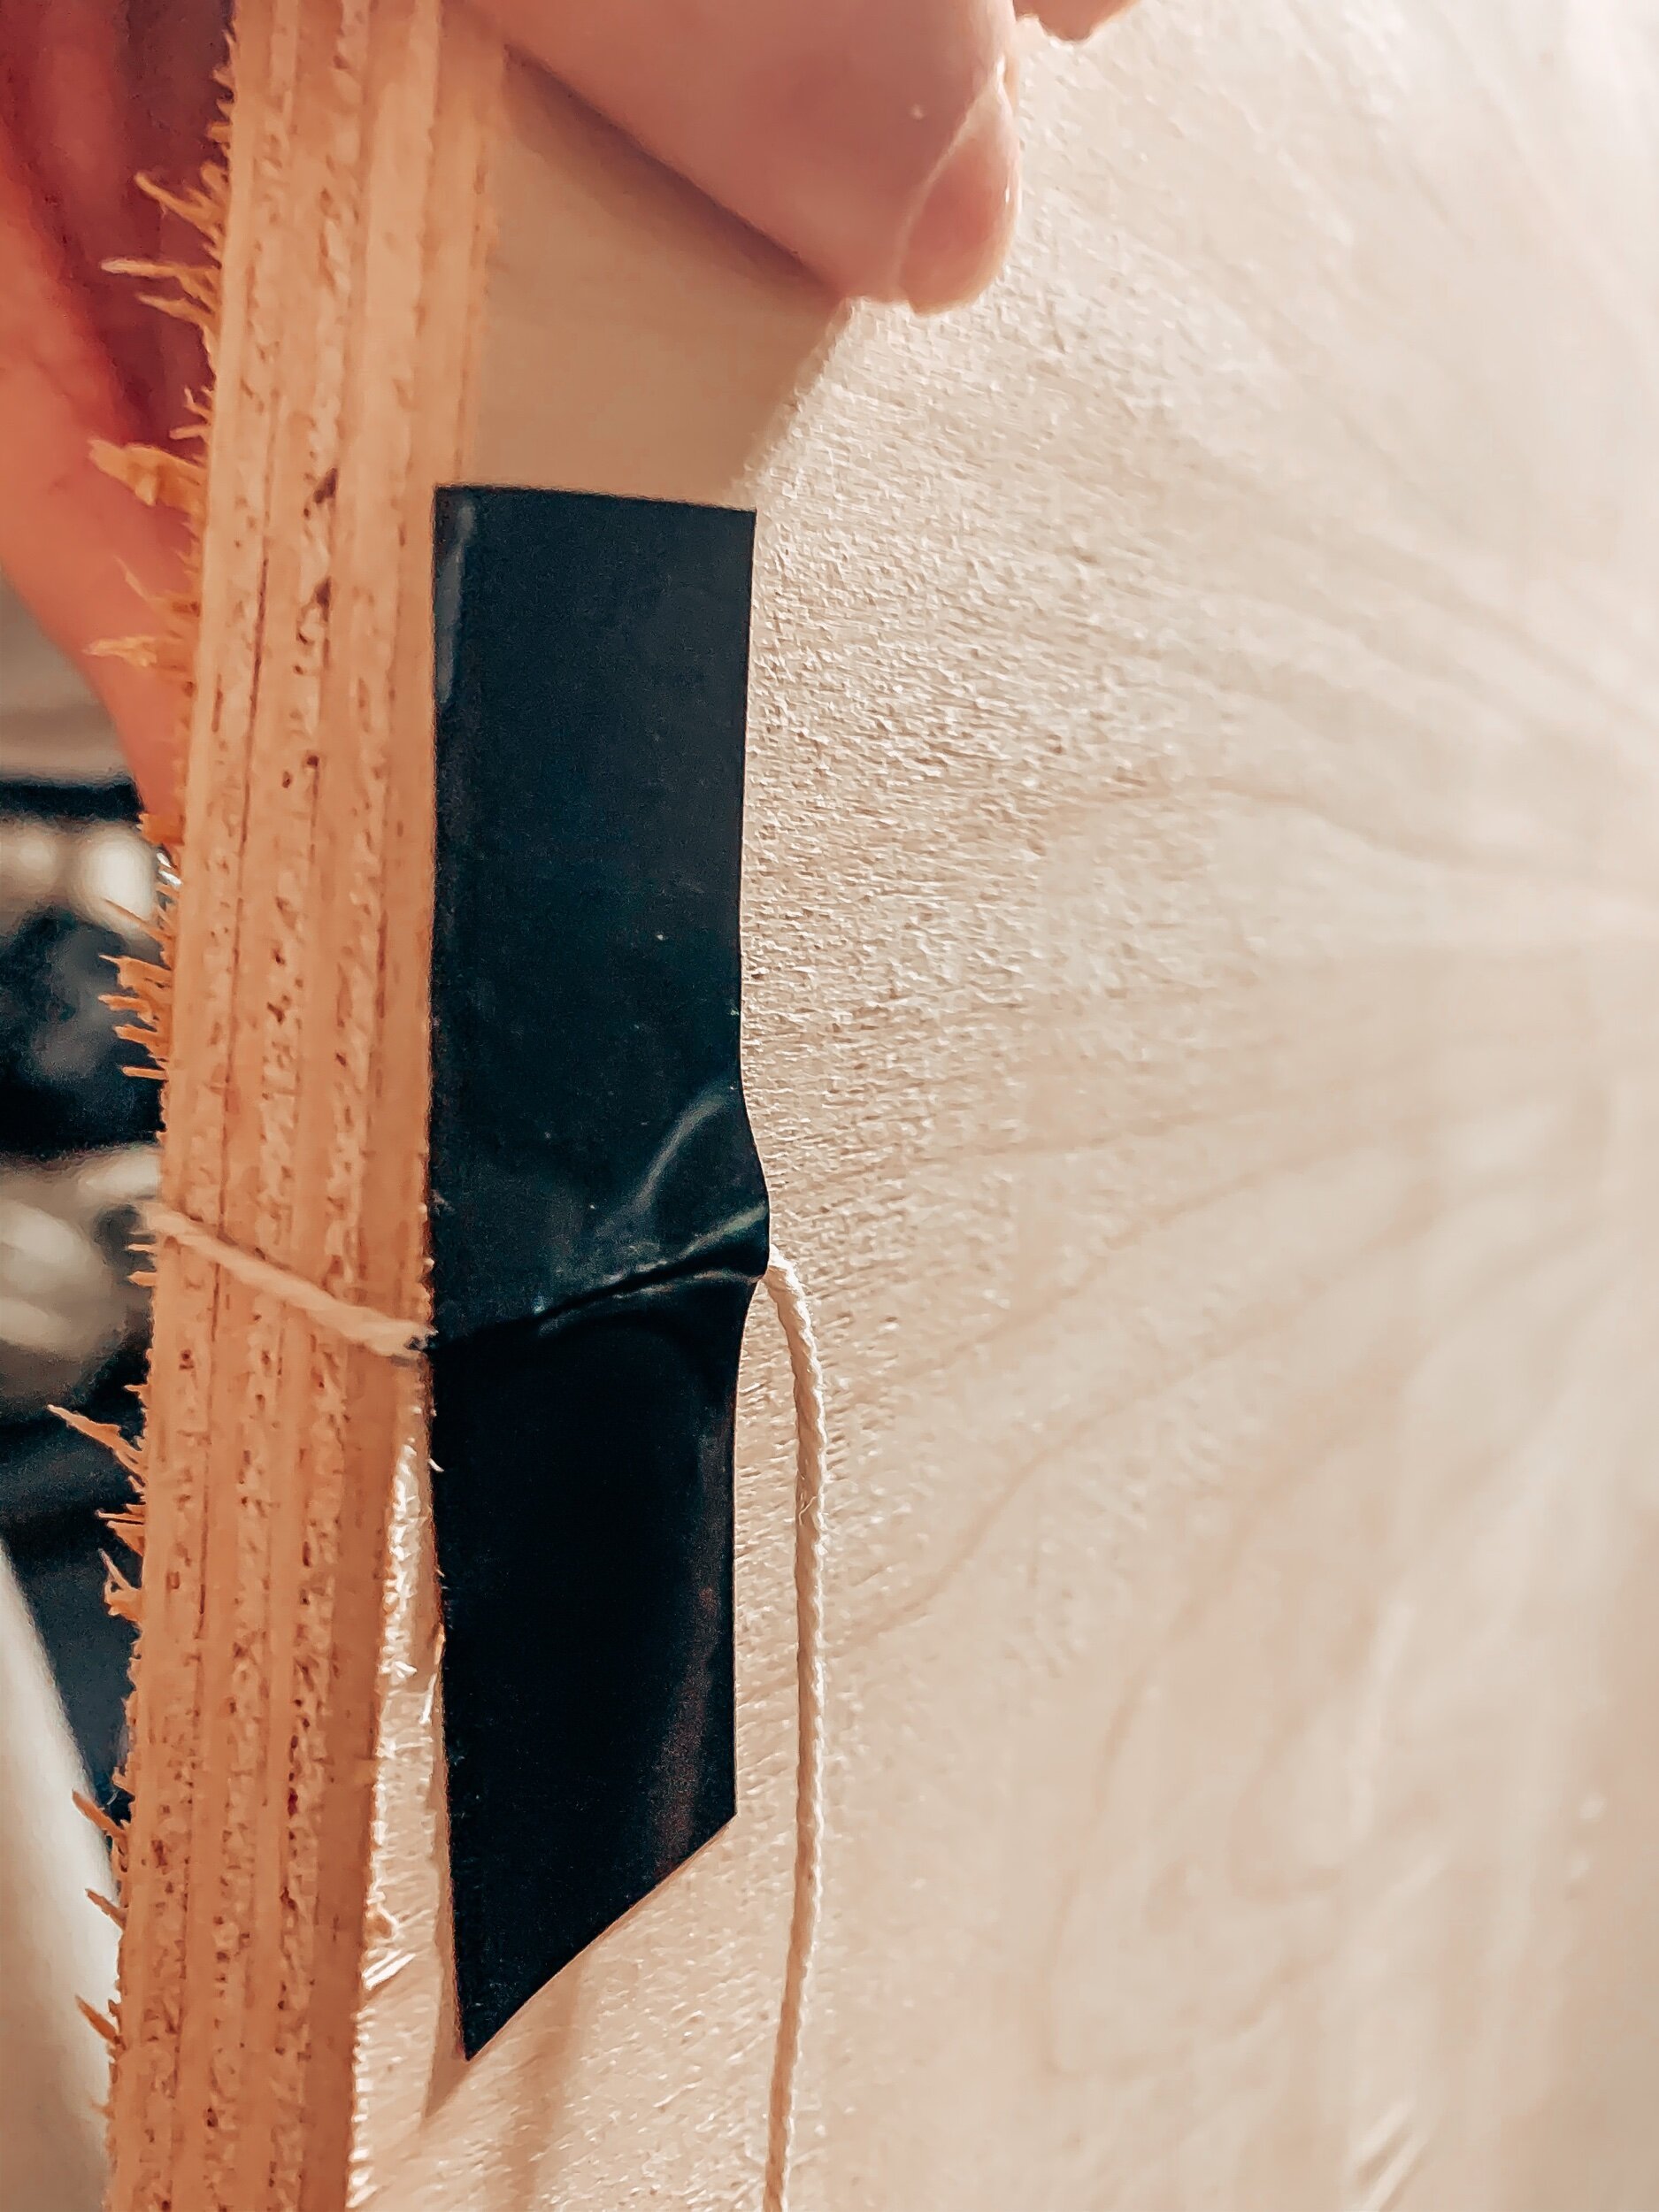
Once you have a string attached from top to bottom, hold (if you have help) or attach the second string from side to side. Make a small dot where the two strings cross (seen below).
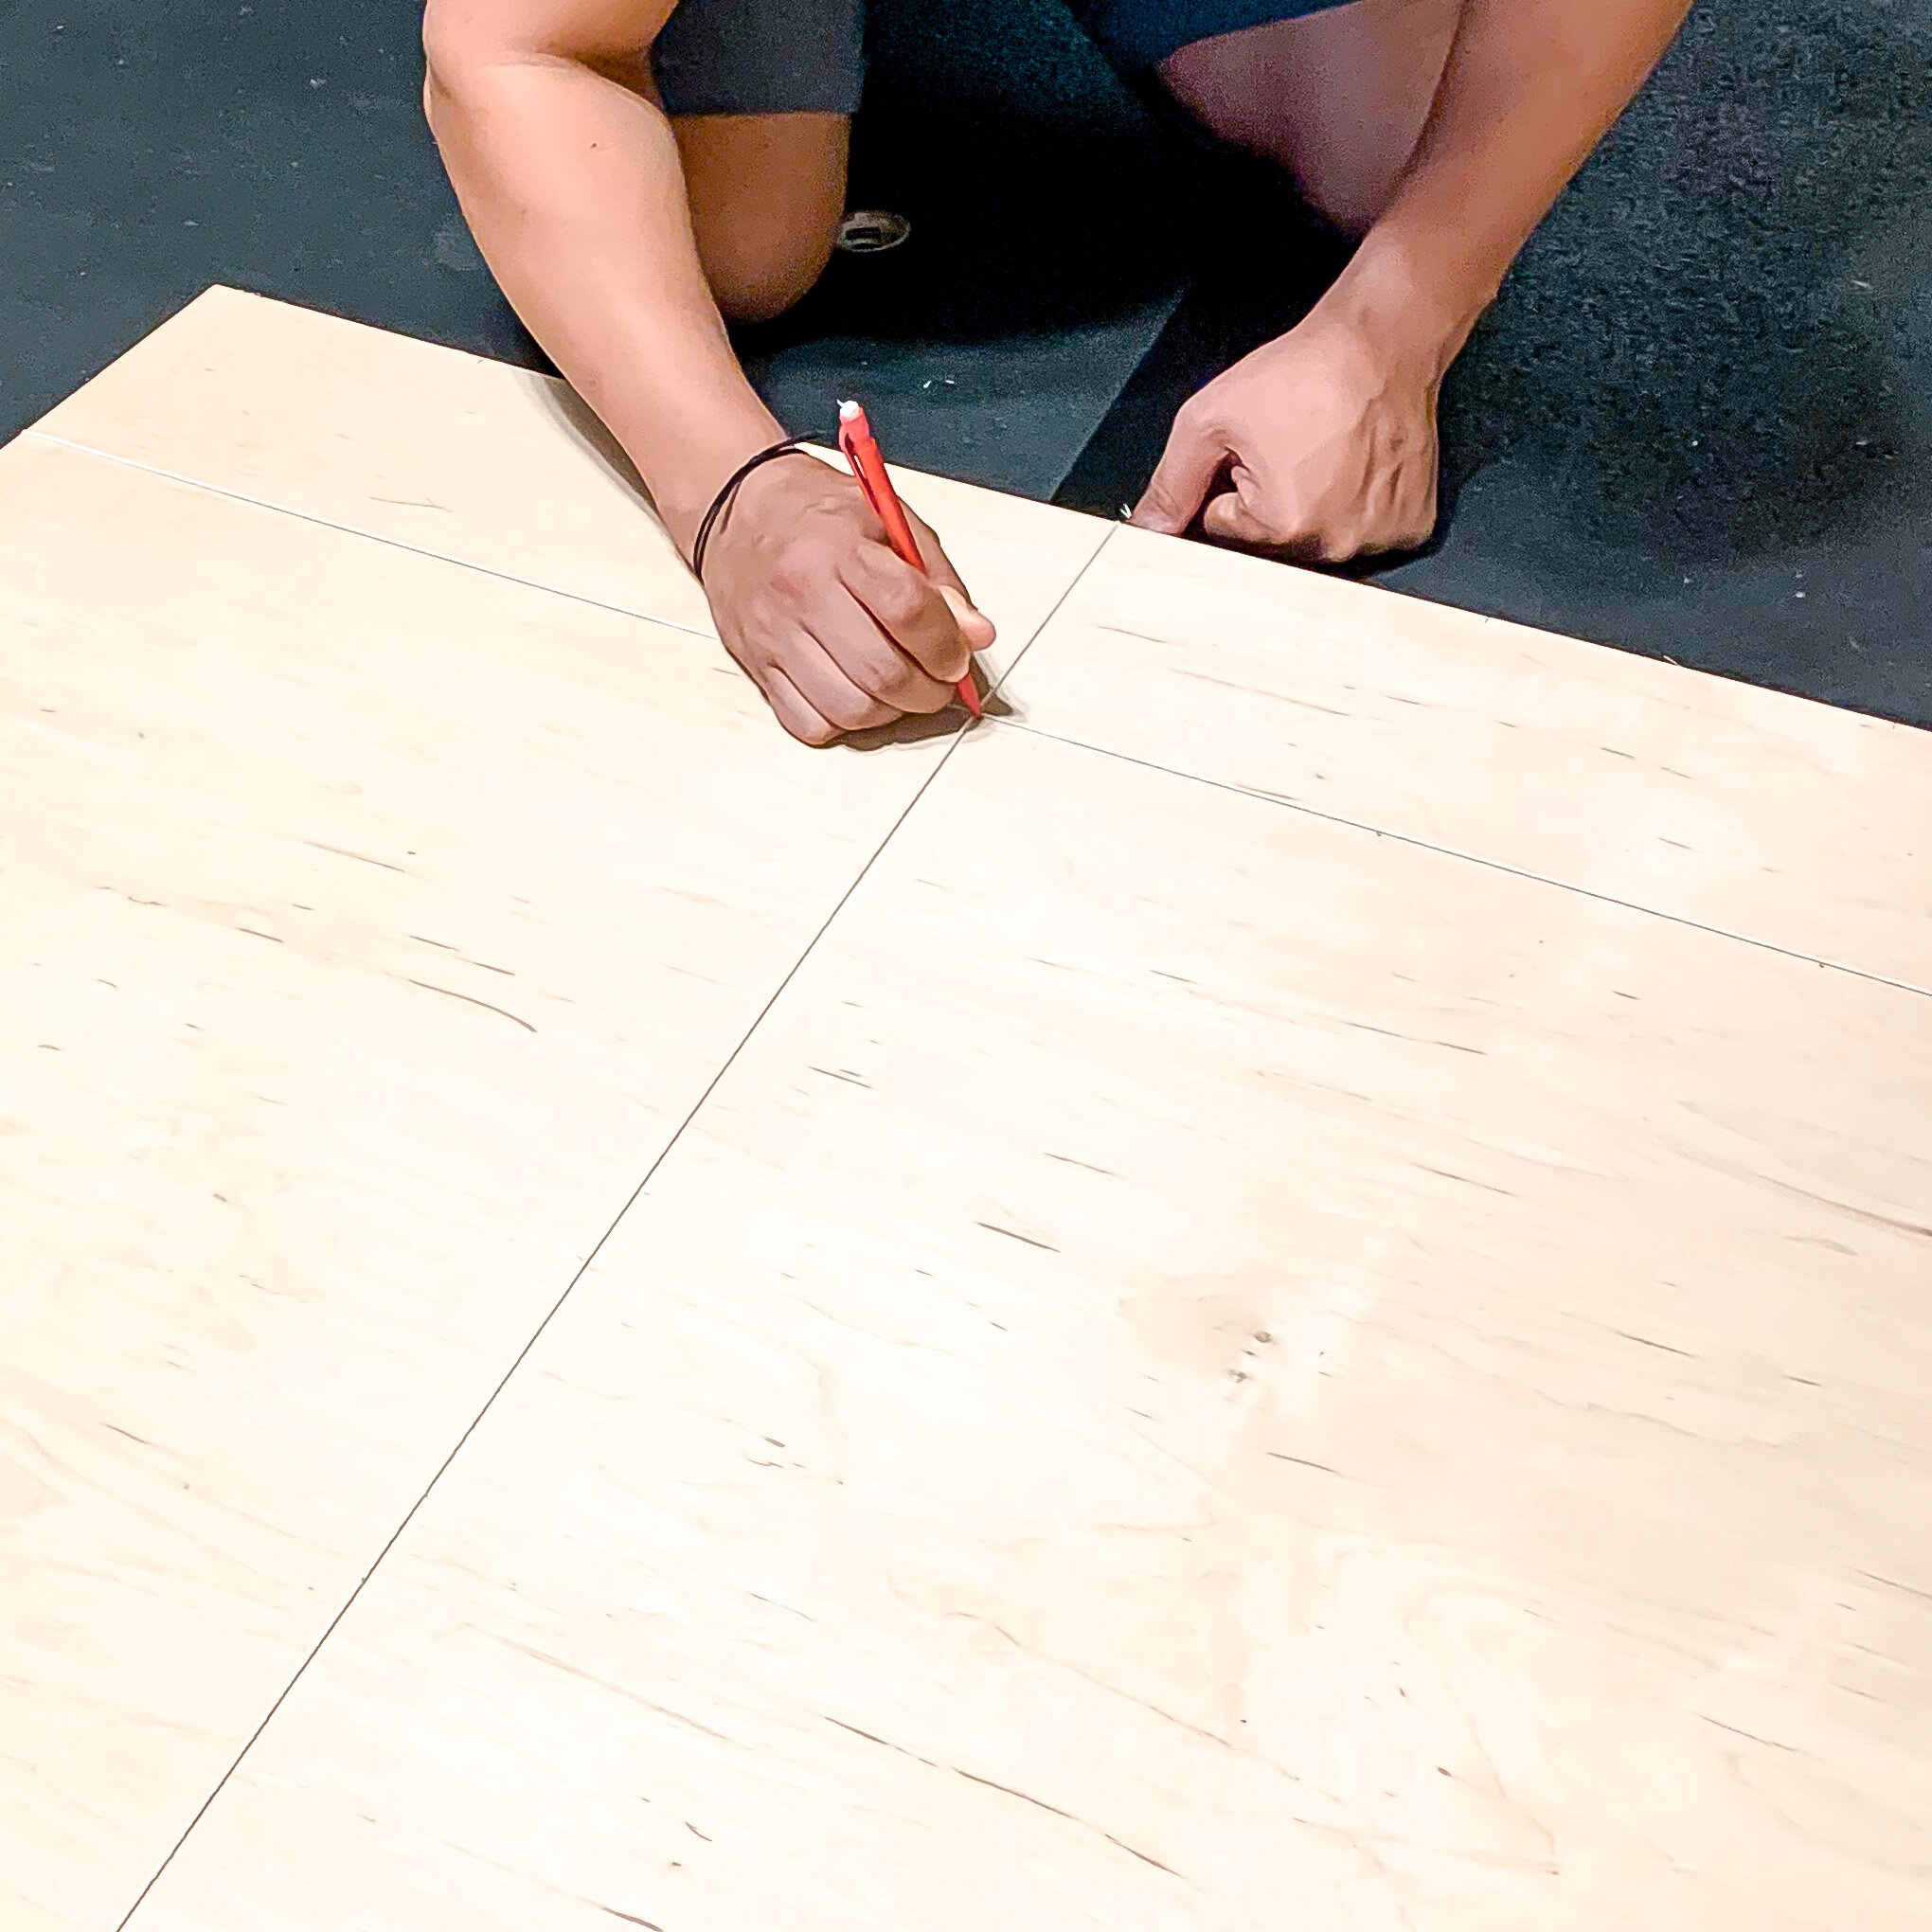
The key is to make your mark on the same side of the string each time.
Once all of your marks are made, it’s time to drill your holes.
The guide is meant to ensure your drill maintains a 90° angle. If your screwdriver is not held level when you are drilling the hole, then your pegs will not fit correctly, which means the shelves will not hold properly.
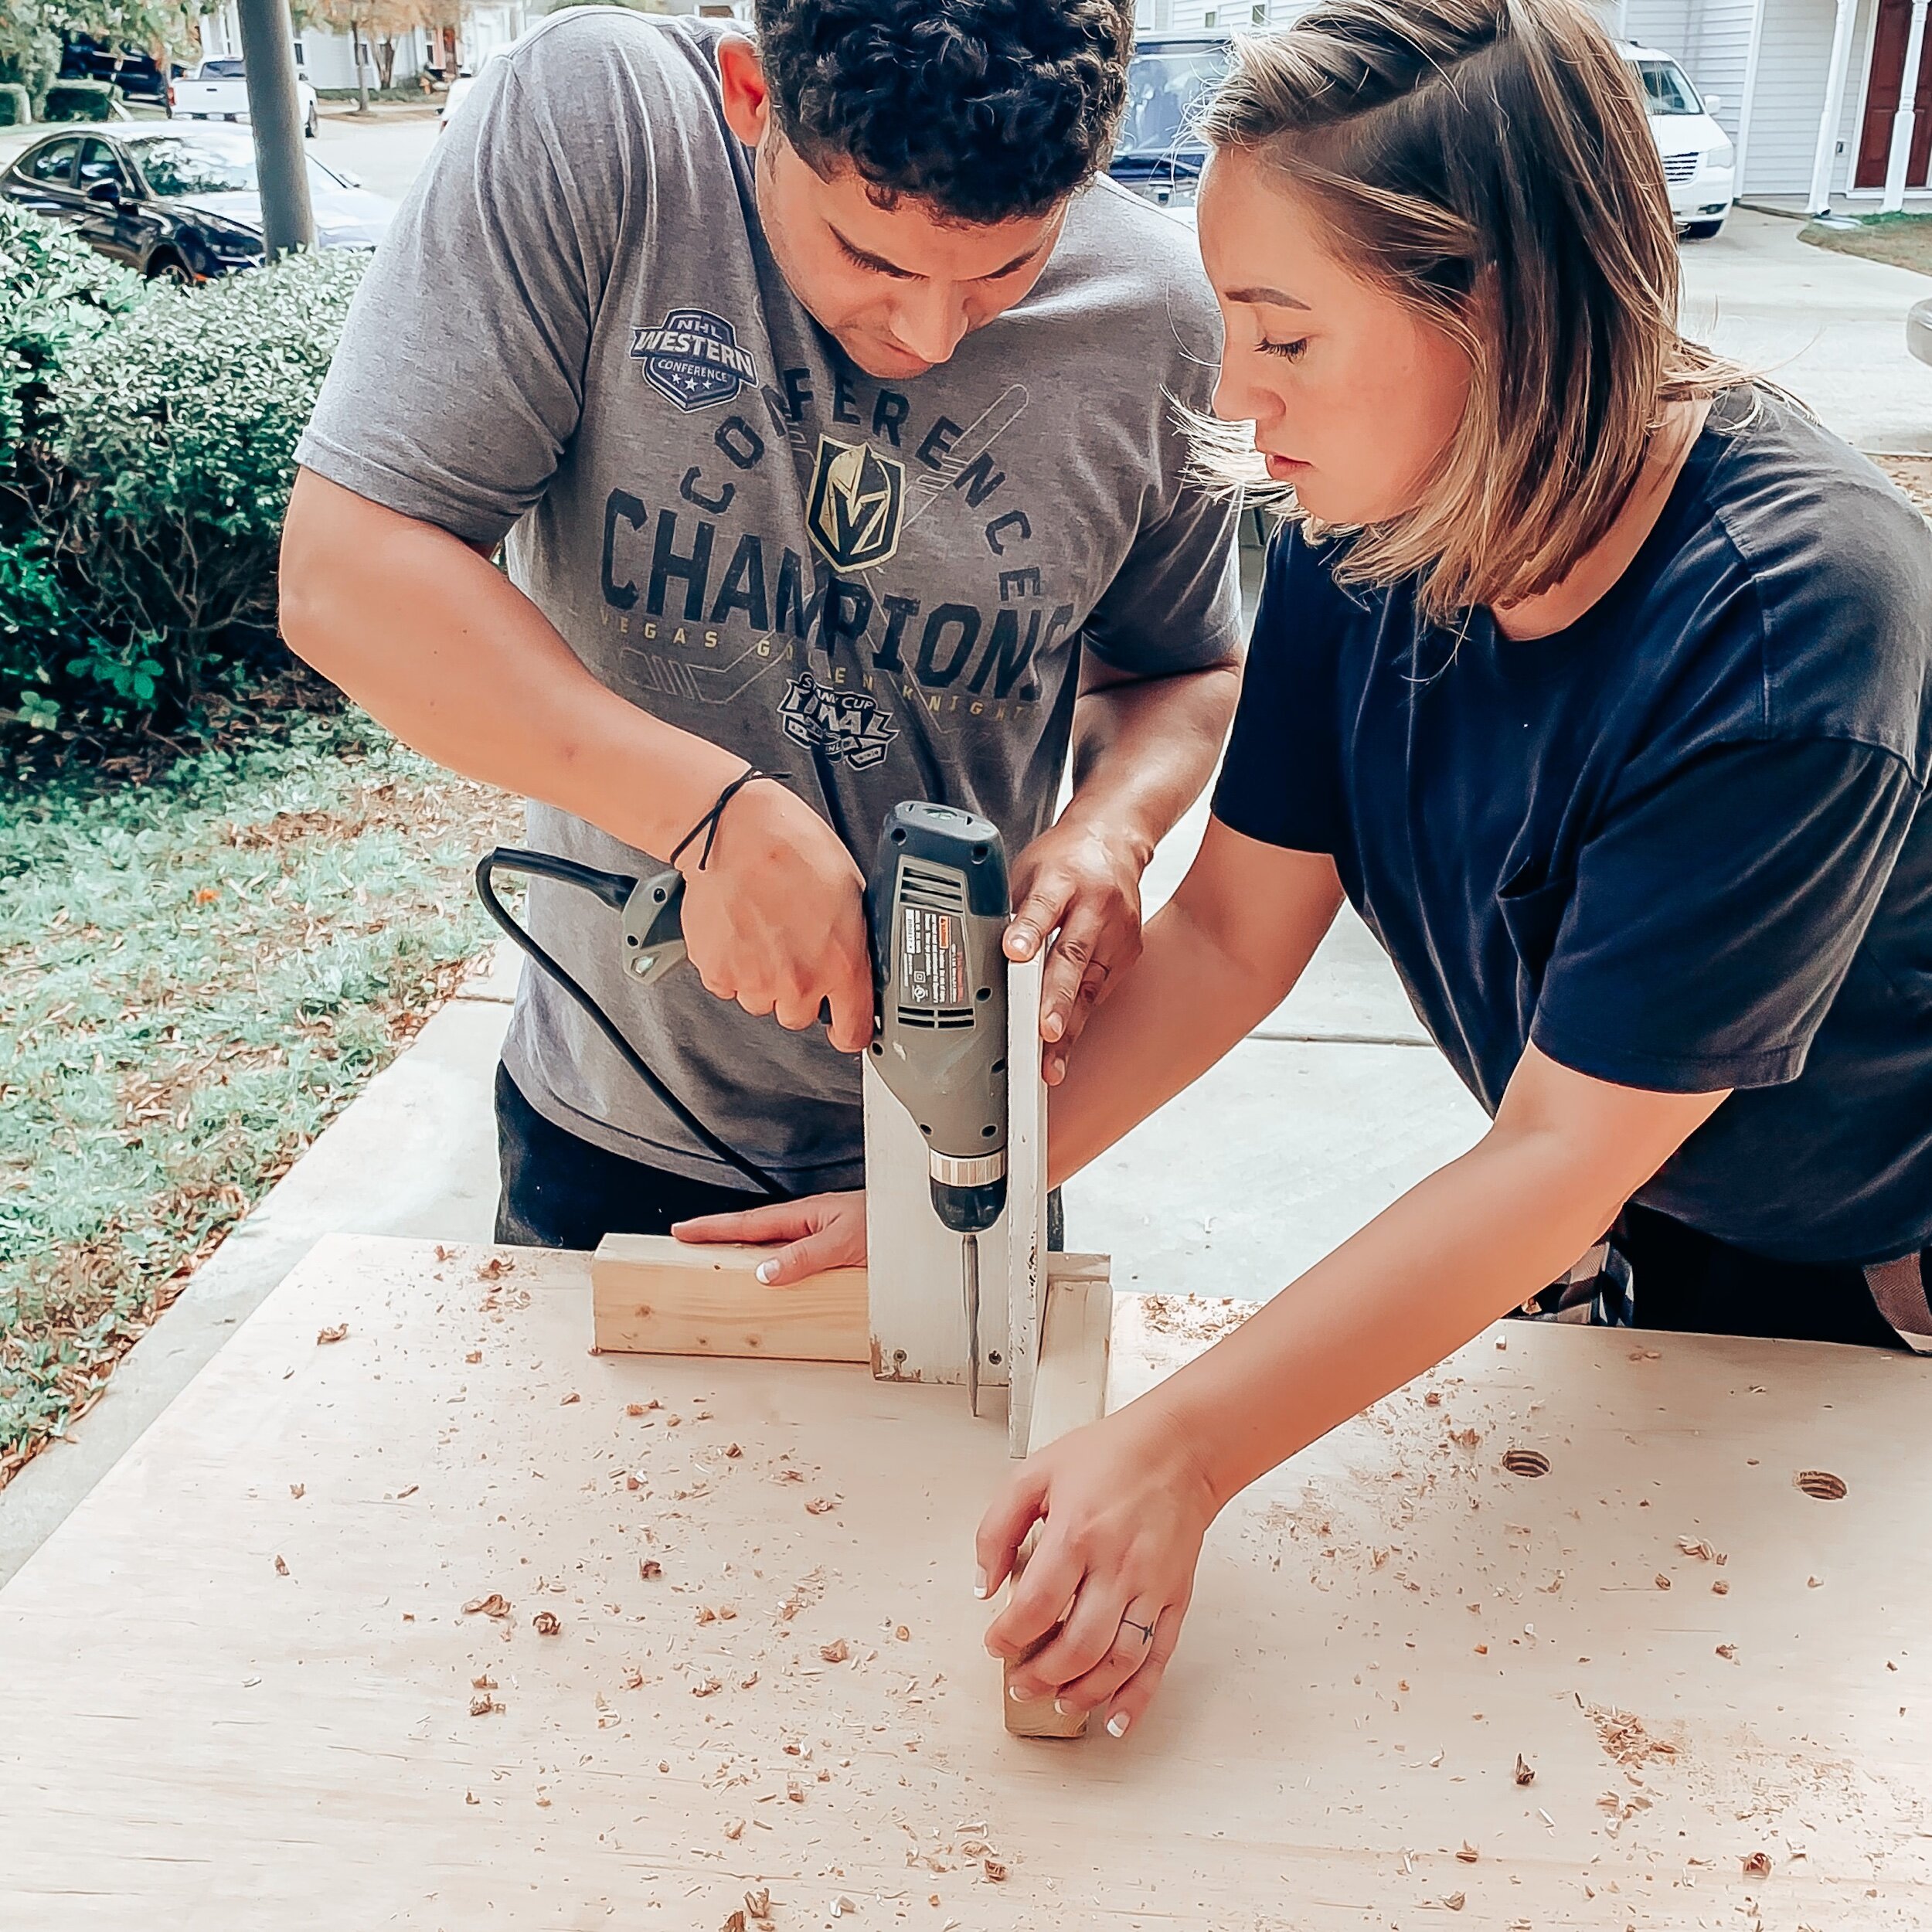
We created a wooden guide out of some scrap wood we already had. This was also another recommendation I read on Pinterest, and seemed to help. Maintain firm pressure and steady speed as you drill.

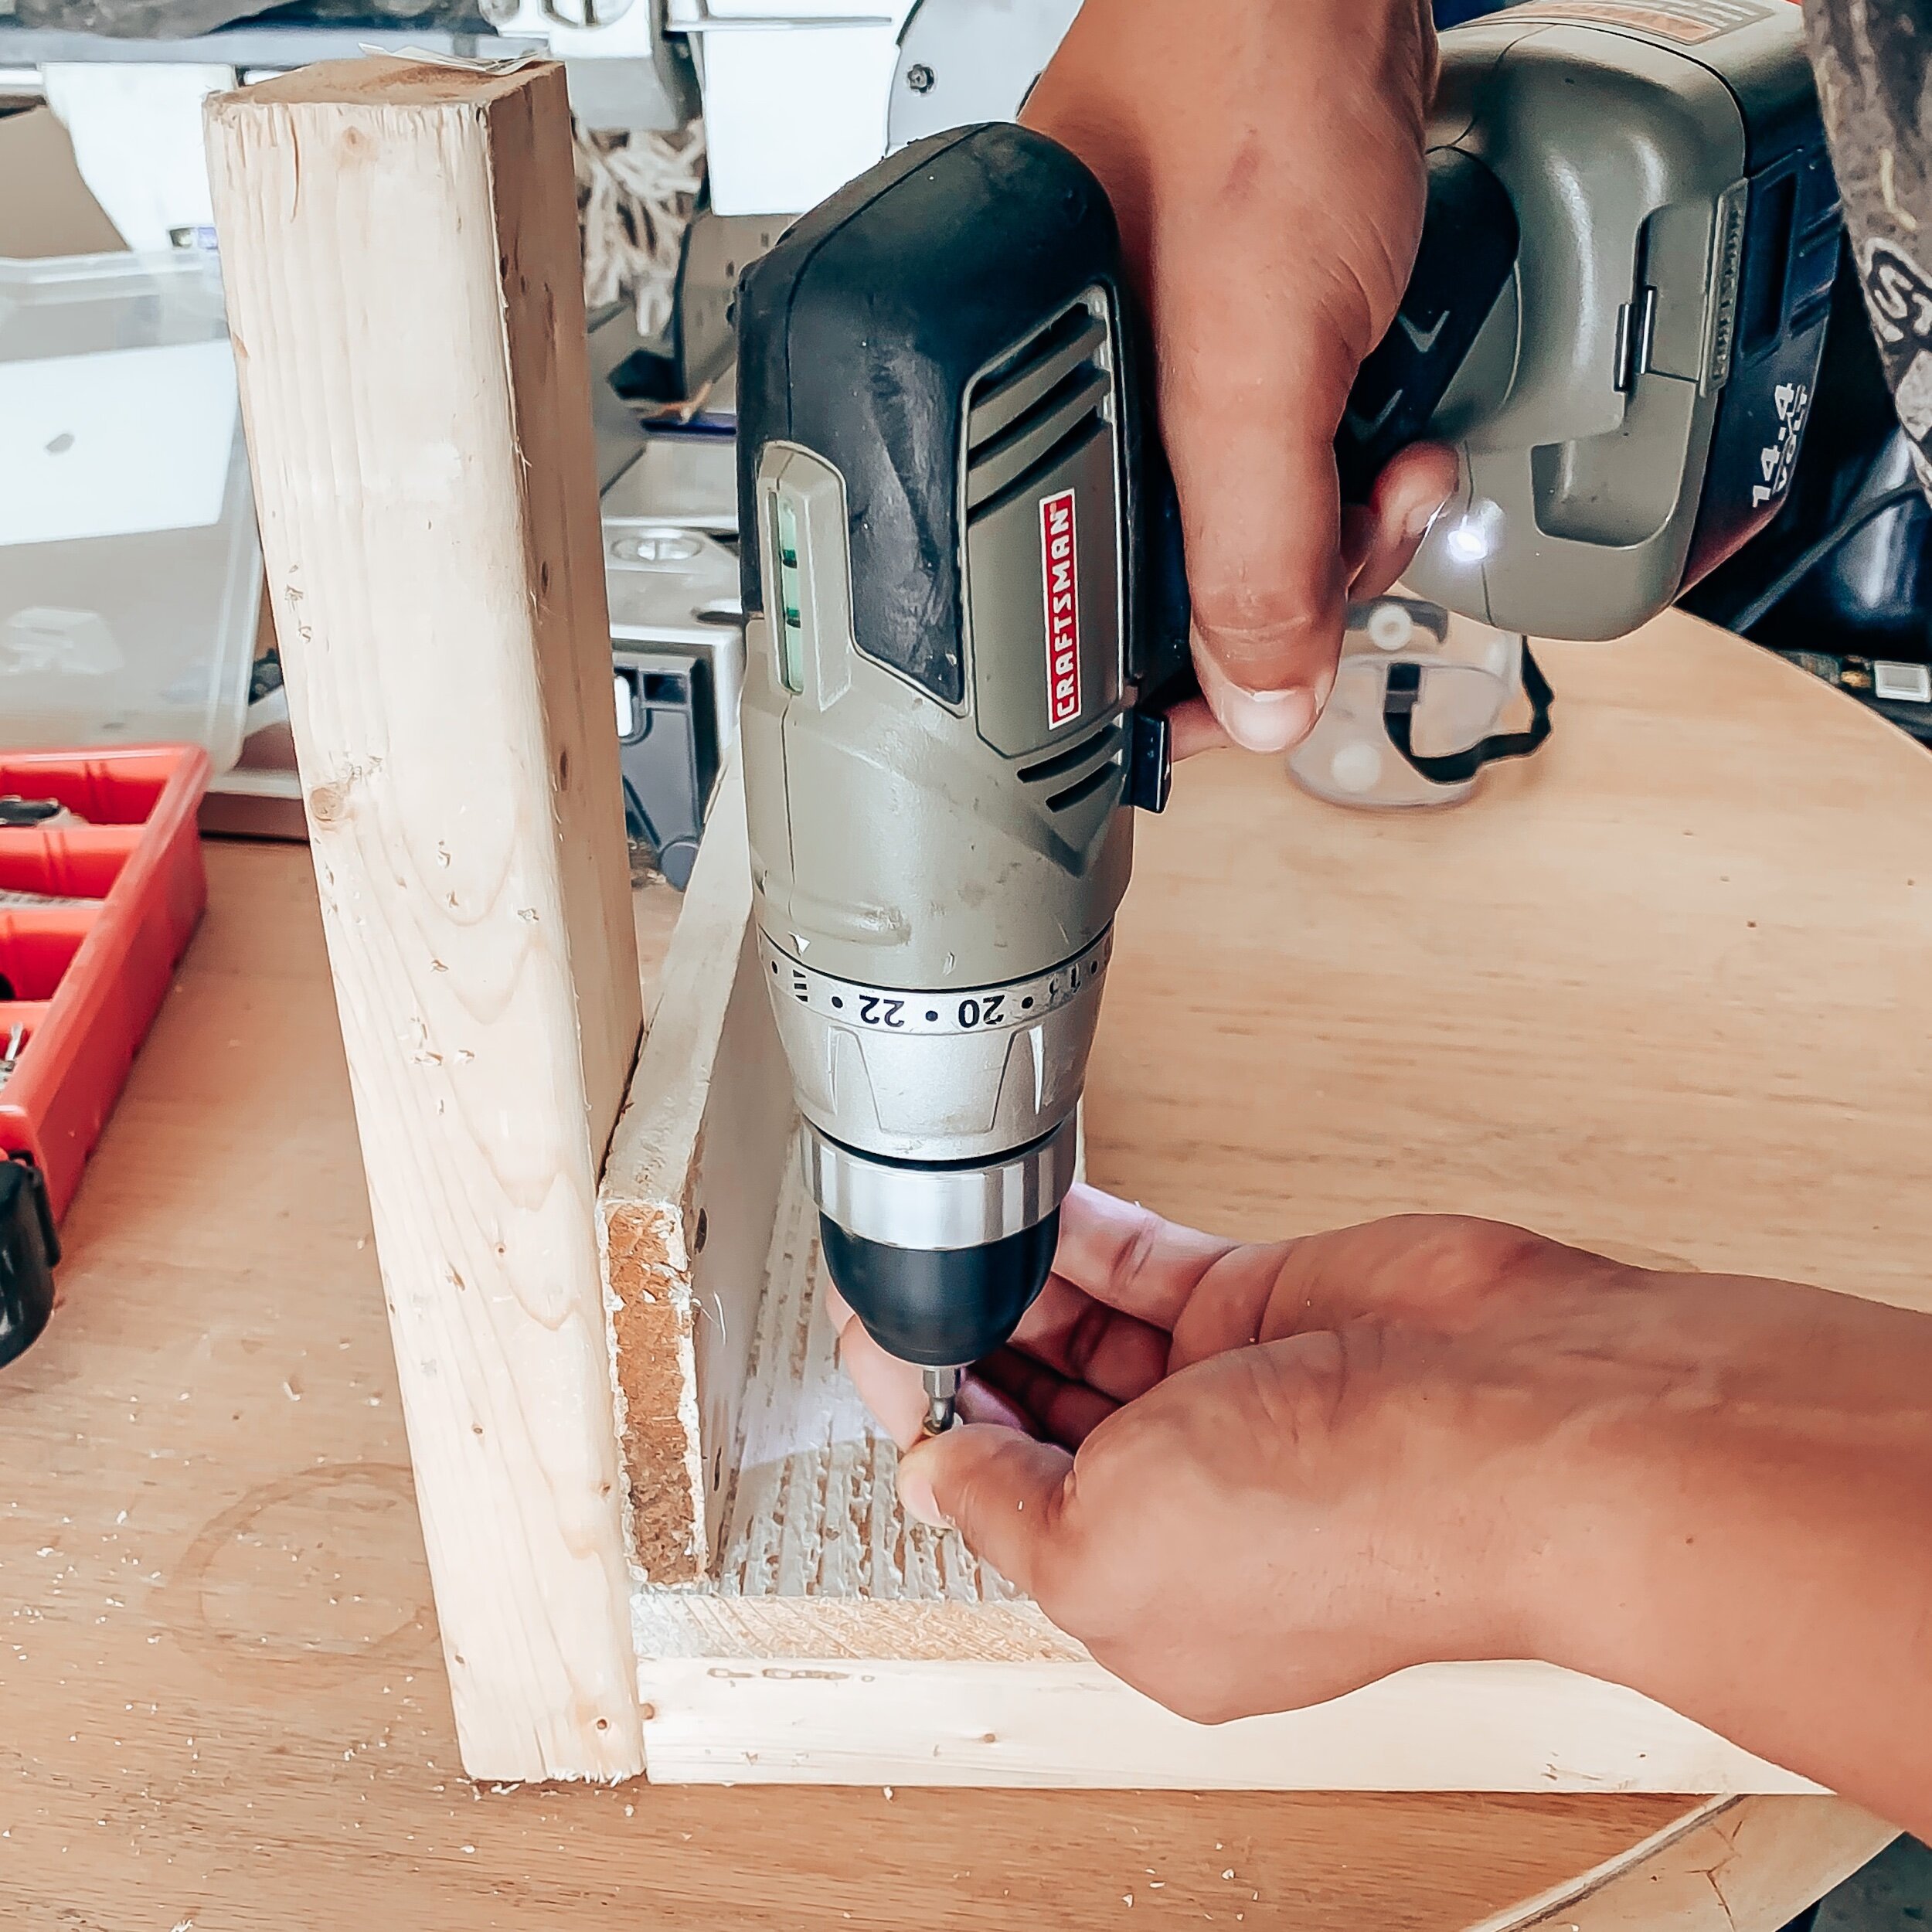
My advice…
First, choose the side of the board you want as the front. You will drill into that side.
Don’t do this portion alone! You’ll need an extra set of hands to hold the guide.
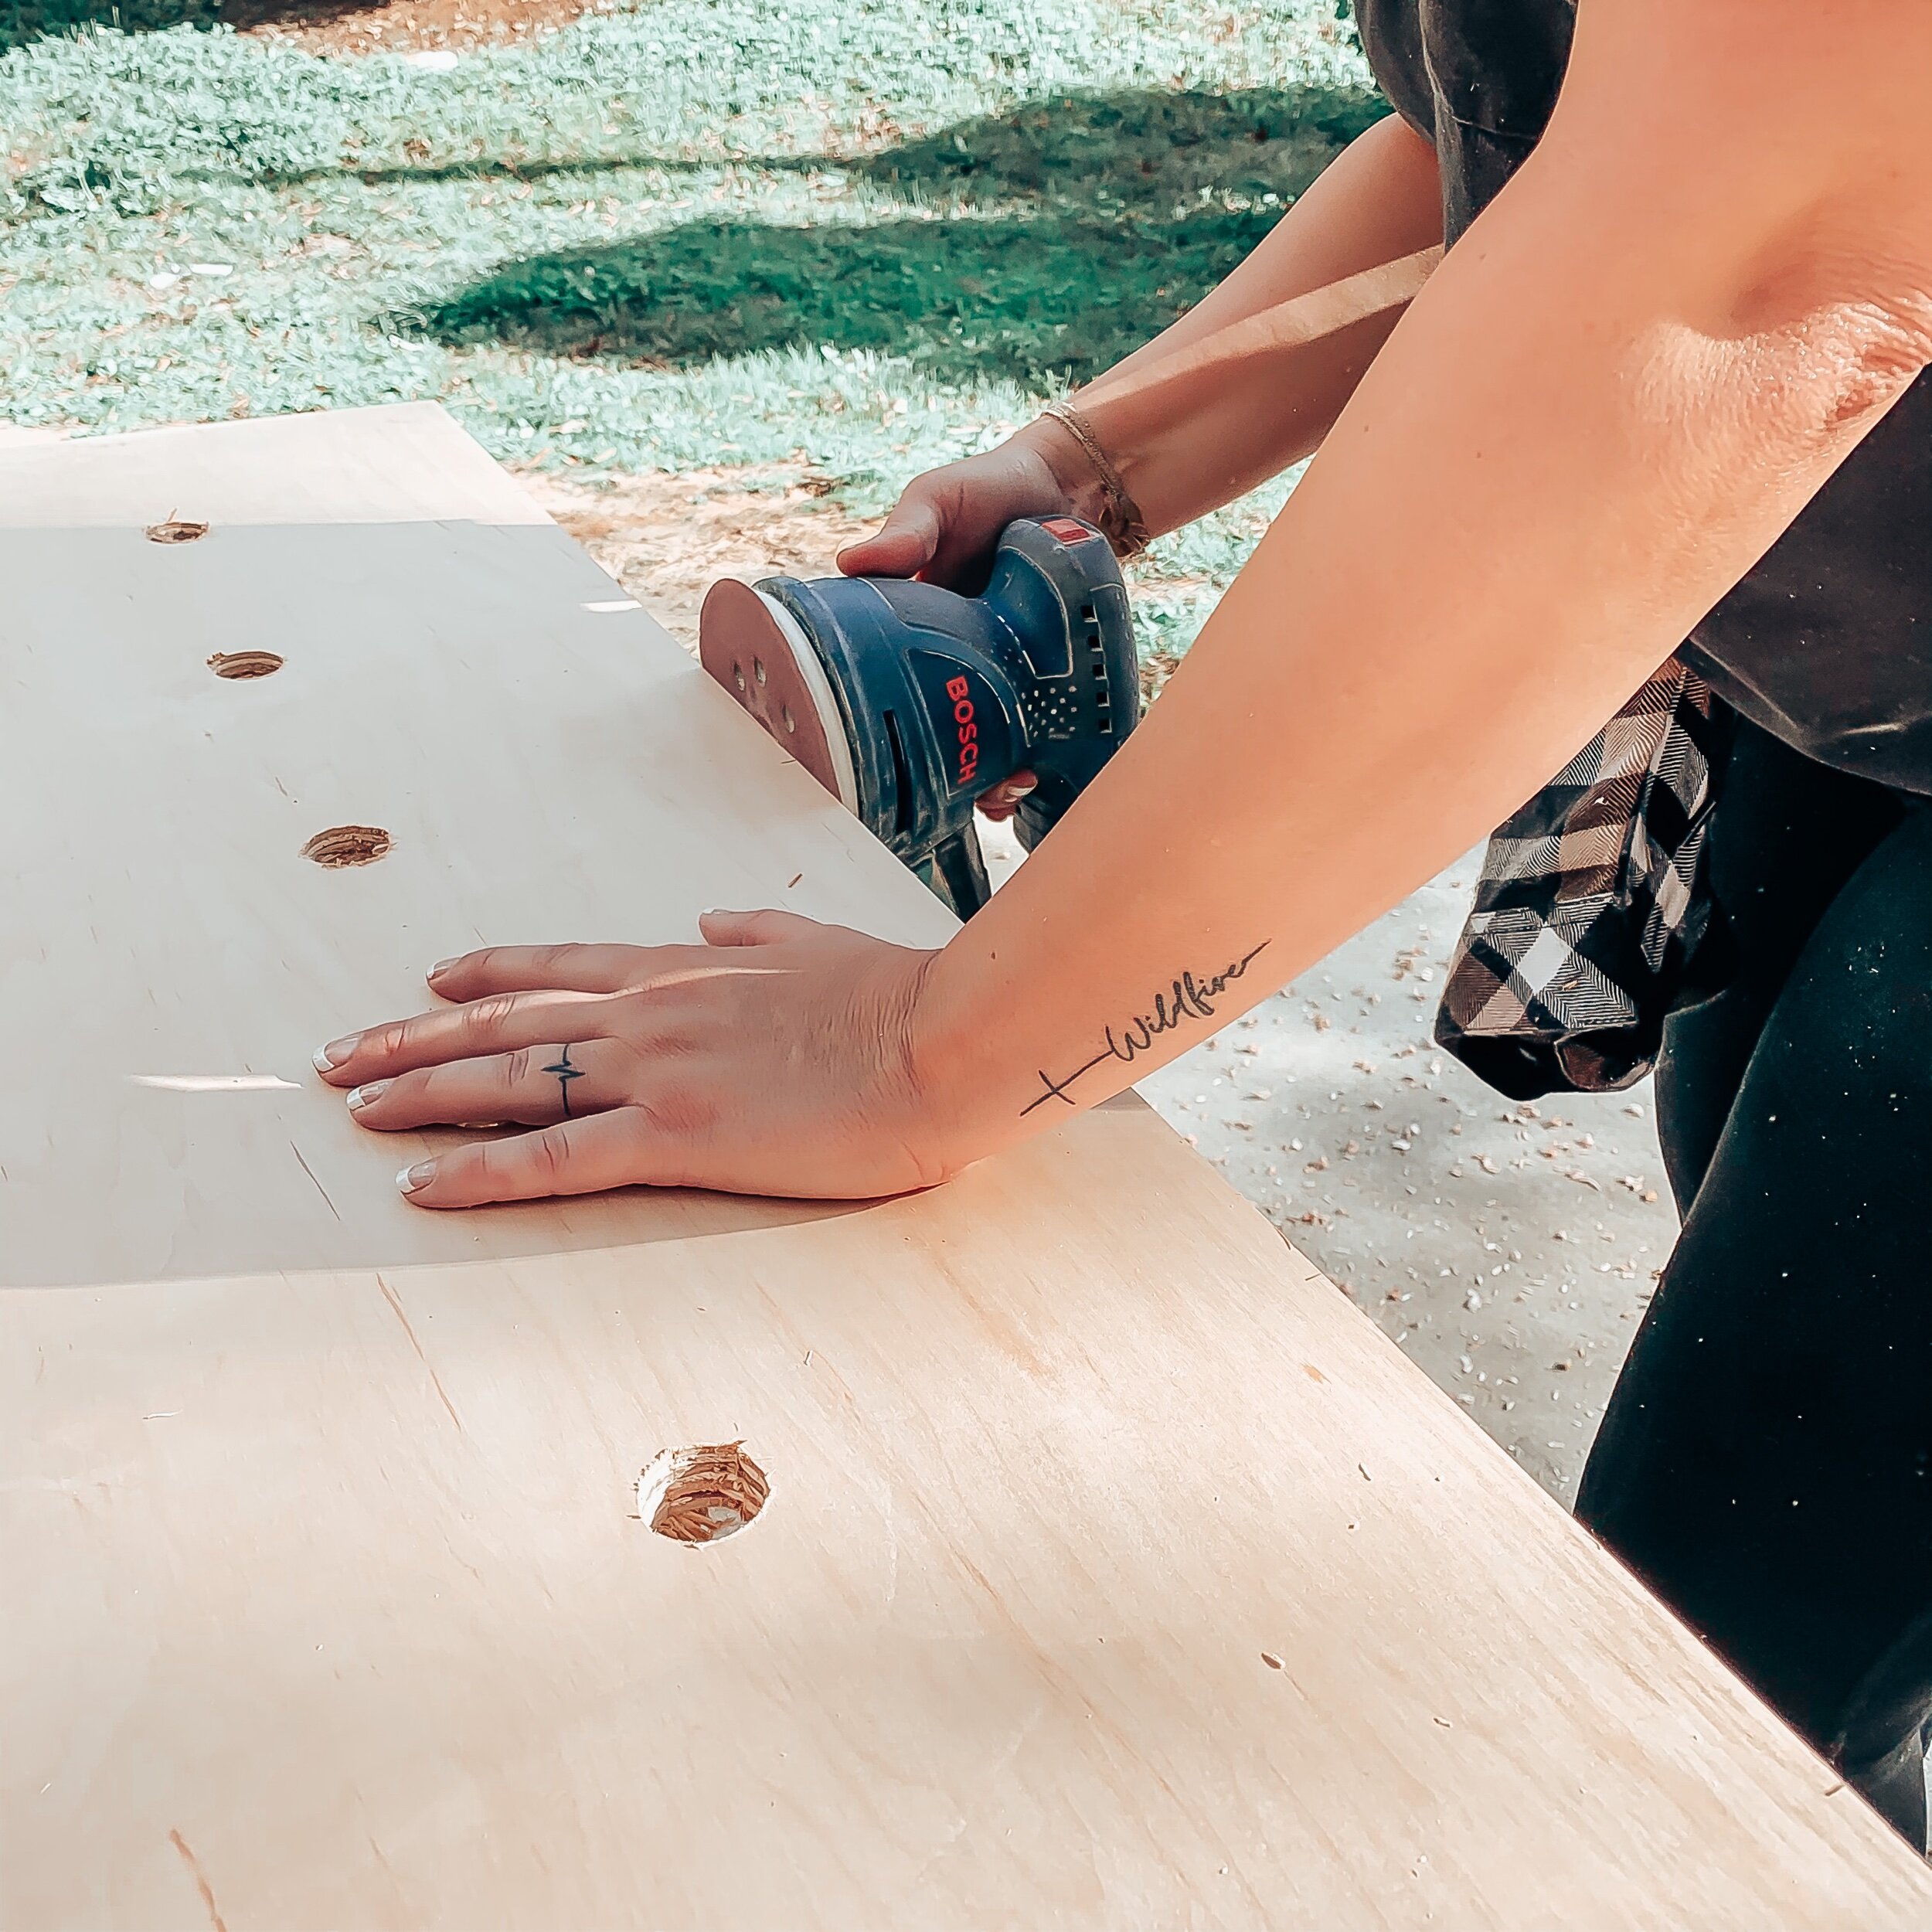
Also, less is more! Your holes will not be perfect! This freaked me out a bit so I started sanding (the inside of the holes) before I hung the board.
I highly suggest you lightly sand the top, back and sides of the board, but wait until it’s hung to touch up the inside of the holes. I found the easiest tool for this step is a dremel with a small sander attachment.
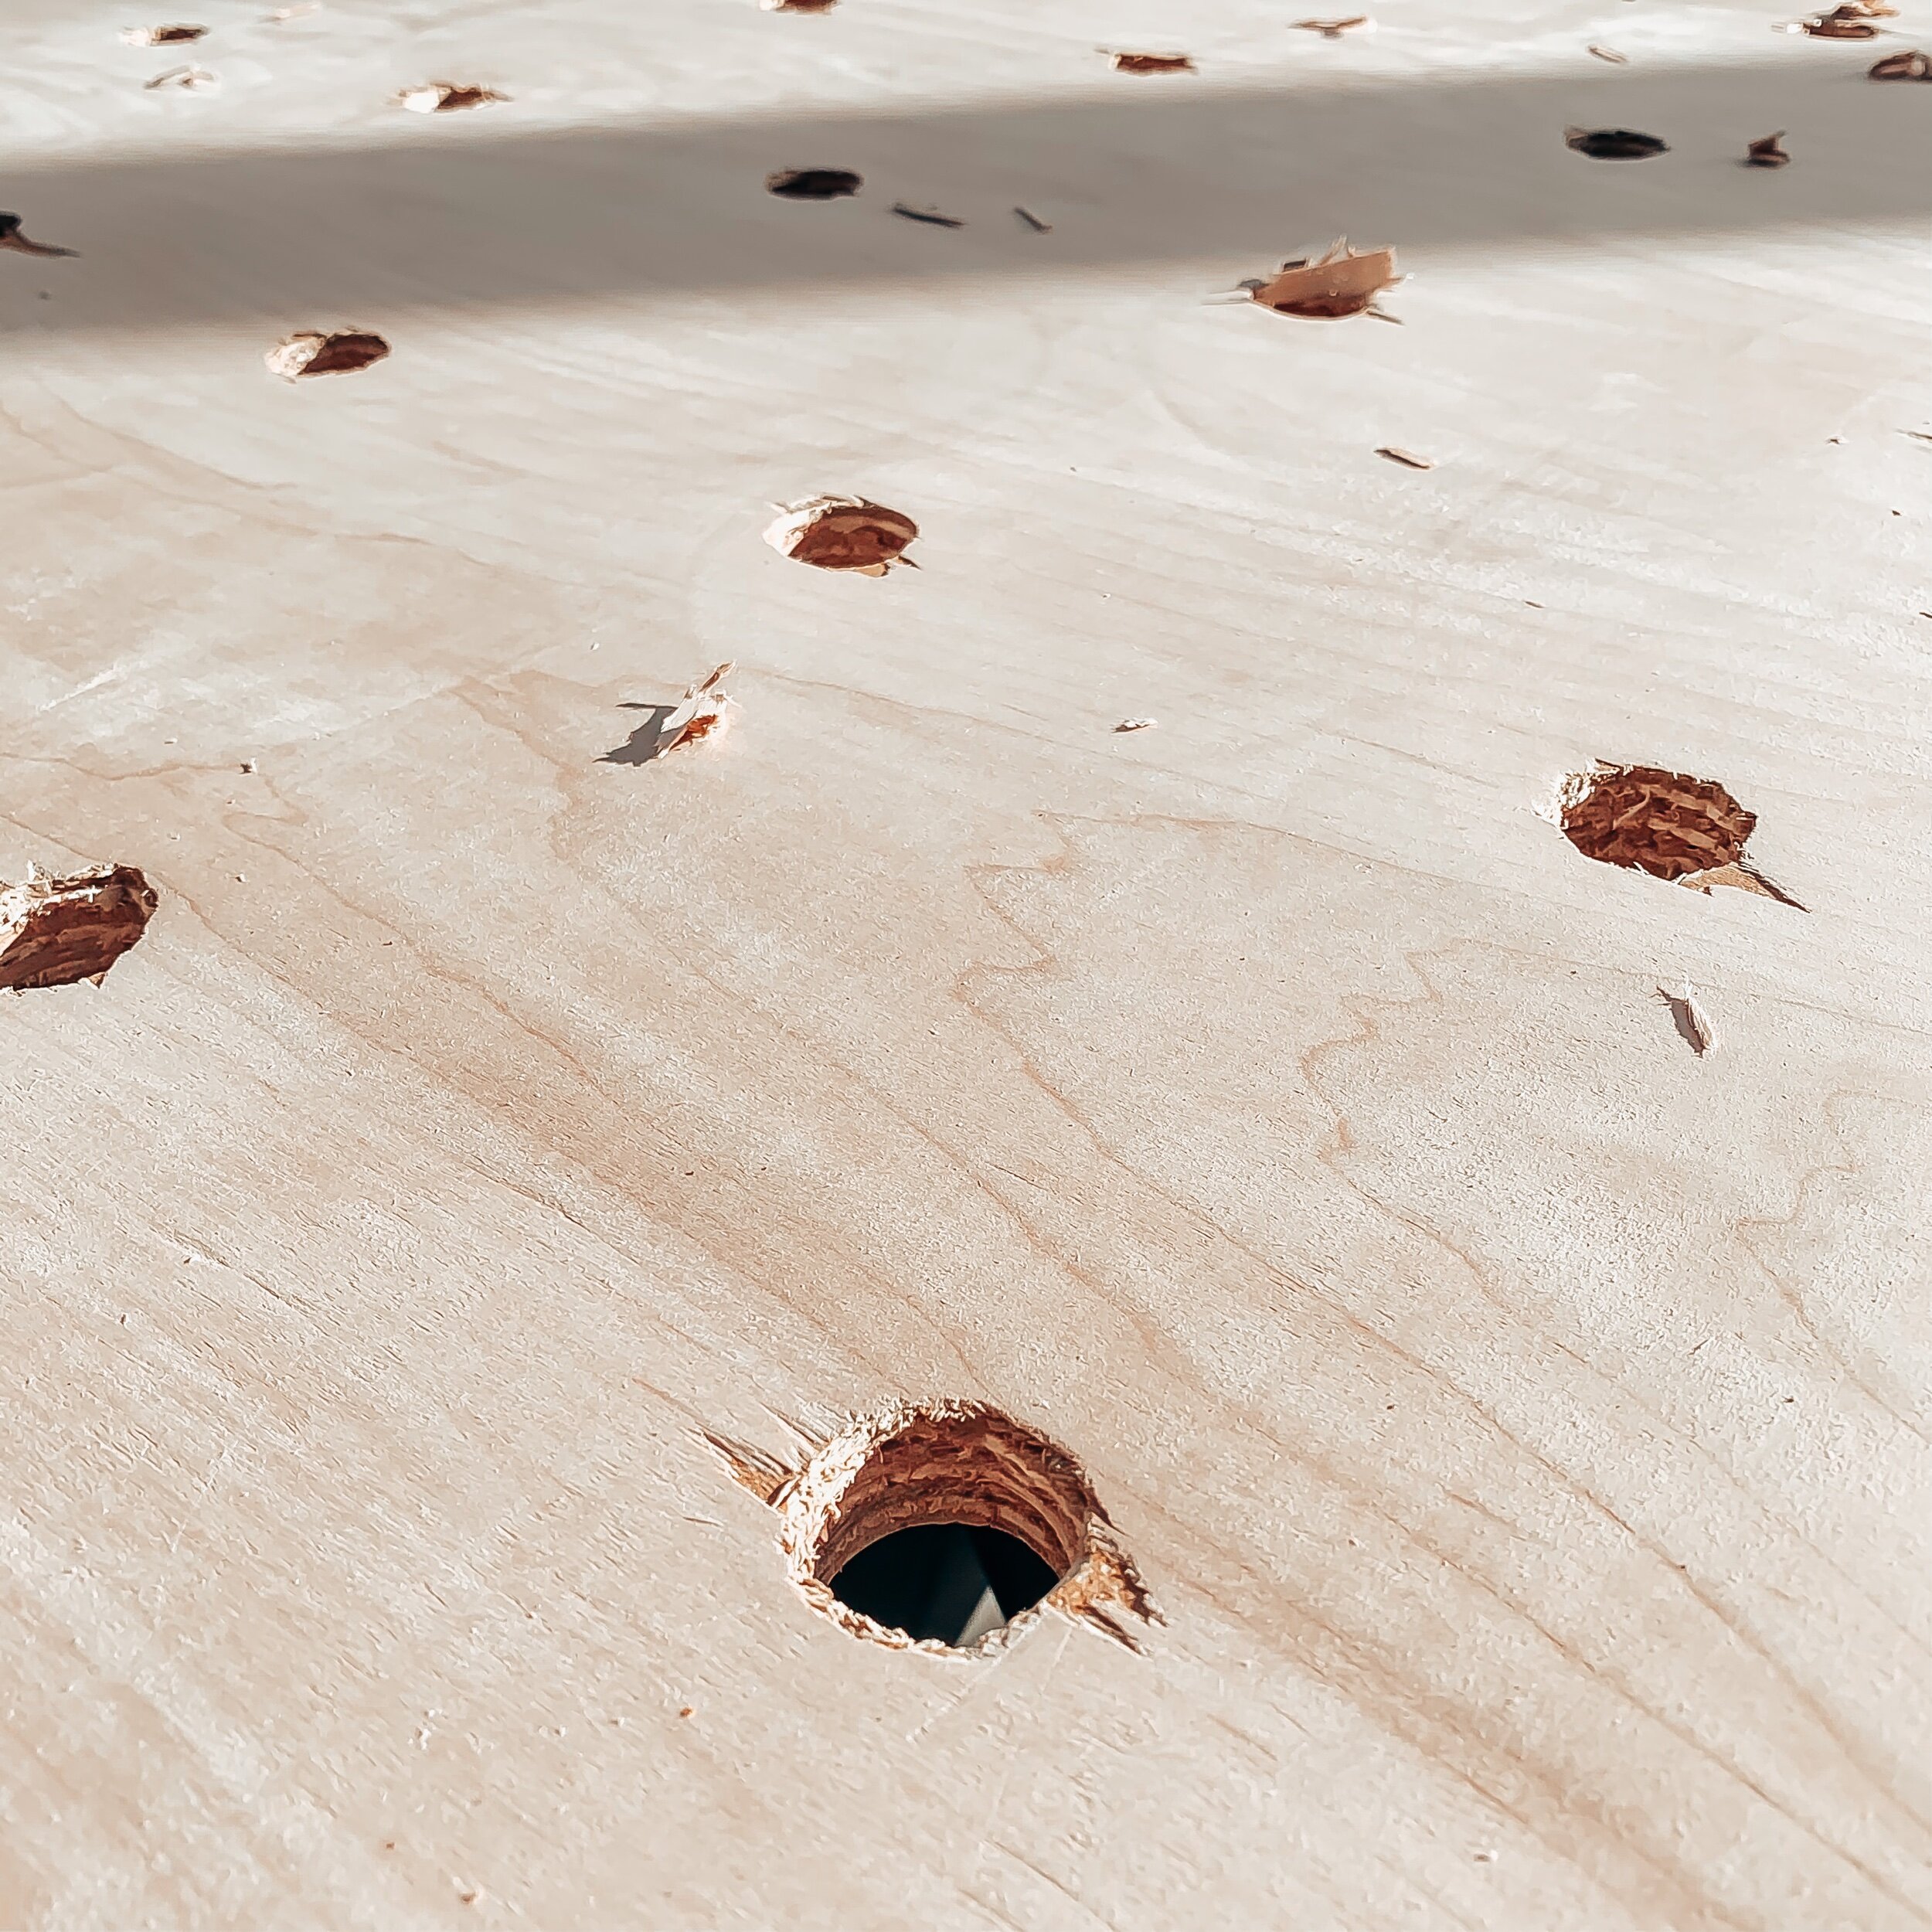
DON’T BE ALARMED…the back of your board will be beat up. Lightly sand it and leave it alone because it won’t be seen.
The front of your board won’t be 100% perfect either but trust me, after a little sanding and staging you won’t notice it.
If you have any holes that are a little rougher than others, just use those for a peg that is holding up a shelf.
Hanging your Pegboard
Since our mirror was already hung, we used it as our guide.
We first marked a level line, 4 inches away from our mirror, on each side.
Then, we set our level on the top of the mirror and started a line across.
This gave us an outline of exactly where we would hang our boards.
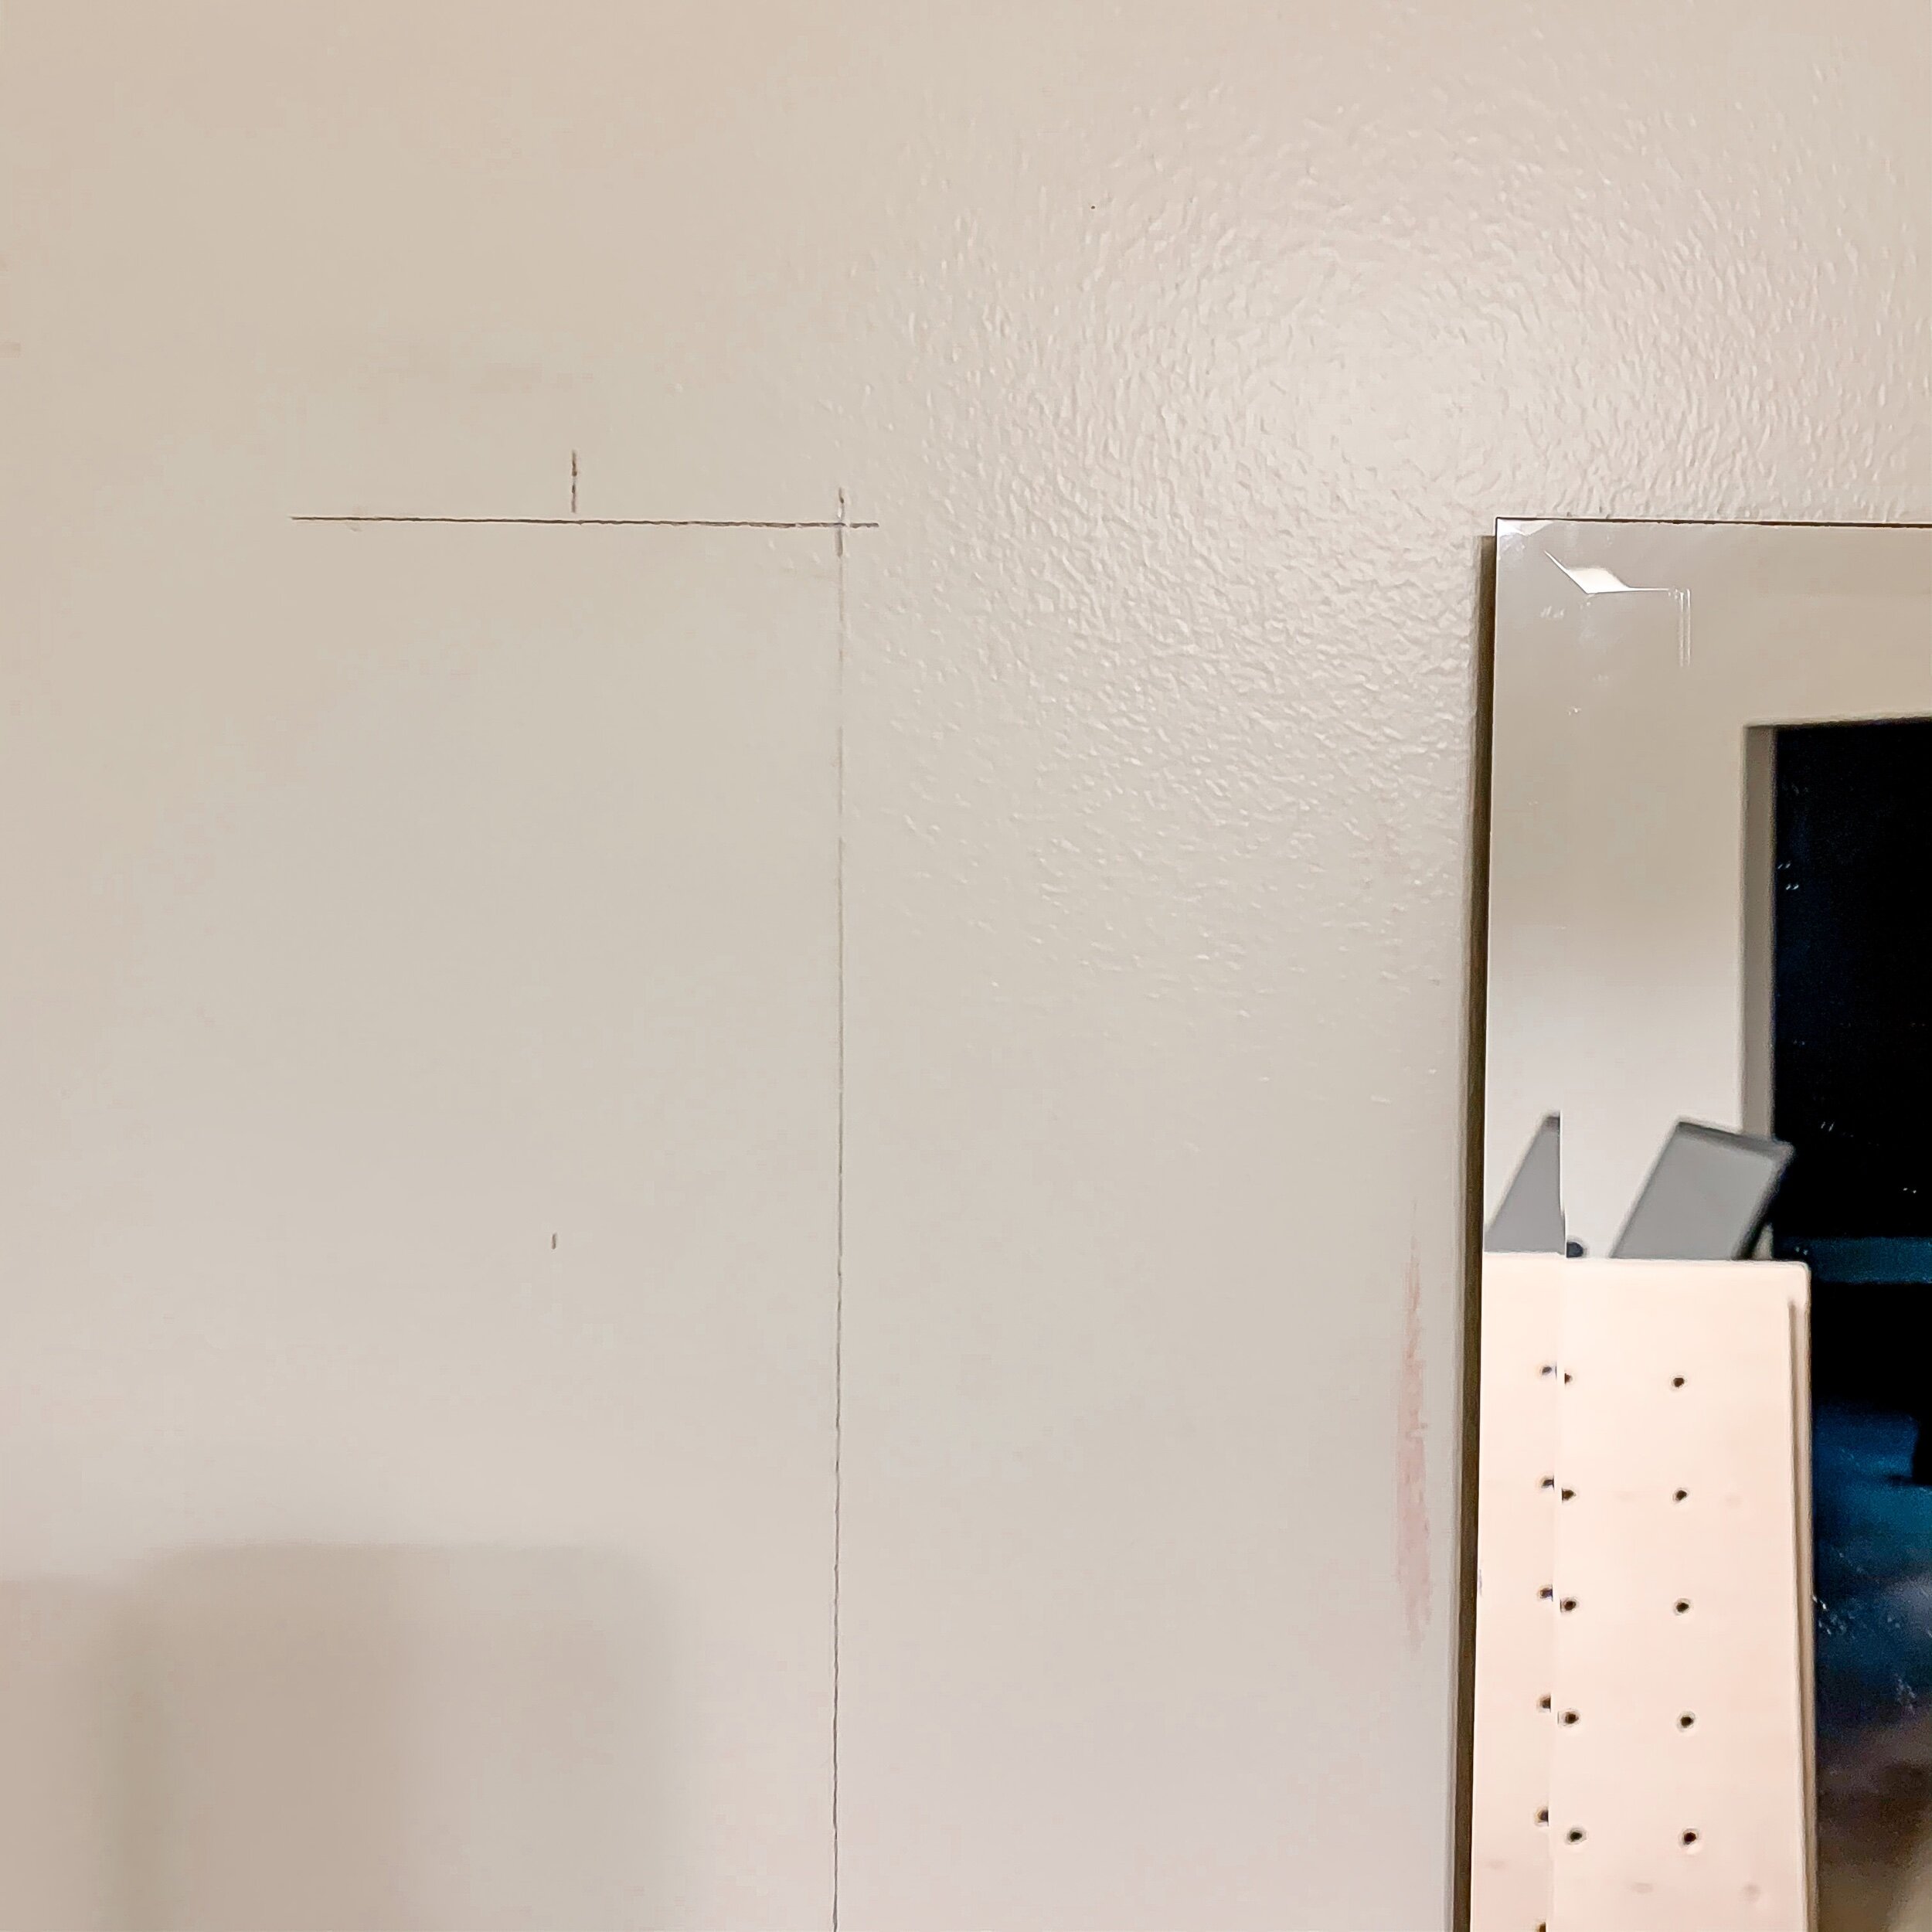
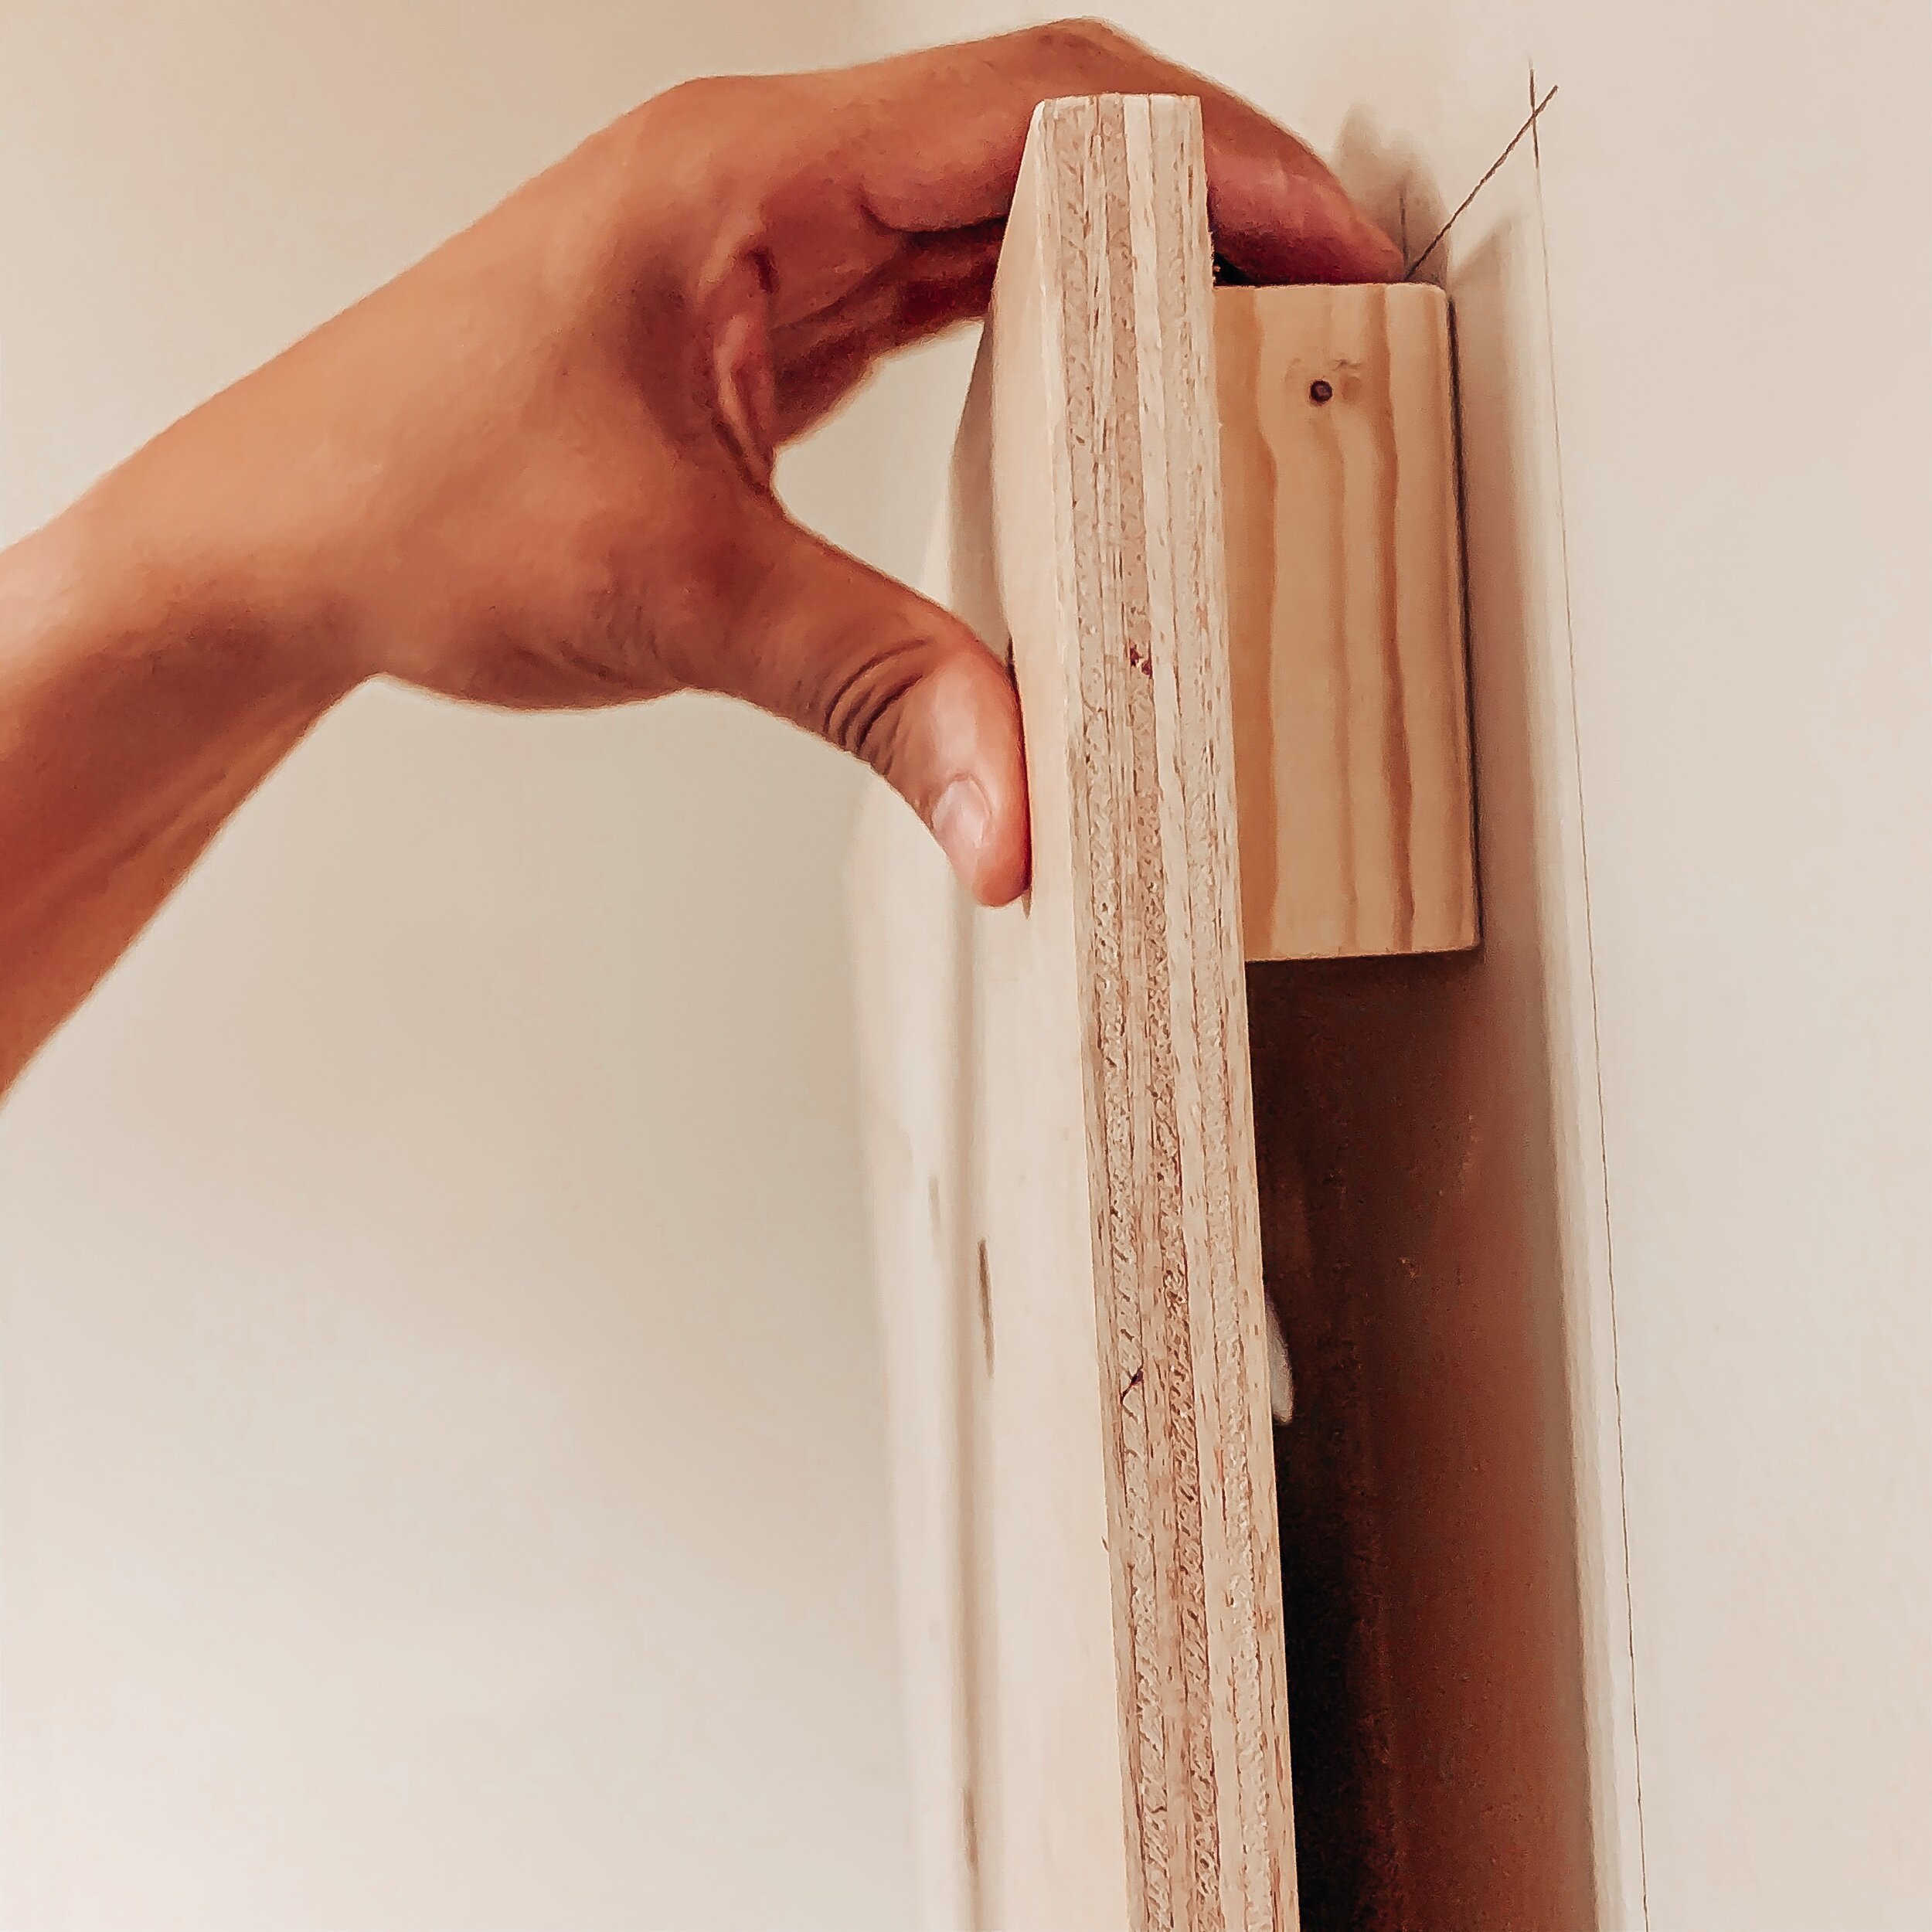
Next, we found the stud, closest to the edge of where our pegboards would be attached to the wall.
We used the corner of our level to mark where we would attach our boards.
Once we found that point, we made two marks on our level and used it a guide to make the drill marks on our board.
You can see the examples below.
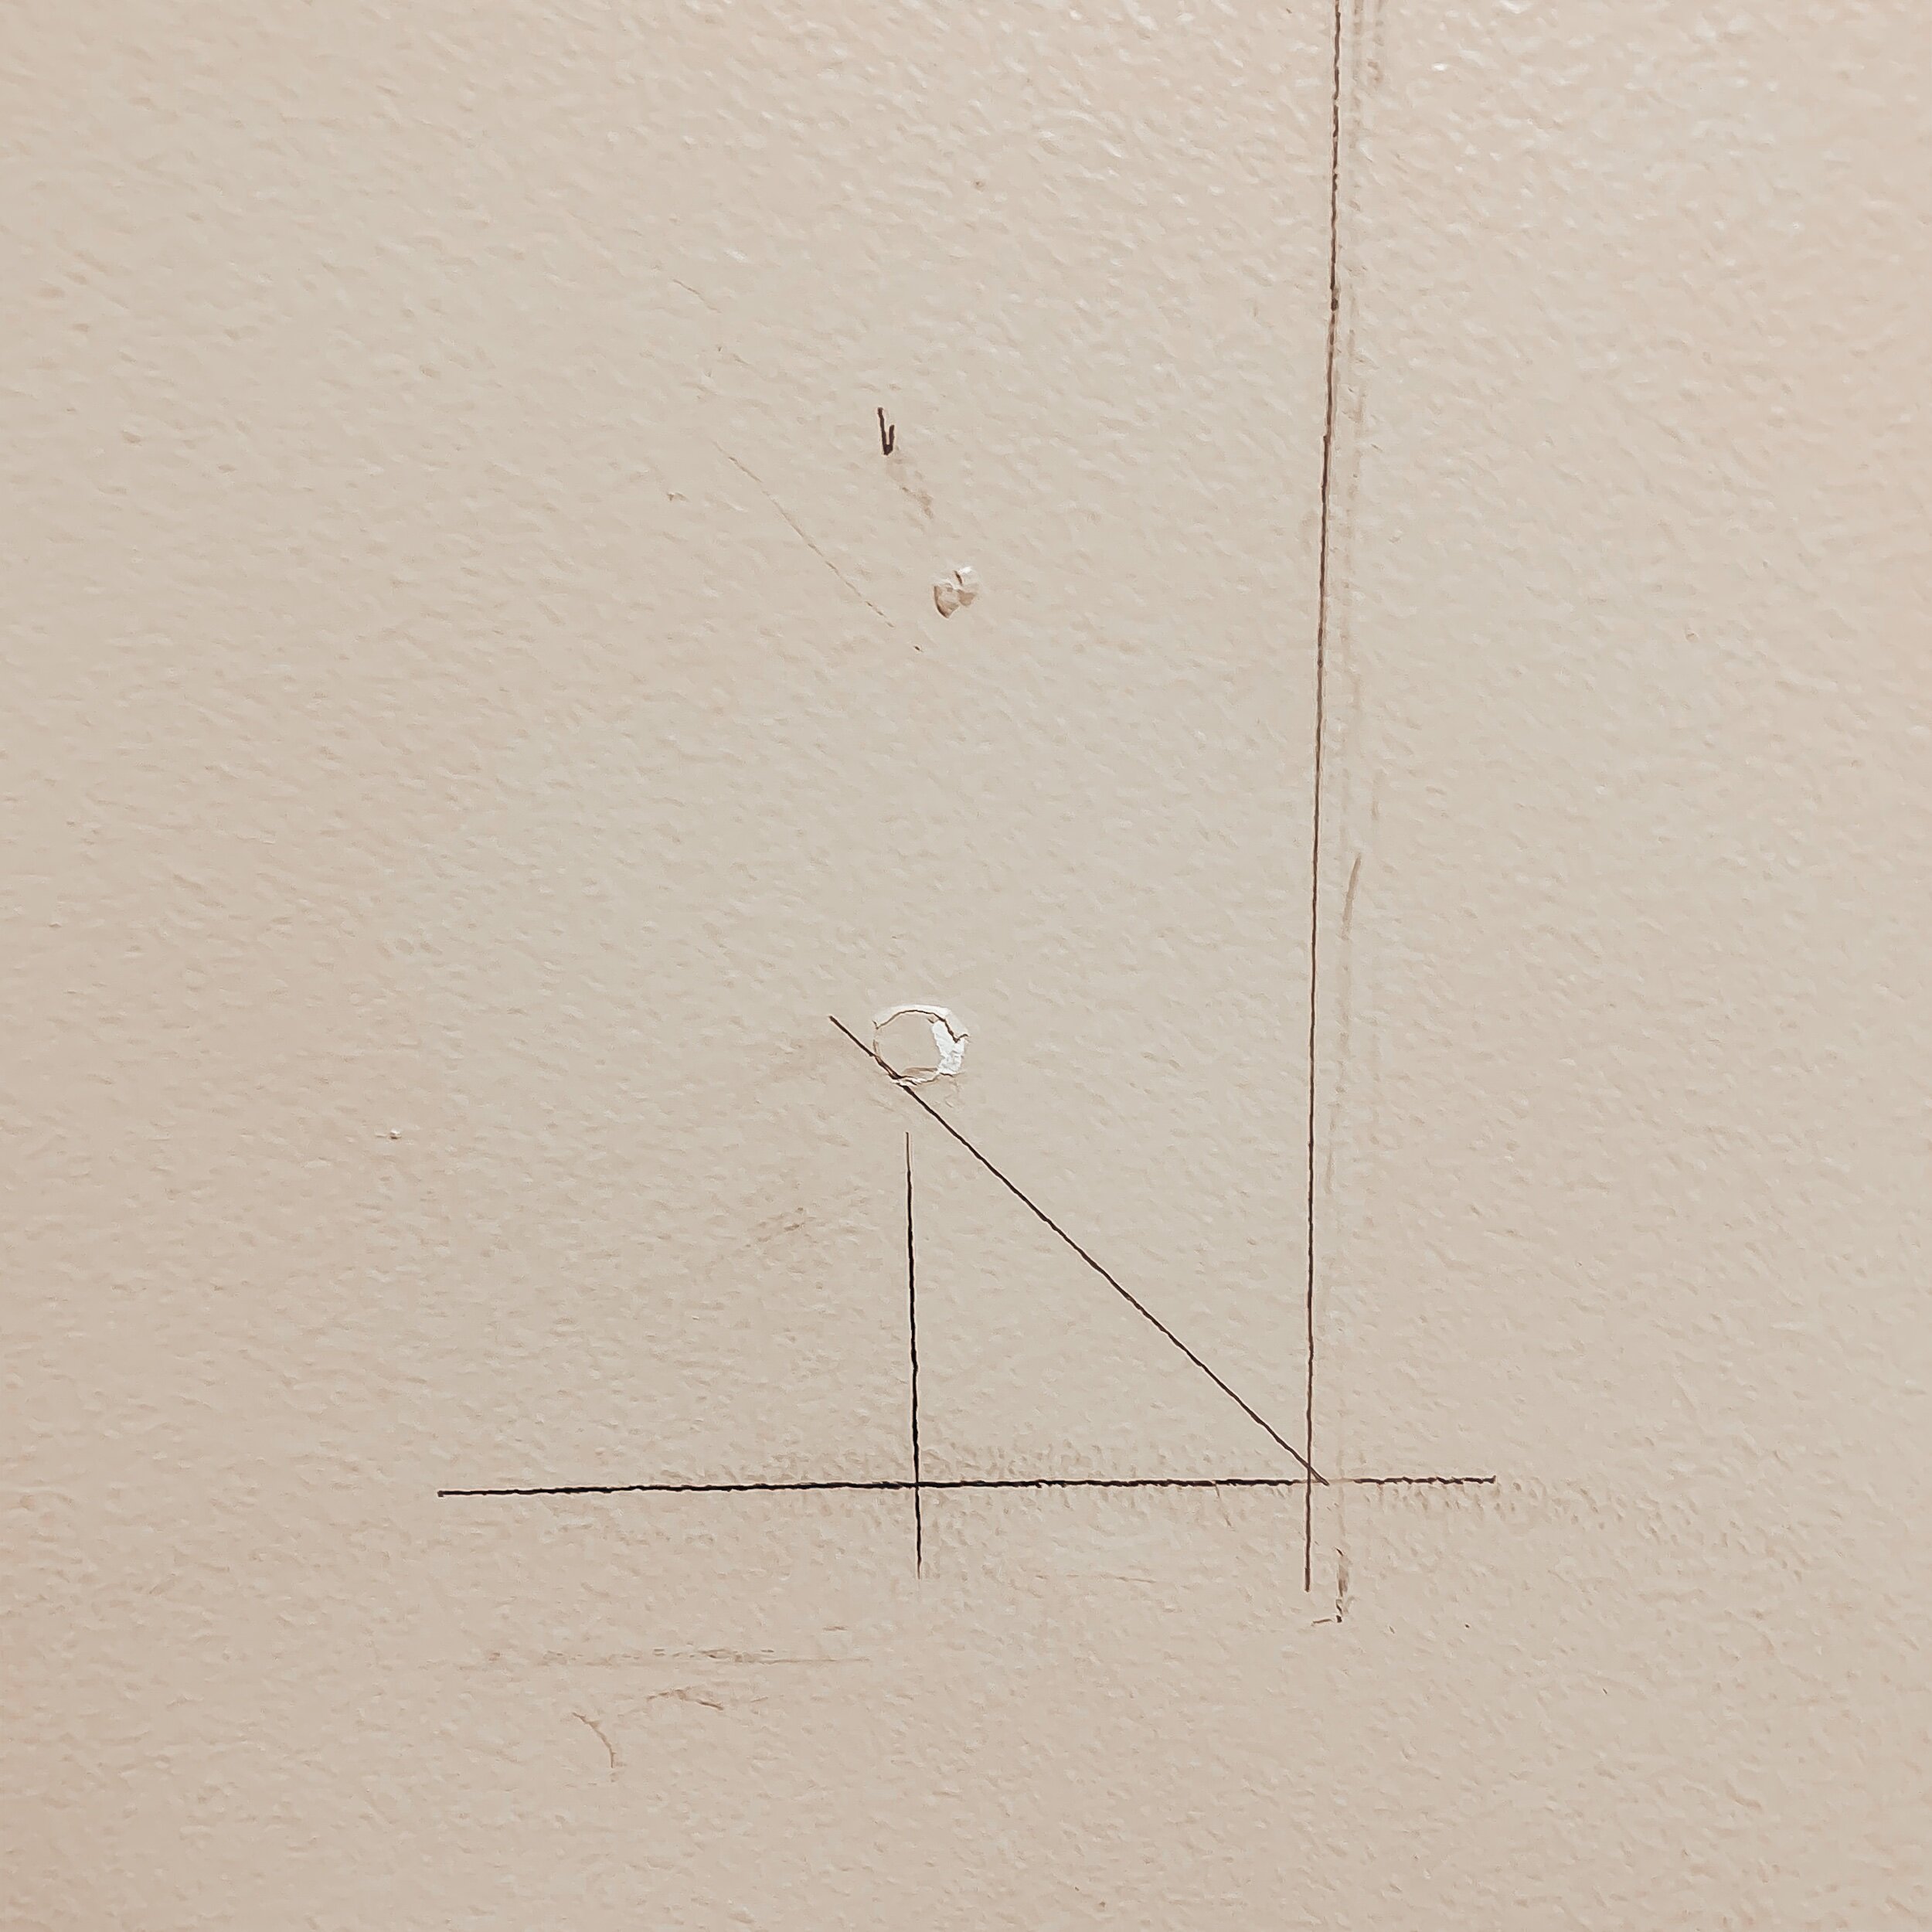

Once all four corners are marked, you can pre-drill your holes.
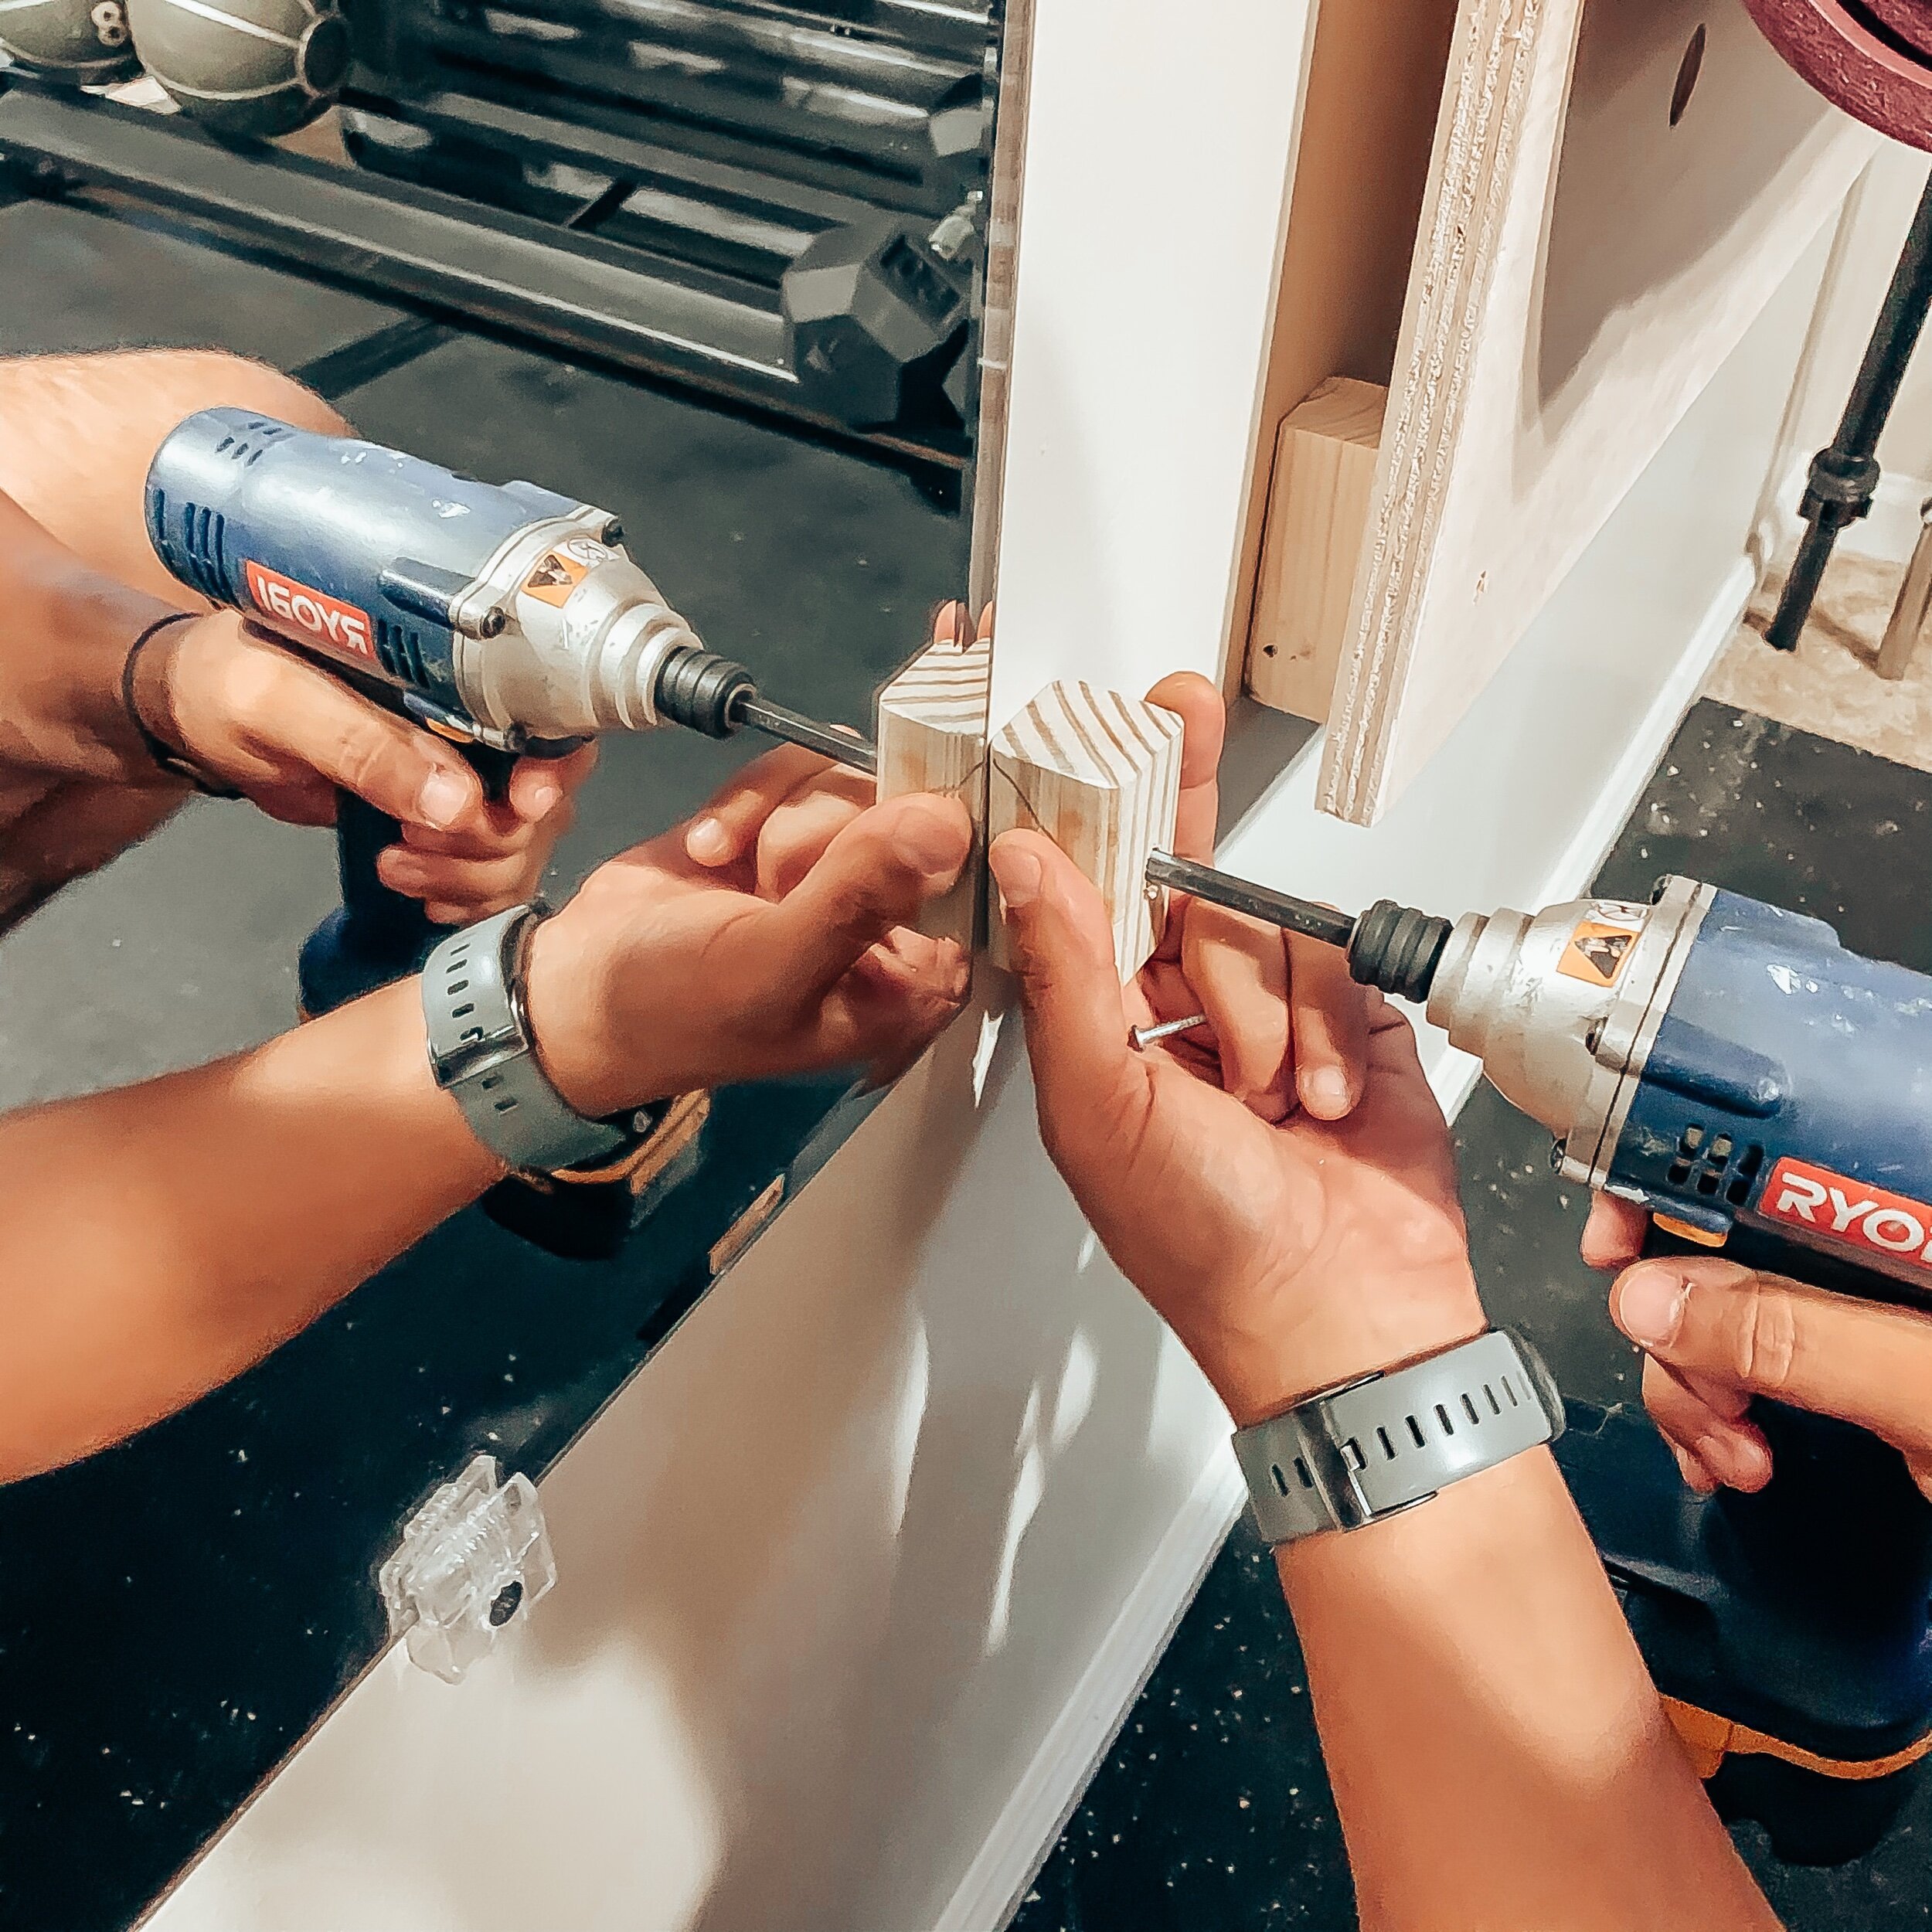
As you will see in the photos below, my husband cut our 2” x 2” board, into about 3 inch blocks. He then used those as our mounting brackets.
After he pre-drilled holes in the plywood, the mount and the wall, he drilled the nail through both boards, leaving only a small tip showing out of the mounting block.
This made mounting our pegboards easier.

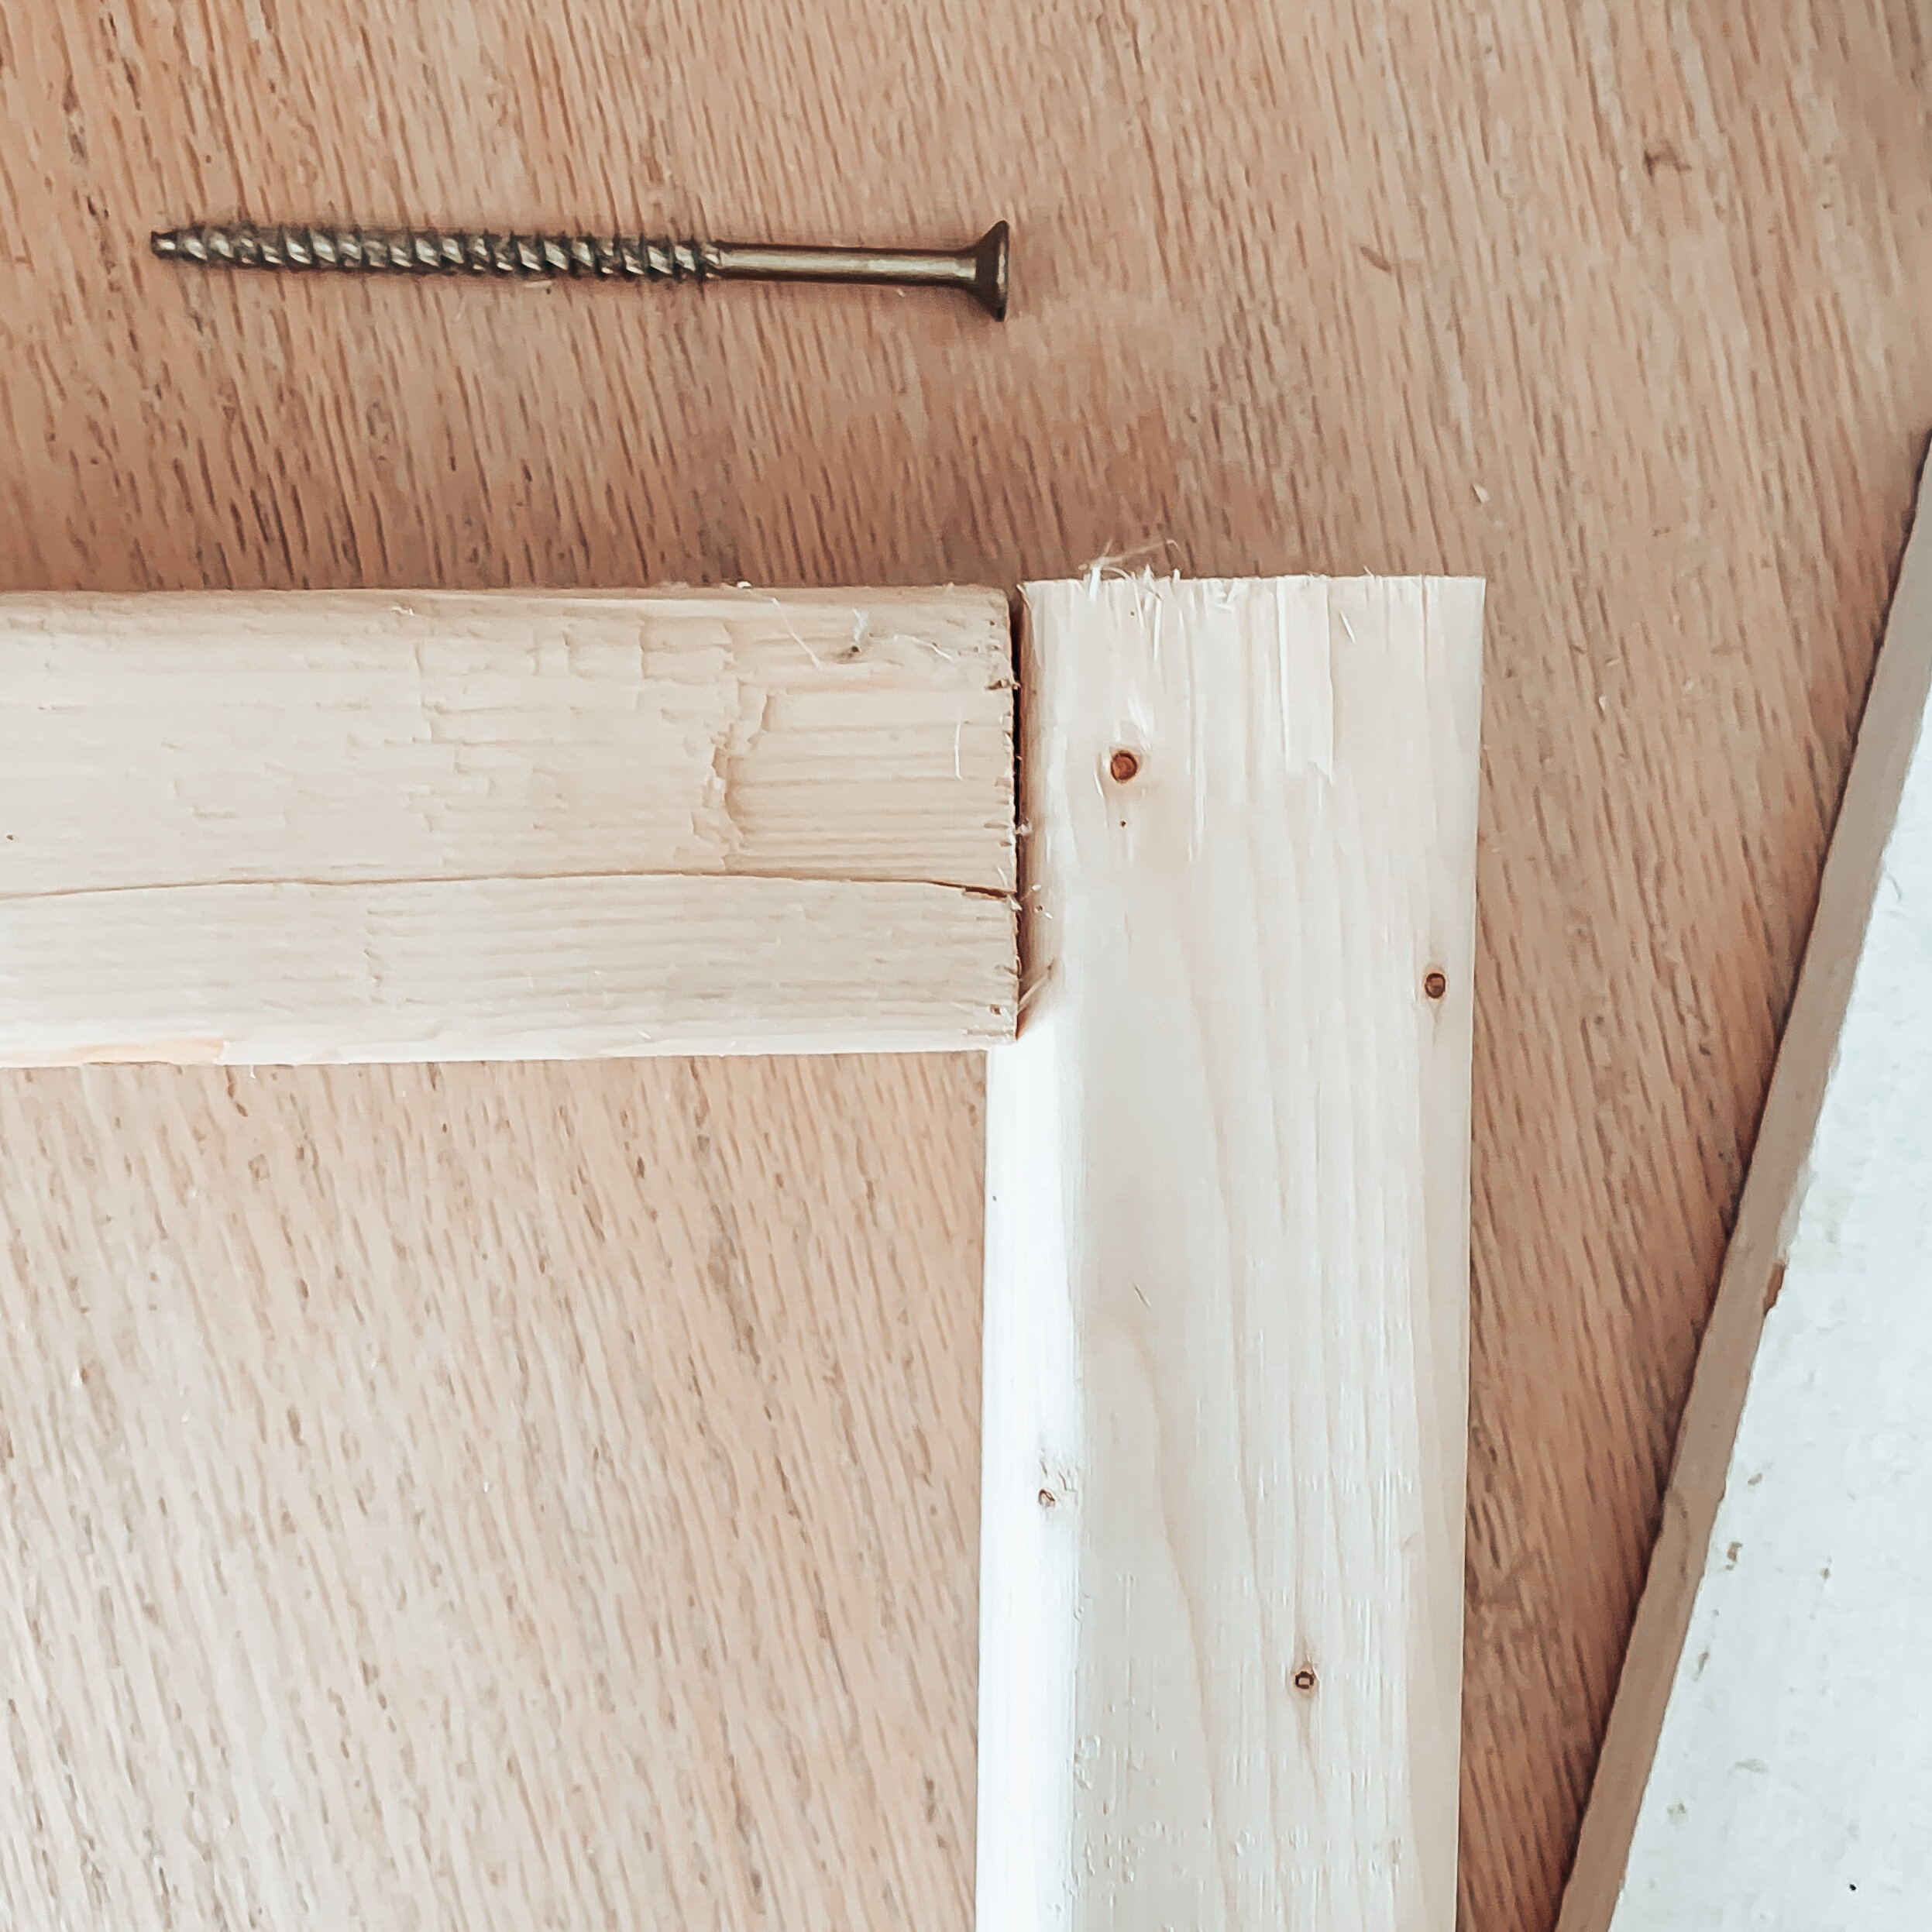
Framing a Mirror
We wanted our mirror frame to match the height of our pegboards, so we screwed the mounting blocks in on each corner of the mirror.
We didn’t leave any space between the mirror and the block.
We drilled the mounting block right into the wall and attached the molding with a nail gun.
To frame your mirror, measure the length you want the top and bottom of your fram to be.
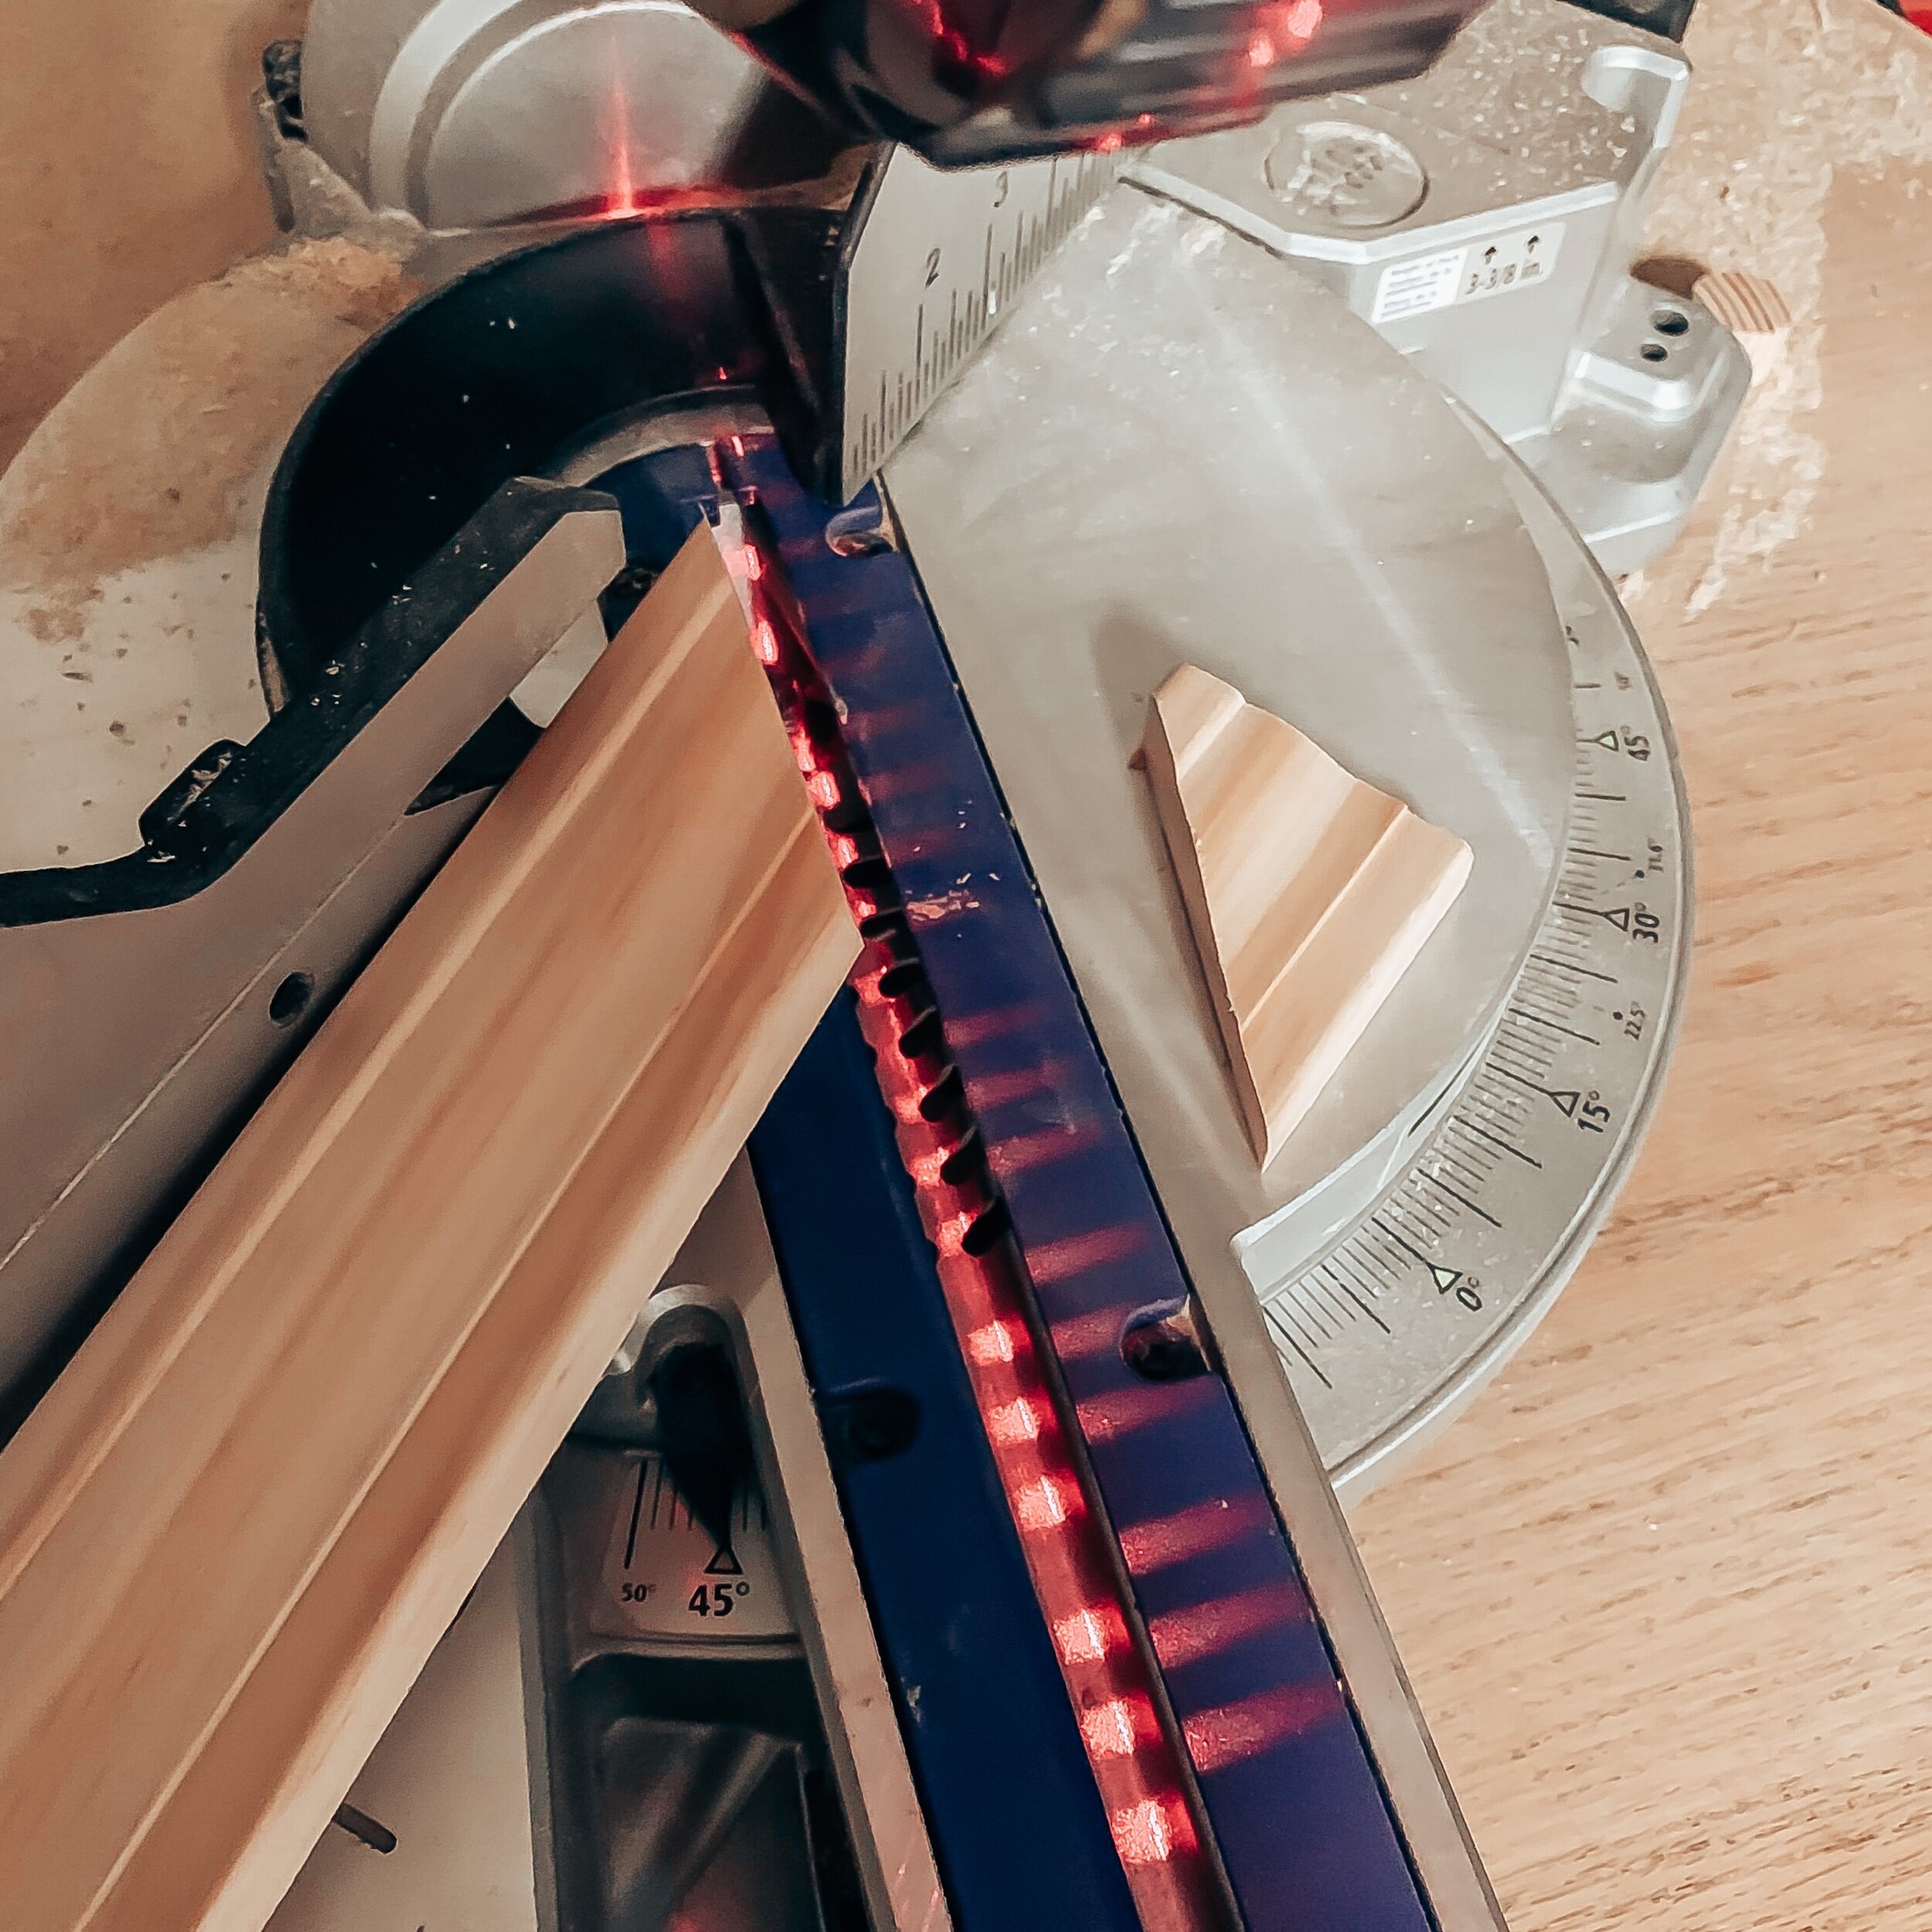
Then make 45 degree cuts, that will angle in towards the mirror.
Once your upper and lower pieces are nailed in, measure from the top to the bottom (longest edge) of those pieces in order to get the length you will need for the sides.
You will then make your 45 degree cuts and nail those in with finish nails.
You can use the wood filler to cover up your nail holes and screws on your pegboards as well.

The Final Look
It took us days to complete this project but only because we made multiple trips to the store and could only work in small chunks of time. I think we could have completed it in about 4-5 hours if truly committed!
In the end, I am IN LOVE with my new gym room and these pegboards made all the difference!

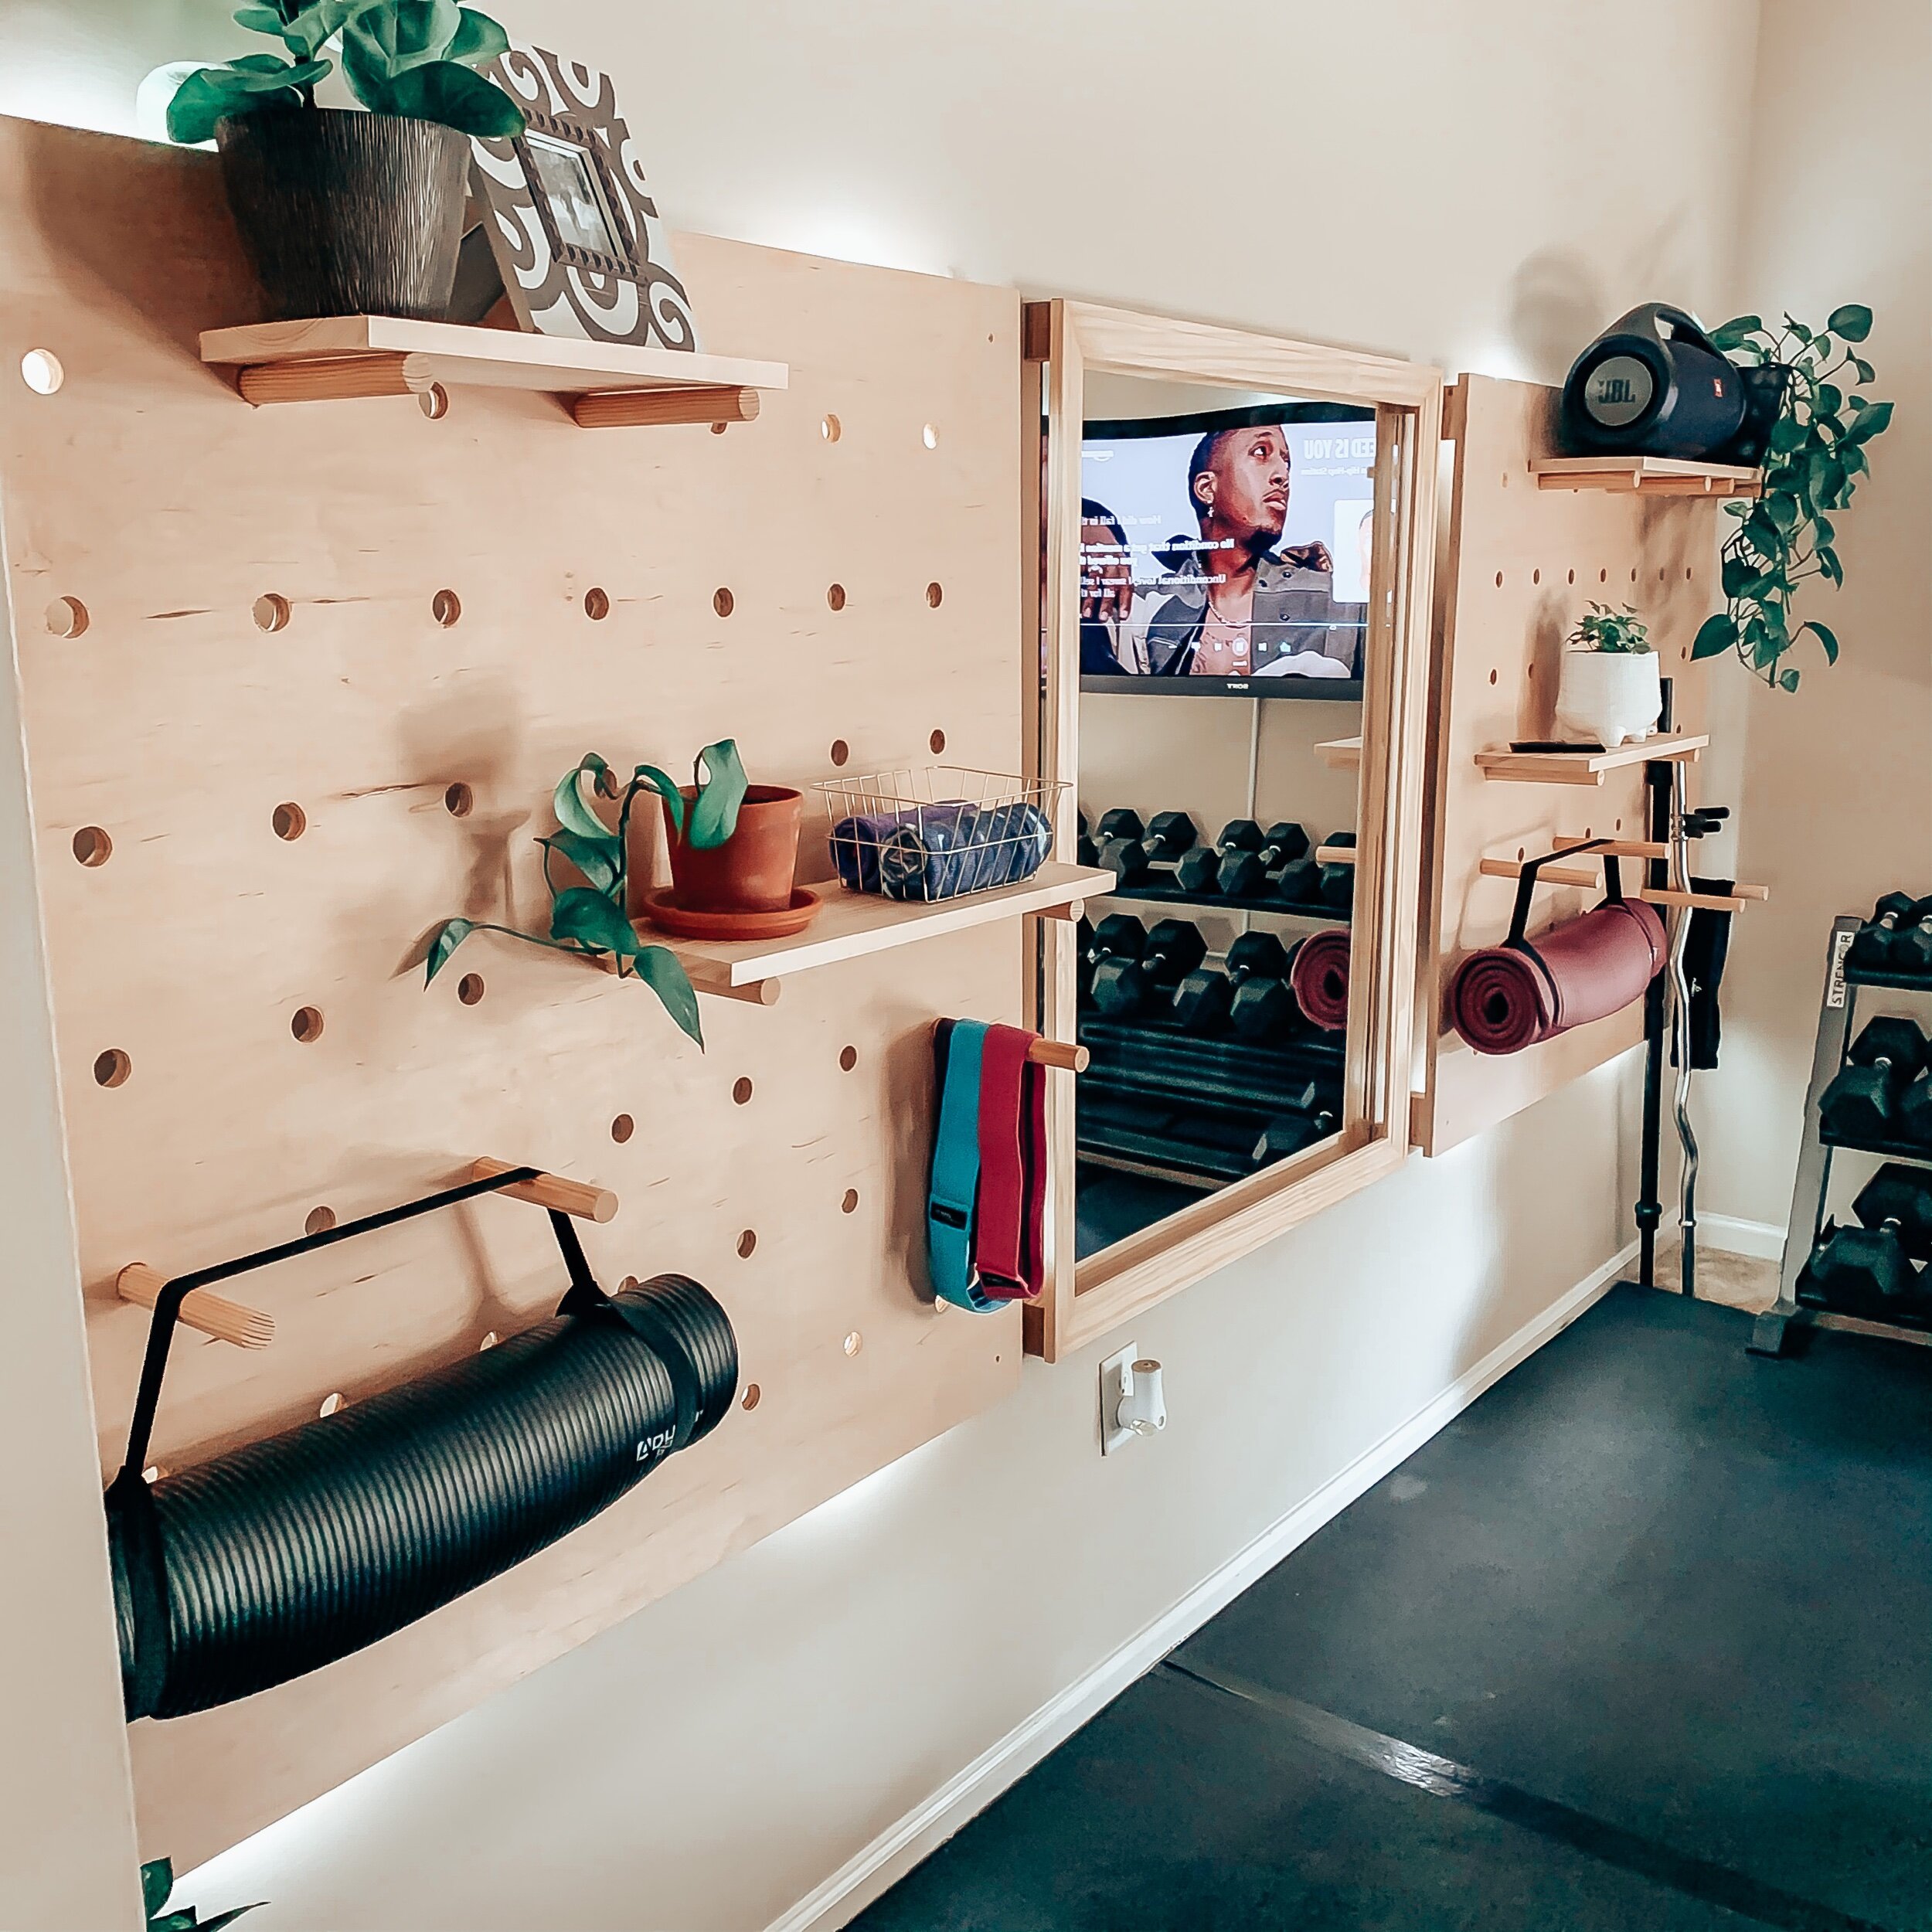


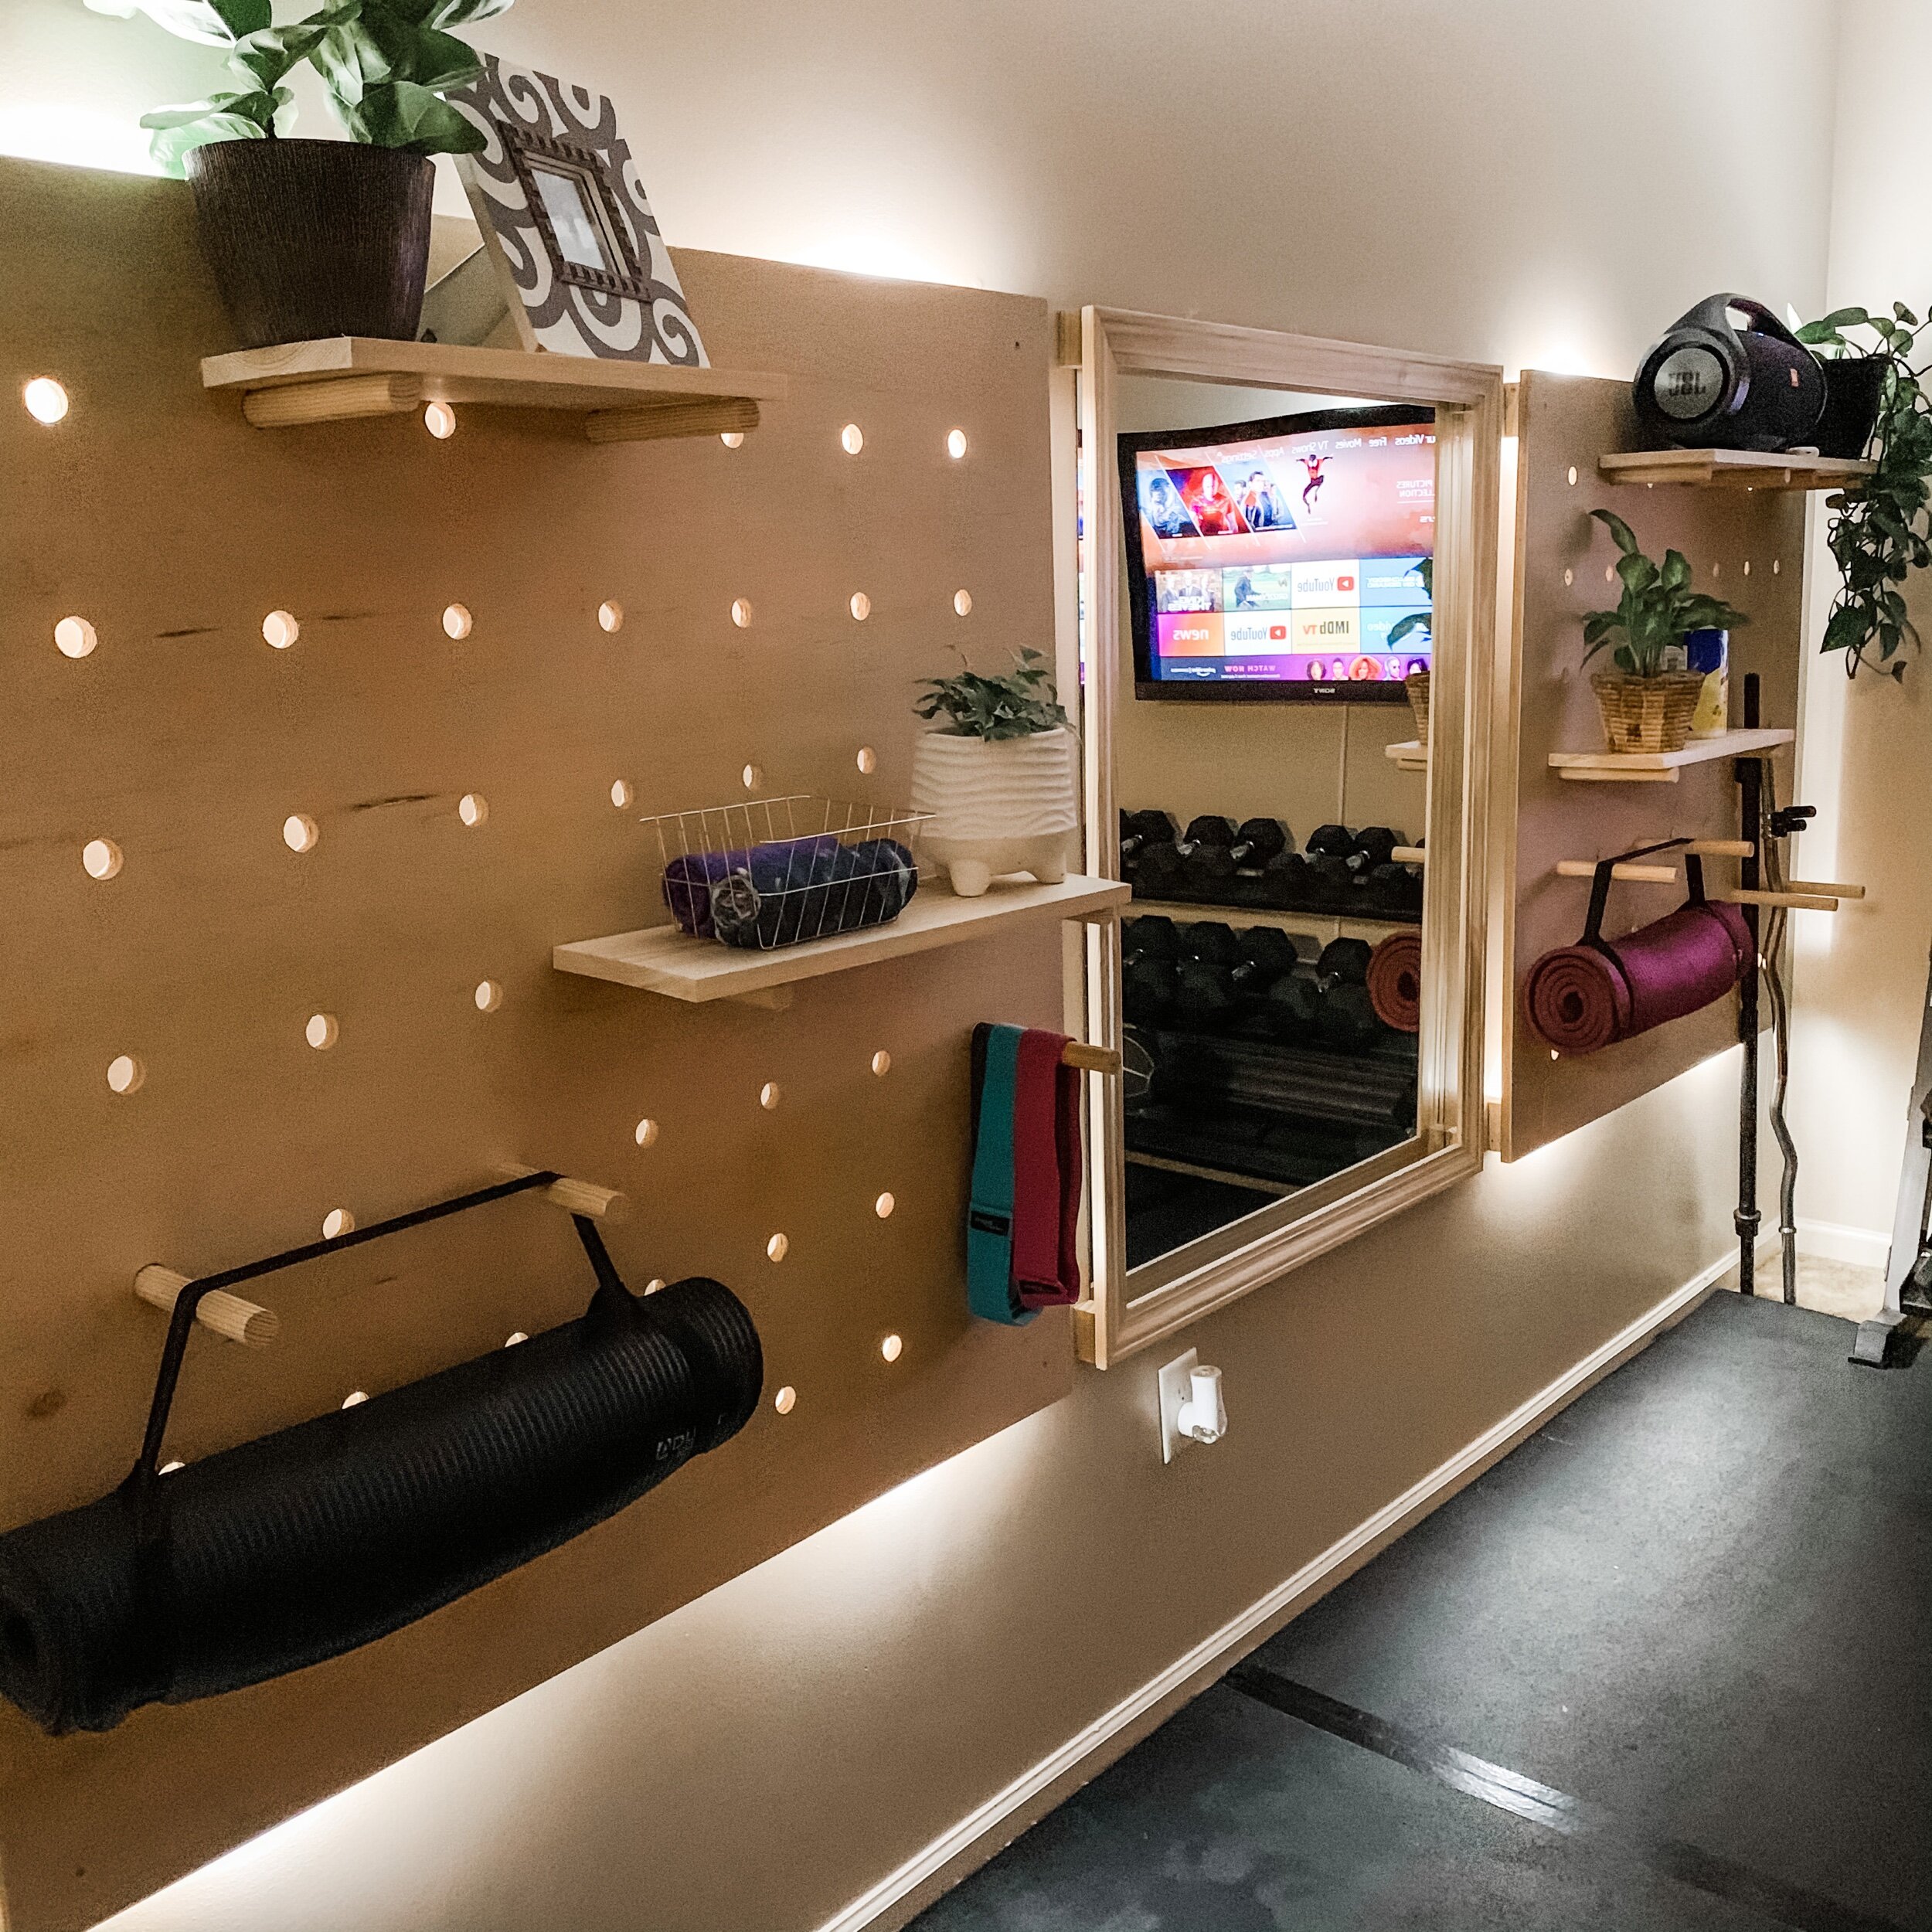
Here is a view of the puck lights! We added two on the top and two on the bottom of each board.
To pull the room altogether, I created my first sponge wall.
Don’t worry, I will create another blog post with step by step instructions on how I pulled this part off.
I hope you found this post helpful and that you are inspired to create as pegboard of your own!
Be sure to save this to your own Pinterest (because I know y’all are besties too) then comment below and share this post on your own social media.
If you decide to make one of your own, please let me know and if you are on Instagram, be sure to tag me so I can share your amazing pegboard too!
With Love & His Spark,
Lisa Faye


What’s the thickness of your plywood?
I used 3/4″ x 4′ x 8′ TOP CHOICE OAK HARDWOOD at lowes.
[…] WILDFIRE RESTORATION BLOG DIY PEGBOARD TIDY HOME GYM ORGANIZATION WALL BY @TRUESTYLEWITHARI […]
Can you give the dimension of the actual mirror? Is is 48″ x 48″ or slightly smaller than that?